


You come back from a long day at the campsite and need to rinse off. This valve lets you connect a handheld shower (sold separately) and control water at the wall, while the vacuum breaker keeps dirty water from flowing back into your clean supply.
The outlet on the valve lets you attach a handheld shower set instead of relying on a fixed setup. This gives you more flexibility when rinsing off after a long day or cleaning up in a tight RV shower. You can connect your shower head directly at the valve and use it where you need it.
The built-in vacuum breaker prevents used shower water from flowing back into your clean water supply. This keeps the system working the way it should when pressure changes. You can run the shower without worrying about backflow through the valve.
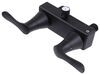
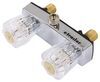
Dual lever handles give you separate control over hot and cold water at the wall. The updated handle style changes how the valve feels during use compared to older knob designs. You can adjust temperature directly at the valve instead of relying only on upstream controls.
Videos are provided as a guide only. Refer to manufacturer installation instructions and specs for complete information.
Hi everyone. Steven here with etrailer. Today we're taking a look at the BB motors RV shower valve with vacuum breaker. Now folks, this uses a modern dual handle design and as you can see, it's got a beautiful satin nickel finish, has a really nice shine too, it's not too powering. There's a little reflection there on the studio lights, but really elegant and this does include that vacuum breaker. So if you do want to add sold separately, you could attach that handheld shower if you don't already have one, pick one up here at etrailer and that's gonna give you flexible options for rinsing the shower and et cetera.
Now that vacuum breaker's also gonna prevent that dirty water from backing back into your clean supply, so it's a great thing to have as well. And pretty standard. You get your hot, cold, on off. And then on the back here, four inches on center, that's your standard as well. Then you got these easily to remove retainers and a couple round rubber washers, welding side, and then of course the plastic deck plate itself.
And with that off, you can see down inside of there the internal guts and everything. Keep in mind most of these RV parts and even some of the household ones nowadays, a lot of this internal stuff is plastic while the outside is the metal itself, so it reduces weight. It's still very nice and strong and again, it's a very, very easy installation as far as doing everything. Now, we do recommend per the manufacturer, you purchase them separately, some tile and tub caulk for the installation as well, and that just kind of gives everything a watertight seal usually around this deck plate, the way when it's flush. You don't have to worry about water getting down in there and stuff and causing any kind of water damage underneath the sink and stuff.
As always, follow the instructions when you're installing this and you should be good to go without any kind of issues. Folks, that's gonna wrap up our quick look together. Talking about the install, if you don't wanna tackle it yourself, no worries. You can click below under this video or under the product page, there's a link that says something to the effect of installer locator and we can help find someone in your area based on your zip code that's trusted with etrailer to the installation for you. I'm Steven.
Have a good one.
Customer Satisfaction Score:
94% were satisfied with this product
6% of customers were not satisfied
Ratings & Reviews

Info for this part was:
At etrailer we provide the best information available about the products we sell. We take the quality of our information seriously so that you can get the right part the first time. Let us know if anything is missing or if you have any questions.



















Thank you! Your comment has been submitted successfully. You should be able to view your question/comment here within a few days.
Error submitting comment. Please try again momentarily.