![Video Thumbnail]()
![Video Player Dialog]()
Videos are provided as a guide only. Refer to manufacturer installation instructions and specs for complete information.
Video Transcript for Checking Out the Empire Faucets RV Bathroom Faucet
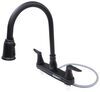
Hello neighbors, its Brad here at trailer. And today we're taking a look at the Empire Faucets, Dual Lever Handle Faucet, and we have this here installed in our camper. And this is gonna be really great, if you are looking to update the look of your camper or replace an existing faucet. Installation's extremely easy, and we're gonna walk you through that, but let's take a look at some of the features of this. Here you can see, we have the Matte Black faucet installed. Also available in this style is going to be the Satin Nickel, so you can match whatever style you're going for inside of your camper.
Each handle is a 1/4-Turn cartridge, so long-term, it's going to have less friction than a washer style. So that's gonna be great for a long time. Now, flow rate is gonna be 2.2 gallons per minute. And you can also see, there's an aerator installed, so that's gonna aerate the water, making washing your hands a lot easier, and be able to suds up a little more. So, if your camper has the standard two hole faucet in the bathroom, this is gonna be a quick easy replacement, can be done with zero tools, and in a very small amount of time.
It's gonna add a great look immediately once installed. And as far as installation goes, I'm gonna walk you through it and you'll be having a working faucet in no time. To begin our installation, the first step is obviously make sure it's not hooked up to water. You're also gonna wanna open these up just to drain any residual. And that's just gonna save you a lot of water coming out and having to catch it underneath, when you remove this.
Now you're gonna see, a standard RV has very simple plumbing here, and it's just twist on, to the faucet itself. So there's really no need for pipe wrenches or anything that you're used to, with your home plumbing. Now, there probably is going to be residual water, so I highly recommend having towels, some paper towels or a bucket, some way to collect this water. That way it doesn't ruin the wood. But with a simple twist, we can undo one line, and as you can see, there's a residual, so I'm gonna throw a few towels now, just catch that.
And we have one unhooked. Now we're just gonna repeat that process, and just like that, we're unhooked. So now that we have our water disconnected, all we have to do is loosen these up. These are gonna be tucked up there, them out, just reach up, similar thing, just clockwise twist these. And this is actually going to separate the faucet from the sink fixture. So now with these removed, really all that's left is to pull the faucet out. And this is also going to be a good time to do a little bit of cleaning here before you put your new one on. So, maybe a little alcohol or some soap and water should bring this up pretty easily. Its already coming up, and having a nice clean surface is gonna make sure that it seals up better. So now we're gonna take our new faucet and simply slide this in place. Now we have our mounting shank nuts here, so we're gonna go underneath and just hand thread these on. We simply take these and just clockwise turn these on, and they should spin up pretty easily here. And just go until it's tight, you don't need to crank it down too hard. Also before you tighten them down completely, you wanna orientate it the way you'd like it, whether you like it closer, further, but also making sure it's not crooked. So right here, looks good. Now I can tighten this back up. So now we'll just take our water line here and we're going to turn this on clockwise to our shank. Make sure your threads are nice and lined up. It's great because there's no tools involved except for just your hands. So you don't really need to crank this down too hard. It should stop, once you find compression. I've gone ahead and turn our water on. I'm gonna check real quick, visually for leaks at out connections and everything looks good there, so all that's left to do, is give this a shot. It seems to be flowing just fine. It looks good in the process. And that was a look, at the Empire Faucet, Dual Lever Handle RV Faucet. Thanks for watching..

 Product Experts Available Now!
Call 1-800-940-8924
2 MIN
Est. call wait time: 2 MIN






























Jennifer
10/31/2023
The faucet still looks and works great one year later!