


Thank you! Your comment has been submitted successfully. You should be able to view your question/comment here within a few days.
Error submitting comment. Please try again momentarily.




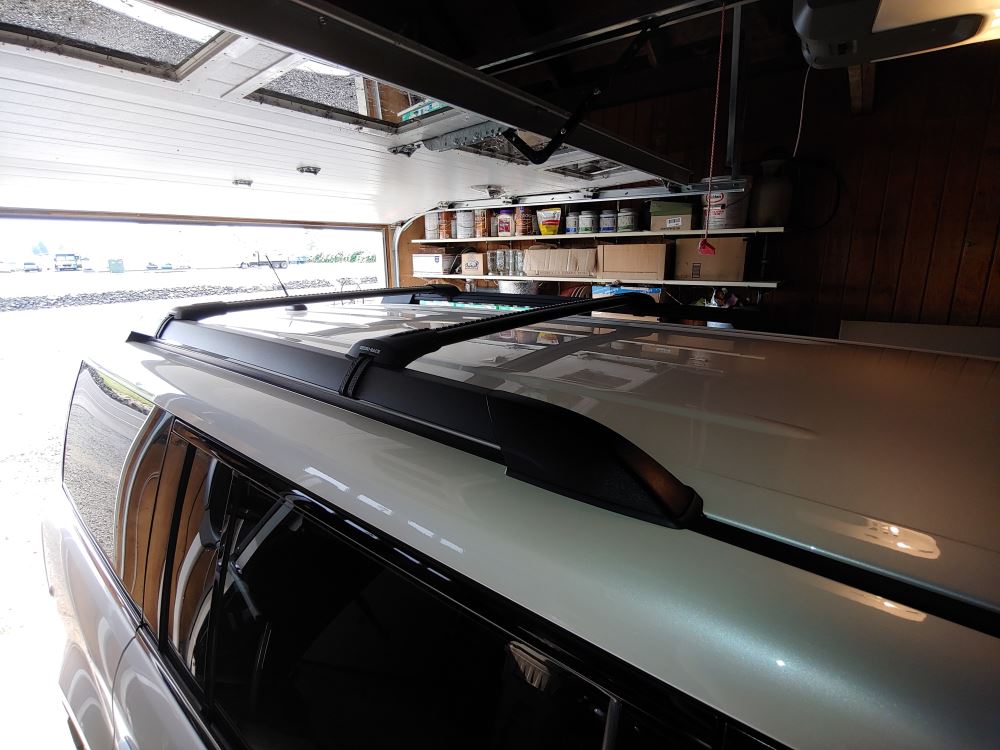
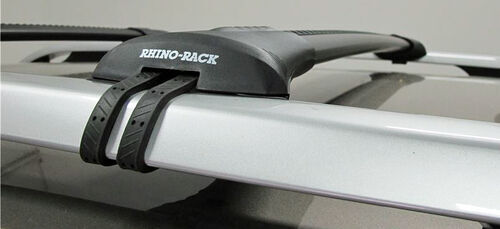
These crossbars sit just 1-3/8" above the factory side rails for a clean, low-profile setup that looks built-in. The flush design means no awkward overhang, giving the roof a sleek, OEM look. The arched shape complements the roofline while keeping everything tight and aerodynamic for everyday driving or long road trips.
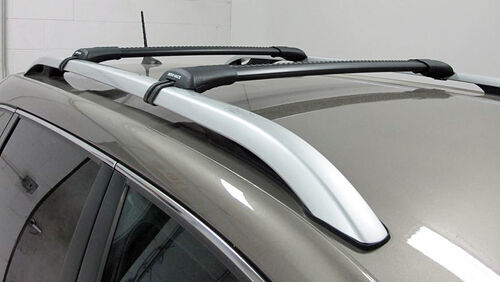
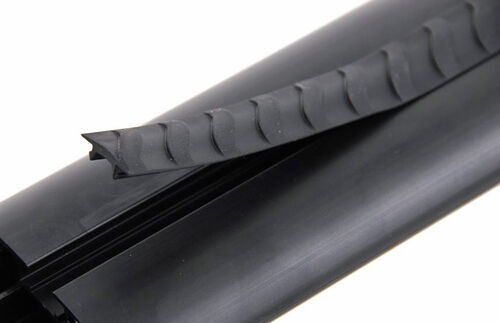
Wind noise can make long drives tiring, but the Vortex StealthBar’s elliptical aluminum shape and rubberized Vortex strips keep things calm. The wave-shaped grooves in the top channel create controlled airflow that cuts down on whistling and drag. You won’t need to add a fairing or make DIY fixes—the design itself keeps the ride quiet and smooth even at highway speeds.
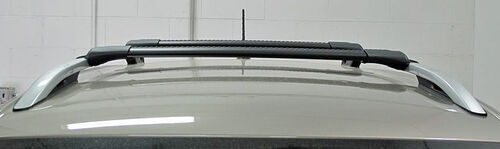
Built from structural-grade anodized aluminum with an internal H-shaped extrusion, these bars combine lightweight construction with serious strength. The rack supports up to 176 lbs (always check your vehicle’s limits) and stands up to weather year-round without rusting. Glass-reinforced nylon legs are UV treated and made to handle anything from heavy gear to rough conditions.
Whether you’re hauling kayaks, skis, or a cargo box for a cross-country trip, this rack handles it all. Each crossbar includes a built-in C-channel for channel-mount carriers, and you can also attach clamp-on accessories right to the bar surface. The split Vortex strips make setup easier—just remove or trim sections around the mounts so everything stays sealed and quiet once installed.
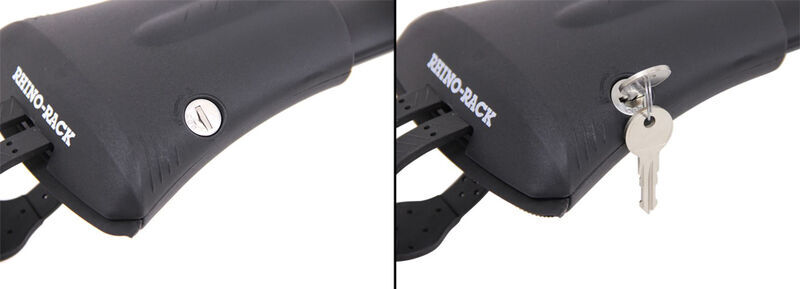
Integrated locking covers on each leg secure both the crossbars and any channel-mounted accessories. All locks are keyed alike, so one key protects the entire setup. The locks keep your roof rack firmly attached while also giving it a finished, polished look ready for any trip.
 Alternate Instructions
Videos are provided as a guide only. Refer to manufacturer installation instructions and specs for complete information.
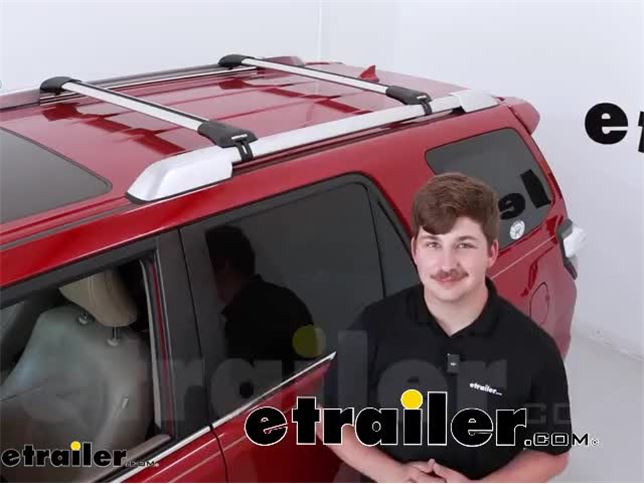
Hi everyone, Aidan here with etrailer. Today we're gonna be taking a look at the Rhino-Rack Vortex StealthBar roof rack system and seeing how it installs. This is gonna be for factory raised rail systems and give you a flush design roof rack. That means there's gonna be no crossbar overhang on the sides for a very clean appearance and because it mounts to your factory raised rails, these raised sections with the gap underneath, the install process is gonna be very, very easy. Let's check it out. Now this comes in a variety of different fits for different vehicles.
Whether you've got a 4Runner like we do today or a different vehicle with factory raised rails, you're gonna have different kits. Be sure to utilize the fit guide on our website, put your vehicle information in and find the right one for your vehicle. But regardless of which one you go with, the installation process is gonna be very similar. So you can watch how we did it on this 4Runner today and give you a better idea of how you're gonna do it on your own car at home. Let's check it out.
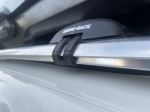
Now this is gonna be Rhino-Rack's Vortex Bar which is their aero bar. It's gonna be a nice taper design on both the back and front, making this a good one for cutting through that wind and minimizing wind noise. The weather strips up top are gonna help with that too. If you don't have those weather strips in it will make a lot of noise, so just be cautious of that and be sure to put them in whenever you start your install and they're gonna be a great crossbar for really any sort of accessory. You've got that T-track up top if you choose to use a T-track accessory but they're great for clamp around accessories too and leave enough room underneath where I think most clamp around accessories will be just fine even if you have hand knobs underneath your accessory.
Aside from the clean look, there are some benefits to going with a flush design like this. A lot of people like to have crossbar overhang for the function of it because certain accessories like a load assist kayak carrier that'll help you lift your kayak up and into place requires a crossbar overhang. Or maybe you're just mounting up an awning or multiple accessories and you need the extra room. In those cases, I always recommend having longer crossbars but if you're only using this for a single accessory maybe just a roof box, whether it's for looks or just calling some extra stuff on your family vacation maybe just a basket or even just two bike racks. There's plenty of room up here for two bike racks.
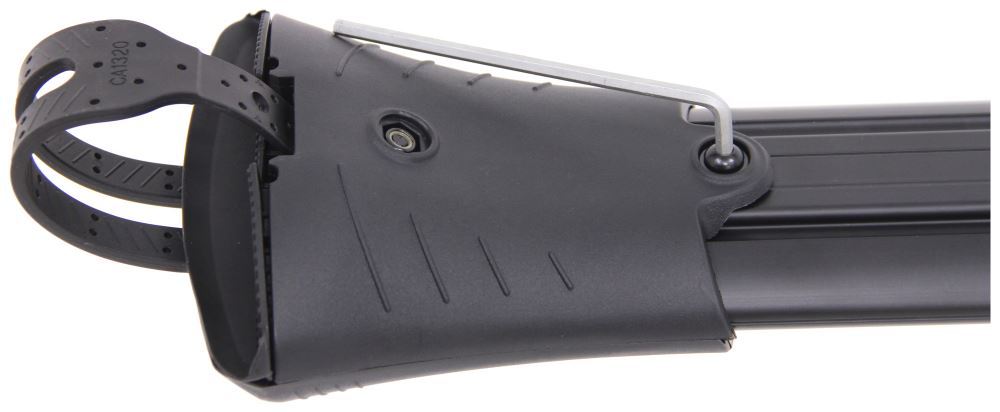
Regardless if you're using this for very few accessories and you don't need all that space, then something like this works perfectly and gives you a clean look in the process. The aluminum crossbars are gonna be great for rust resistance, keeping them resistant to the elements over time. So when you're leaving this on your roof it's not gonna be affected and it maintains a good amount of strength. It does have a 176 pound weight capacity and that's for the crossbar roof rack system. Be sure to check what the roof capacity on your vehicle is because if it's lower you want to go by the lowest rated component. And as we can see, they are a silver crossbar. You can get them in black too. Nothing functionally changes, just the look of it. So if you've got a vehicle where you wanna match it a little bit better, you can. Your kit does come with two keys to correspond with the locks on the feet here. Those are going to let us unlock these and access things like that T-track underneath where you can pull up that weather strip and slide your T-track accessories into. Or if you need to adjust the spacing of these crossbars to maybe accommodate a different accessory, you can loosen up the clamps and move them front to back as you see fit. Then when you're done, the covers will just pop right back into place, giving you a clean look but also keeping things protected and locked. And because there's no fixed mounting points here you just mount it to wherever your factory raised rails are and what works best for you. The installation process is very straightforward. The only measurements we need to take is between one crossbar and the other making sure that they run parallel. But as far as that install process goes, we're gonna walk through that with you right now. Now the first thing we need to do for our install is get our crossbar laid out. I recommend having a flat surface to work just so you can keep everything straight and we're gonna pop these end caps off and get some things set up on the table before we take it to the roof. First being our end pieces. These are gonna be the rubber pads that sit in between the plastic here and our raised rails on our vehicle. So just line it up with the shape. There's two tabs that'll line up with two holes on the foot. So get those lined up and push them in. Now if they don't go in all the way, that's fine. As we tighten things down they'll kind of wedge themselves in place, right there's good enough and we'll do that on both sides. While we've got the bar upside down, we're gonna loosen these security screws just a little bit. You don't need much just enough to pull the foot out. You'll feel when it loosens up. We can pull the foot out as far as it'll go on both sides and then flip the bar back around to add in our weather strips. Now you get two of these with your kit and it's not enough to fully cover the bar here but once the covers on the foot pack it'll sit there underneath so you won't see any gaps. So my best advice is to just get this laid out as centered as possible. That looks good there. And just add in that weather strip. The best trick for the weather strip is to get one side started and then just kind of go down the line pressing the other side in. The rest of our work on the table will be done right in here. So flip this bar up and it's gonna expose a screw underneath down in the foot pack. You wanna loosen and fully remove this. And all of this is using the same provided Allen key so no need to keep any extra tools straight pop that out and take your band. Now there's going to be a series of numbers here depending on the vehicle and the type of fit that you have, you'll use a different number. You can find those in your instructions. Or if you need vehicle specific instructions you can find those on Rhino-Rack's website. But for our application today, we're gonna be going towards the number one hole. So that will just feed up this slot on the bottom of our foot line up with the hole we just removed this screw from and add it back in and tighten it down. Repeat these steps on the other side as well. When we're done, fold that bolt back over. And once we get this to the roof what's gonna happen is we'll set this wedge on the inner edge of our raised rail. The band will wrap around the underside and hook into this block right here wrapping around that raised rail on our roof. We'll just repeat this whenever we get up to the roof, but I wanted to show you down here where it's a bit easier to see. With all that done, we can take this to the roof where we want to feed it across to the other side trying to wedge it in place as best we can. Now it could be really helpful to have an extra set of hands here on the other side to just grab the bar once it gets over there but it's definitely doable on your own. And as you're doing this, you want to take measurements from one crossbar to the other or from some fixed point on your vehicle to the crossbar in the case of that first one. For us today, I'm actually going to just wedge it right up against this edge on the raised rail making it very easy to tell what's running parallel. But you just wanna take those measurements to ensure the bar's running parallel to each other and aren't crooked on the roof. I'll do my best to keep my hands out of the way here. Just replicating that thing we did on the table getting the band wrapped around the block there. It is a little bit hard 'cause it is a metal band and it kind of digs into your fingers as you try to get it started but right there is looking great. Do that on both sides and use the included tool to tighten it down evenly. Now as we're tightening this, Rhino-Rack doesn't have an included tool to judge how tight it is. They don't list any specific torque rating so get it snug on both sides, not overtight but enough to keep it very still and make sure that this band is sitting flushed to the raised rail. With the bands tightened down, we can't forget about that one screw we loosened in the very beginning underneath the foot pack. Again, use the same tool. I find it's helpful to just reach under with one hand to find where that screw is located. Use the other hand to get the Allen key in place and just turn it tight as best you can. It's a little hard since it's underneath the crossbar and not visible, but once it's tight, you're good to go. You can lock up the end caps here so insert your key into the lock core. Get that slit in kind of at a diagonal angle between the locked and unlocked icon. Twist it to the unlocked and lock it to add the core. Then you can unlock it to add it back up to the foot here. Now I'm gonna have this set up so that the lock core is on the back so we don't have to see it whenever we're facing our car. So get that lined up, push it into position and lock it up. And that'll do it for our look at the Rhino-Rack Vortex StealthBar roof rack system. This is gonna be a great option if you're looking for a clean install process for your factory raised rails. And it's gonna give you a good method to mount up some accessories. Like I mentioned before, if you need more space for other things or overhang for specific accessories like a load assist kayak carrier, then yes, maybe a roof rack system with an overhang would be a better fit. But if you're looking for something clean and simple, then this could be the one for you. Thanks for watching.
Ratings & Reviews

Thrilled I got quick delivery with standard shipping! The product arrived in good care and took maybe 40 minutes to install. Looks great and is sturdy
Great low profile design. Better than what Chevrolet offers. Holds up great and handled the weight. Easy to install Make sure you have it spaced out to your desired liking otherwise is a little time consuming to move again but otherwise I would definitely buy again.
Great rack for my '23 Outback Wilderness. Lowest profile out there. When installing use fixture point 1 or 2 for the locking strap. If you use 2 it is tight and I had to remove the barrel, attach the strap, and then reattach the barrel. Point 1 is easier and still tightens all the way.
I bought this rack as a Christmas gift for my daughter's 2023 Subaru Outback Wilderness Wagon. It fit perfectly! It was relatively easy to install with the help of my son-in-law. It is very secure and holds her cargo box very well. After multiple highway trips between Maine, New Hampshire and Massachusetts it hasn't budged!
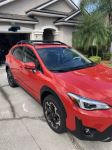
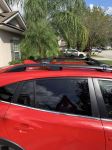
Very well-made and easy to install. As-advertised, these are compatible with a 2021 Subaru Crosstrek. They don't interfere with the operation of the sunroof - this had been a concern but there are no issues at all. They are low-profile and look good on the car. We'll use these to transport a paddleboard and kayak.
I researched low profile bars for 3-4 hours before buying these Stealth Bars. A major reason I went with these is the metal strap inside the rubber band that attaches to your side rails. Other companies just used hard rubber that could easily be slashed with a box cutter.
Of course these lock, which is important. They were also easy to install. I installed one and my wife installed the other.
Thanks etrailer and Rhino Rack.
It looks great. I have not heard any noise from these bars, so far while driving. The crossbars were installed on a 2022 Subaru Outback Wilderness. The Rhino-rack hardware kit RSK01 was shipped separately. It contains four CA1319 RSB Short Locking Straps. Hole #1 (i.e. the farthest hole) worked best for the installation.
Great job etrailer!!!! I received a phone call from etrailer about my credit card. Once all was cleared, I received my crossbars in 2 days. I was surprised how quickly I received them.. Installing the crossbars was pretty simple. The first one always takes a little longer; reading the instructions; going slow, making sure I am doing everything right. The second bar took half the time, if that much. The outside noise that other customers complain about, is none existant unless I am traveling over 70mph.Definitely recommend the product.
The stealth bars are sturdy and low noise. But they are so close to the roof of my 2016 Escort that the knobs for attaching the J-hook kayak carrier rub the roof. I put a eighth inch hard rubber pad between the rails and the crossbars and removed some of the unthreaded portion of the knobs to make them fit to my satisfaction.
Looks like good quality product. The only problem was I didn't know what hole to use on locking strap, called Rhinorack.com headquarters. They quickly got info I needed for my vehicle. Wish there was an insert with that info.
2021 Subaru Crosstrek,
Website video for installation was easy to follow, installed to spec, might have to adjust span when I get my roof basket. Cross bar seems solid, and was what
I wanted, a little better than OEM. Look great
Product fit well, easy to install. I received a new Ford Expedition at work with an aluminum roof. I have an emergency light with magnetic mounts that will not work on the aluminum roof. Purchased these bars and used them to mount the light without having to put holes in the roof.
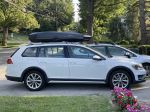
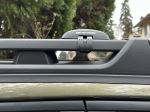
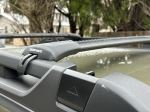
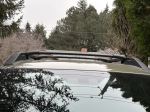
Rack looks sturdy. For my 2017 vw Alltrack the rear bar could be replaced for a shorter. On my side picture that is as far back the bar will go (item ja7975). Which it worked out for this application if you want the bar further aft a shorter bar will be needed. The front fit well within it’s range. The car tapers towards the back so back bar is shorter. I also dont like how VW put a notch on the bottom rail. It looks like the straps will be easy to cut with a bolt cutter.
Appears to be a well made product. I wanted a low profile rail. I would have preferred a clamp style cross bar, like the Yakiima Whispbar, but they were to wide for my Thule Evolution (ski box), mounting brackets.
You need to be careful when attaching the straps when attaching to the bracket and mounting to the rail. The exposed metal portion is very sharp.
The only con is see to this product is the strap mounting system, its more of a hassle to adjust.
When I ordered this product I was excited to see the reviews said how fast it shipped. I was not so lucky. The item was back ordered and the website did not indicate that. I received an email saying it would ship in a week so I thought it would arrive in a week. I was wrong. When I called about compatibility with attachments they told me it was back ordered and I wouldn't receive it until mid July. That whole ship in a week meant ship from the distributor to etrailer. Then it would ship to me.
Once it arrived we immediately opened it up and started assembling it. When we got to the part in the directions about attaching it to the car the directions said to go to Rhino-Racks website to find out what hole in the y-straps to use for my particular vehicle. Their website does not have an area with a fitment guide as the directions indicate so I had to call. I spoke with Jeff at Rhino-Rack and he said hole number 3. That was impossibly tight and the strap would not reach. I called back to see if hole 2 two would be acceptable and he said it should be hole 3. Well, we went with hole 2 because there was NO way hole 3 would reach the bolt since steel does not stretch.
Upon attaching the strap around the raised roof rails the strap slipped and I quickly found out the steel loop is as sharp as a kitchen knife as it sliced the tip of my finger. It was cut so deeply and cleanly it took over an hour to stop the bleeding. I called Jeff back to let him know about this problem. Aside from thanking me for letting him know, he did nothing to better the situation. I will say, now that my finger isn't gushing blood and the cross bars are securely attached to my 2015 Hyundai Tucson in hole number 2 on all four of the y-straps, I am pleased with the appearance and how quiet they are when driving.
Some cons, aside from the aforementioned:
-The rubber strip caved in when I strapped one kayak just to the cross bars. I will need to order a new one to prevent water from getting inside and to prevent noise. It is very disappointing when you have something for less than a week and you need to replace parts on it.
-The locks are super cheap and it wouldn't take much for someone to break them if they really wanted my cross bars.
-The options for attachments are very limited. In fact, I almost sent these back because I was having a hard time finding kayak attachments that I liked.
I wouldn't order these again knowing the hassle I've gone through with them.
Great aftermarket cross bar for my Chevy Traverse. I wanted something as low profile as possible so I could still get in my 7ft garage door with a Yakima Alpine lo ski box on the roof. These rails are rock solid and did not disappoint.
Exactly what I was looking for to mount my Thule roof box on my 2025 Subaru Outback Wilderness. This kit is truly low profile, sits perfectly on the OBW rails and is very simple to install (just follow the included printed instructions). No wind noise to report, and so far, it's holding up very well.
Easy to install great quality low profile bars for my OBW exactly what i was looking for !
Rack setup and installation was a breeze. Offers a nice low profile design while being really sturdy. Mounted my extended cargo basket and the pair is rock solid.
Everything went as planned and follow up was awesome. I told my rep I needed product by a set date he went and saw they had the product in stock before he took my order and it was delivered as promised. Geoffrey sent a follow up email with his phone number to see if I got the product and needed advice on install. Great customer support.
Pretty simple to install. I did need to adjust the length of the crosssbars to accommodate the diverging rails on my Flex. It worked great. The straps take a little effort to wrap around the rails but that was as difficult as it got.
Perfect fit for our 2013 Ford Flex. It was easy to install and seems to be very secure. We've already used it with our rooftop carrier box and it's worked quite well
Great product, and great service. It not only works well for our thule top box, but looks good on the flex too. I would recommend this to anyone looking for a dependable set of rails.
Fits perfectly- took about an hour to assemble and attach to rails. Very happy with the appearance and functionality
Do you have a question about this Roof Rack?
Info for this part was:
At etrailer we provide the best information available about the products we sell. We take the quality of our information seriously so that you can get the right part the first time. Let us know if anything is missing or if you have any questions.































Bob S.
5/11/2021
Great product