


To see if this custom-fit item will work for you please tell us what vehicle you'll use it with.


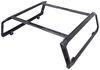
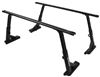
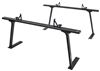
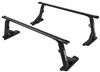
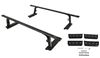
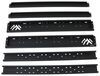
This rack hauls up to 400 lbs of gear, so it’s built for both daily work and off-road adventures. The design lets you mount rooftop tents, traction boards, jacks, or storage boxes without losing bed space. Because the rack sits at mid-cab height, your gear stays low and stable while you’re on the move, and your truck still fits into most garages.
The frame is made from strong 14-gauge steel tubing and finished with an e-coat powder coat for durable, rustproof protection. The textured black finish resists wear and looks clean even after heavy use on trails or job sites.
The low-profile style keeps cargo below the cab roofline, which helps reduce wind drag and keeps noise down on the highway. It also makes loading tents and gear easier since you don’t have to lift everything as high.
You don’t need to drill into your truck bed to mount it. The rack bolts directly to the OEM Trail Rail System using the included hardware, creating a secure fit without extra tools or modifications. That means you can install it quickly and get back on the road.
Top rails can be mounted in several positions to fit different tent footprints or gear setups. You can attach RotoPax cans, shovels, LED lights, or storage boxes where they’re easiest to reach, making it easy to organize everything for your next trip.
Videos are provided as a guide only. Refer to manufacturer installation instructions and specs for complete information.
How's it going neighbors This is Ed here with etrailer.com. And we're taking a look at the Westin Overland bed rack on our 2023 Jeep Gladiator. Ladder racks for overland and off-road are very popular on the Jeep Gladiator and this particular entry from Westin is gonna allow you to get those things out on the road with you that go along with that type of lifestyle. The design of it is designed for people that would put a rooftop tent on it in mind with the elevation, but the key of it was to not extend beyond the top of the cab. Overall, something like this is gonna just allow you to get those jacks, those jerry cans, recovery boards, all those things that you need for your adventure out on the road with you. Constructed of black powder coated steel and all of your fasteners are coated stainless steel.
I actually dropped some hardware and tried to use my magnet to retrieve it and found out that it's actually stainless steel, so that's gonna hold up super well with the elements against rust and corrosion. I'm a visual person so you can kind of get a better idea of something when you see it in the capacity that it's supposed to be in. So I put up one of our Yakima rooftop tents so you can get an idea of the clearance and how it would look on top of the the Westin bars. And as you can see with this positioning here, it's similar to how you would use crossbars on top of a car. You just have those two rails where you're making that contact connection and clamping everything down.
The Overland is a solid carrier that's gonna give you 400 pounds of weight capacity and a system that's designed for your roof top tent. So, the two bars that are gonna run from the front to back here gives you additional strength and support and it allows you to make adjustments using the holes on the end to go in tighter or wider or apart depending on what's required for your rooftop tent. This system only works with the OEM track system from Jeep, so you will need that in order to secure it to the back of your bed. Just a small note, during your installation, you will have to remove your factory tie down loops. Once you get into the installation, I'll show you the point where you can reinstall them.
It's gonna still allow you to have those points, you just have to get them out of the track so you can slide the supports down. The Overland is a great value out of the box because it's a complete system that allows you to use your existing brackets and hardware. If you we inchesre looking for an alternative to compare it against the Yakima Outpost is a mid height ladder rack that fits on the back of the gladiator, gives you a little bit more weight capacity, but the trade off is the fact that you're gonna have to add accessories like your sidebar, and your accessories for like shovels and recovery boards are all gonna be channel mount and Yakima exclusive. So, if you want that additional flexibility, the Westin is kind of the better option. Overall, in my experience, speaking with our neighbor and our vendors with Westin and all the other brands that we have, I would say that I trust the brand because of the quality of the products that they use.
Westin makes a lot of vehicle accessories like nerf bars and brush guards and these are right on par with those types of products. Not a necessary function, but something I thought that looks really cool, on the side of our rack, we actually have this precision cut mountain range here along with the die-cast Westin badge to give you that real put together look. And honestly, I think that this is gonna give you a super rugged outdoorsy look for your Gladiator that's already starting out that way. Another thing that's really cool that the installation seems like it's a lot because there's so many individual parts, but kind of getting ahead of that and organizing it as you remove it from the two boxes you're gonna receive, it makes the a world of difference for the setup. If you have an additional set of hands, tell them to come on over and then I'll show you guys how to get this installed. Our installation has a lot of pieces and parts so it makes the most sense to lay everything out first, I went ahead and assembled the one closest to the cab to get an idea of how everything comes together. And one step that you're definitely gonna want to do first is getting your bolts into your track for the end closer to the tailgate 'cause it's not gonna be another opportunity to get that installed. So that's gonna be one of the first things that I suggest that you get going. And then from there, I'll show you how to get the structure put together. You get these in place by removing your factory tie downs and just sliding them down the track just close to the end of the tailgate and we'll get in position once we have our rear structure. So, you wanna identify your uprights to make sure you have everything in the correct orientation. For the driver's side, you wanna make sure these holes for your sidebar is, are pointing towards the cab. You also have this blank point that's pointing towards the inside that's gonna let you know exactly where you should have everything aligned. And we're just gonna grab our crossbar bar. I'm just gonna slide it a little bit further off of the bed. And use my weld nut and my M10 bolt. (bolt clattering) Gonna slide her in flat. Now I just wanted to grip on a couple threads just enough to hold it and I'm gonna do the same for this one. And that way it'll slide along this track so I can make sure I have it to the correct width for the positioning. I'm gonna flip this over and do the same on the other side. And there is a lot of hardware, however, the instructions, I would say they give you a great guideline of how everything goes together. You just want to, just make sure you're taking the time to set everything up and set it out so it's easier to to access when you're assembling. Found that holding that plate with the weld nuts back gives you enough resistance to get those threads in. Let's get our other tower installed as well. Super fun time fastening all these nuts and bolts. It's really not that bad. And so, from here I'm gonna grab my bar. I'm just gonna rest it along the edge of the bed. And because we didn't completely tighten our hardware, we can make use of the slots here for adjustability. And now, I'm just gonna align our T-bolts with the slots on the bottom of the platforms. (bolt clattering) There we go. I'm gonna hop over on the passenger side and do the same thing. Now that we have our uprights installed on a track, you're going to have to position them far back as possible on the track. They take up the whole bed, so you're gonna go as far back as you can and as far front as you can. If you we inchesre wanting to still use your factory tie down loops, this is gonna be your last opportunity to do that without having to unbolt anything. It will require you to move, remove your in, T-nuts and then slide those guys on the track before you fasten down. Now that we are at this point, we're gonna move to the next phase and that's gonna be putting our bar from the front to the rear and we're just gonna align it on the two top holes right in here. From there we're gonna take our M8 hardware and we're just gonna fasten it to the top and take our second bar and do the same. In this point of the process, we are still hand tightening, just still giving ourselves that flexibility to make any necessary adjustments in position. So we still got a lot of hardware, lots and nuts and bolts. However, once you install this, it's likely that it's gonna stay on the back of your vehicle. And speaking to the fact that I will be taking this apart 'cause it's a demonstration, just a fit guide. If I we inchesre installing this on my Gladiator, I would use some Loctite blue with all my hardware, if it's gonna be a, if it's gonna be a permanent fixture, just to, you know, give it that extra measure of security. So now that I got the last of this hardware in, I'm gonna go to the passenger side and get our other bar here. Our next step is putting our side bar on. One thing that I encountered right here is actually a little bit of imperfection in our weld nuts and that tends to happen from the powder coating process. You can clean that out using a wire brush or various different means, you can just do an online search, but you can get that cleared out and then you don't have to worry about your hardware binding up. We're just gonna mock this up, just give it a little prop up here, make sure we got the correct spacing. And now, I'm gonna grab my hardware and we're gonna fasten her on. We we inchesre able to clean up the weld nut here. We just basically just, I took the tip of my knife and pop that burr out of there really carefully not to damage the threads and just hit it with a wire brush with a little silicone spray. And now, we're good to go for your hardware. And I'm just gonna align my crossbar with the plates. I'm just gonna use this kind of to pin it into place. So I'm gonna get a couple threads started. (bar thuds) (bolt clattering) I'm gonna do the same over here. And now, my hardware will hold my sidebar in place. So we're getting closer to home now. You just wanna make sure the entire rack is shifted as far back as you can on the track. For your installation at home, you're gonna use the included plastic washers here, right above your nuts. But once you install these, they don't come off. So for my demonstration, we're just going to pass over that step and we're gonna grab our 13 millimeter nuts. And get those started. And now we're at the point where we're actually gonna start fastening down. So I would say any adjustments that you wanna make, you want to definitely do before you grab your socket wrench. And then we're just gonna tighten these guys down. So at this point, since we have all four contact points fastened down, this is where you're gonna be able to make any other adjustments as far as that crossbar slide. It's gonna be a little bit more stiff, but this is where you're gonna fasten down and it's a pull that plate with the weld nut closer to the inside of the bar and it's gonna give you a sturdy connection. And now, we're gonna go around and go to each one of our connection points and fasten everything down. So I'm gonna grab my 13 millimeter wrench. I'm gonna hold in on here. I'm gonna fasten these guys over here across the top and on my side rail. After you fasten everything down, you're gonna want to check all your hardware with your torque wrench to make sure that you have everything at the specified requirement. Is a difference between the M8 and the M10, so you just wanna look in the manual to make sure you have it all correct. So this is Ed with etrailer.com taking a look at the Westin Overland bed rack on our 2023 Jeep Gladiator.
Ratings & Reviews

Info for this part was:
At etrailer we provide the best information available about the products we sell. We take the quality of our information seriously so that you can get the right part the first time. Let us know if anything is missing or if you have any questions.

























Thank you! Your comment has been submitted successfully. You should be able to view your question/comment here within a few days.
Error submitting comment. Please try again momentarily.