
To see if this custom-fit item will work for you please tell us what vehicle you'll use it with.


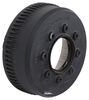
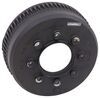
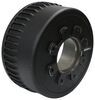
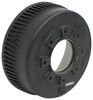
This fully welded trailer hitch receiver bolts onto your vehicle's frame with no welding required. Matte black, powder coated steel is durable and corrosion resistant and creates a rugged look.
Features:
Specs:
The sturdy steel construction is protected with a matte black finish for added durability. This unique powder coating gives etrailer hitches a carbide-like appearance and a rugged look that sets them apart from traditional glossy hitches. In addition to being rust and corrosion resistant, the tough matte coating hides dirt, scuffs, and dings better than a glossy finish.
At etrailer we're committed to the products we sell, and to our customers. Our experienced and knowledgeable staff are available via both phone and email to address your questions and concerns for the lifetime of your hitch. The technicians at etrailer perform hitch installations on a daily basis, making them a valuable resource for do-it-yourselfers. The one-on-one, personal service you'll receive comes straight from an expert in the towing and automotive field. We've installed it, we've wired it and we've towed with it, so whatever your question, we can answer it.


Tech Tip
No drilling through vehicle frame required for installation , Exhaust must be temporarily lowered for installation , Spare tire will need to be lowered or removed temporarily for hitch installation
California residents: click here
Complete Towing Package for 2010 BMW M5


Popular M5 Trailer Hitch Accessories
Videos are provided as a guide only. Refer to manufacturer installation instructions and specs for complete information.
Hey guys, it's Jake here with etrailer. Today, we have a 2013 Ford Transit Connect van and we're gonna be taking a look at, and I'm gonna show you how to install the etrailer class three two inch hitch receiver. Adding a two inch hitch receiver to the back of your Ford Transit van is gonna allow you to do a couple different things. You can use it to haul bike racks, cargo carriers, or maybe even pull a small trailer. That's what the owner of this vehicle is doing, he uses it for some side jobs and stuff, just doing some odd jobs here and there, and he wants to be able to pull a trailer, so we hooked him up with the etrailer hitch and the Curt fourfold wiring so that he can get the lighting functions properly to the back of the trailer. Our hitch pin hole here is gonna be a standard five eighths inch hitch pin hole that's gonna accept a pin and clip.
Make sure you that you get a five eighths pin and clip, one will not come with the hitch, but we've got plenty on our website. The safety chain tabs are gonna be nice and large, it's a loop style, so it'll fit your S hook style like this or clevis style like this, so that whenever you're towing those trailers, you can hook 'em up safely. Now when it comes to measurements, we are sitting up on our lift here, but from the ground to the top inside of the receiver tube even on our lift, is 20 and a quarter inches. Our lifts sit about eight and a quarter inch high, so that leaves you with 12 inches. That should be high enough, you don't have to worry about accessories dragging on the ground.
I would be cautious if you're going into an extreme slope, an incline like a driveway or the entrance to a business or something like that, you can get around it by kind of approaching it at an angle, doing one of the front tires at a time, that'll help so your accessory does not drag. What else that's gonna help you with is that's going to help you find the right size rise or drop ball mount. Being at 12 inches off the ground, I doubt you're gonna have to have a drop ball mount. It's just all gonna depend on what kind of trailer you're pulling, but you can compare that to the height of your trailer coupler when it's level, and that'll tell you whether or not you need a rise or a drop or how big it should be. For hitches that are receded underneath the back of the bumper, we give you a measurement from the edge of the bumper to the hitch pin hole.
For this particular one, the hitch receiver sticks out past the bumper, that helps a lot with clearance and stuff like that. I would say, you will have to watch it a little bit if you're getting in and out of the back of this van, just watch your shins on it and stuff, but you should have no problem with any accessory folding up to the back of your van if you're concerned about that. This hitch is gonna have a max tongue weight capacity of 350 pounds, and a max gross trailer weight capacity of 3,500 pounds. If you plan on using this particular hitch to tow a trailer like a work trailer or maybe a small enclosed trailer, something like that, and you want to use weight distribution, you can do that. It will increase your tongue weight capacity to 400 pounds and your gross trailer weight capacity to 4,000 pounds.
Again, that is with weight distribution, if you're not using that weight distribution, you wanna be sure to stick to those lower amounts, and you want to compare all of those numbers to that of the vehicle's capacities and go with the lowest rated component between the vehicle and the hitch. Now that we've gone over those details, let's go ahead and show you how to get this hitch installed. To begin our installation, you're gonna need to lower your spare tire out of the way. Ours we can't remove right now because the stud on here is messed up, so we just have to hang it up here out of our way. The second thing you're gonna do is grab a pair of channel locks and up here on our exhaust hanger, you're going to twist and rotate this hanger, and it should pop out of the opening there, just like that, and then you'll just want to drop your exhaust down and support it with a strap. Our exhaust is broken, so we're just gonna remove this whole tailpipe and just set it out of the way. Now we need to, on both sides of the vehicle, loosen some of this wiring by popping these (indistinct) out. I'm just gonna pop these out of the frame rail, and it's gonna give us a little flexibility to be able to get our hitch up into place without it getting in the way. Now, because our vehicle at the time of this video is 11 years old, the frame is very, very rusty. The weld mounts that are in the side of our frame rail are impossible to get the bolts started in, so we've got a thread tap here. It is a M12 by 1.75, it matches the thread pitch of our bolts. What we're gonna do is we're going to send this through the frame rail. Chances are you're probably not gonna have a thread tap, so if you have to go pick one up, if your vehicle looks like this underneath, you might want to do that 'cause otherwise, you'll never get the bolts in. So we'll just run this through each one of our weld nuts, there'll be two on the driver's side and two on the passenger side. (wrench rumbling) I'm gonna take some more penetrating oil after I've tapped each of these and then a tube brush and we're just gonna clean it out. (brush humming) Now, I'll grab an extra set of hands, we're gonna lift our hitch up into place. Just keep in mind, you want to stay away from pinching any of those wires or anything like that. We'll have to slide it up. We'll put the passenger side up first because it's got the filler tube for our fuel, and then we'll take your bolt and one of your conical tooth washers and run that through the corresponding holes in our hitch. Now, we're gonna take a 19 millimeter socket and snug up all of our hardware. (wrench rumbling) Then you'll want to grab a torque wrench and torque all of our hardware to the specifications in the instructions. Now, all that's left to do is put your exhaust back into place or put it back up there, and then put our wiring back in, and lift our spare tire back up. Once you get your spare tire back up into place, that's gonna do it for the installation. Hopefully this video helped you decide whether or not the etrailer class three two inch hitch receiver is right for you and your 2013 Ford Transit Connect.

Worked great easy to install.
Info for this part was:
At etrailer we provide the best information available about the products we sell. We take the quality of our information seriously so that you can get the right part the first time. Let us know if anything is missing or if you have any questions.


Thank you! Your comment has been submitted successfully. You should be able to view your question/comment here within a few days.
Error submitting comment. Please try again momentarily.