


To see if this custom-fit item will work for you please tell us what vehicle you'll use it with.



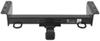
This Blue Ox trailer hitch receiver is built for light to moderate towing, cargo carriers, and bike racks. With a Class III rating, it can handle up to 4,500 lbs of gross trailer weight and 675 lbs of tongue weight. When used with weight distribution, those limits increase to 5,000 lbs GTW and 750 lbs TW. The sturdy, square-tube design gives you the strength and stability needed for small trailers, campers, or gear haulers without overbuilding or adding unnecessary bulk.
The hitch has a textured black powder coat finish layered over an e-coat base for superior rust and corrosion resistance. That extra protection means it holds up well through wet roads, salt spray, and years of use. The textured surface also hides nicks and scratches better than a glossy finish, keeping it looking clean even after tough seasons of towing.
If you like tackling projects yourself, this hitch is ready for that. It bolts directly onto the vehicle’s frame using the included mounting hardware—no drilling or welding needed. The precision robotic welding ensures everything lines up cleanly for a secure fit, so you can get it installed in your driveway with common tools instead of needing a full shop setup.
The 2" x 2" receiver opening works with most common hitch accessories—bike racks, cargo trays, or ball mounts—so you can get more utility out of your ride. It’s a straightforward way to expand what you can carry without changing how you drive or load up your gear.
Videos are provided as a guide only. Refer to manufacturer installation instructions and specs for complete information.
Hi, this is Scott with etrailer. Today, we're taking a look at and installing our Blue Ox hitch on our 2018 Chrysler Pacifica. The Chrysler Pacifica is a really versatile vehicle and you can actually haul quite a bit in it, but it's nice to be able to add to that versatility by being able to haul a bike rack and maybe a cargo carrier. It'll give you a little more room to haul some stuff. This Blue Ox hitch we have here is gonna be a really nice heavy-duty option for this. You're not gonna see the cross tube, it's gonna be hidden underneath and back in a little bit, so you're not gonna see that at all.
All you're really gonna see is just your receiver hanging down. And speaking of that, I really like how this one is really accessible. You're gonna have easy access to your chain loops and your pin for your receiver, and this is gonna be the 2-inch by 2-inch variety, so that's gonna hold most of your common accessories that are on the market today. This hitch is gonna have a 5/8 pinhole opening, that's gonna hold in your accessories that you put in the back of your receiver. Now, this hitch won't come with a pin and clip, so you may wanna pick one of those up.
But keep in mind, a lot of your accessories, like your bike racks and cargo carriers, will come with a pin. And a lot of your bike racks now will come with an anti-rattle pin. This hitch has heavy-duty, welded-on chain loops. It's gonna hold either your clevis-style hooks or your S-style hooks, so either one of those are gonna work if you plan on pulling a small trailer. Another nice thing I like about this hitch is it does have a heavy-duty bracket here.
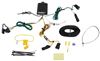
So no matter what type of wiring you wanna get put on the back of your Pacifica, you're gonna have that option to put that on, or you can leave it off if you don't get wiring. But if you do plan on getting wiring or you plan on doing it in the future, I do recommend go ahead and just get your wiring and do it now while you have all of your undercovers off of there. It makes things a whole lot easier to get that installed. As far as measurements go for this hitch, from the center of the pinhole out to the edge of our bumper, we're looking at right at around 3 1/4 to 3 1/2 inches. With that measurement, you'll be able to decide on, if any of your accessories that fold up or stow away, when you fold them up, will make any contact with the back of your vehicle.
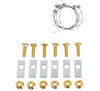
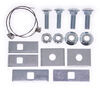
Now, for our measurement from the top inner lip of our receiver to the ground, for that measurement we're looking at right at 12 inches. With that measurement, you'll be able to decide on if you need any rise in either the shank of either your bike racks or your cargo carriers for clearance, and it will also help you figure out what size you may need for a ball mount. As far as weights go for this hitch, we're gonna have a tongue weight rating of 675 pounds. That's gonna be the weight of your bike racks loaded down with your bikes or your cargo carriers loaded down with your gear. Now, as far as the gross trailer weight rating, we're looking at 4,500 pounds. That's gonna be the weight of your trailer and everything that you have on that. Now, this hitch is capable of weight distribution, and that's gonna bump up your tongue weight rating to 750 pounds, and that's also gonna bump up your gross trailer weight ratings to 5,000 pounds. It's always a good idea to take a look in your owner's manual and make sure that you're not gonna exceed any of your maximum towing capabilities listed in there. Now, if you have any questions or comments about this Blue Ox hitch for your Chrysler Pacifica, you can always leave a question or comment down below in the comment section, or you can get a hold of one of our experts here at etrailer, they'd be glad to help you out. Now, as far as the installation goes, this can be a little bit tricky, but it's definitely something you can handle yourself. If you don't have the tools or the place to do this one yourself, you can always take a look at our dealer locator and get something done for you locally. If it's something you feel like tackling yourself, stick around and watch our video, and we'll help you get it installed. To start our installation, the main thing we wanna get going is we need to get this cover underneath of here out of the way so we can get our hitch installed. Now, we're gonna have quite a bit of hardware under here we're gonna be taking out. So before this starts sagging down from removing it, I like to get in this corner over here 'cause this is gonna be our hardest spot. Now, I did already take a couple of those out, so I'm just gonna take my 8-millimeter socket and a ratchet and I'm gonna start removing this hardware back in this corner. And, like I said, this is kind of a tight spot back in here. You will need a pretty small ratchet to get these out. And usually once you get them so far, you can usually start backing them out by hand. (ratchet clicking) Once you think you have all of them out, just go ahead and pull that back just to make sure you have it separated from our lower part. Now, I'm gonna start with these 10 millimeters we have towards the front. Let's go ahead and start removing those. (drill whirring) And underneath there, we're gonna have a couple of plastic nuts. (drill whirring) Now, we'll start working our way back. Gonna have a couple more 10-millimeter plastic nuts here. (drill whirring) Over here, towards our heat shield, we're gonna have a couple more of those plastic nuts. (drill whirring) Along the back here, we're gonna have these little eight millimeters across the back we're gonna need to remove, so I'll just use an 8-millimeter socket and start getting those removed. (drill whirring) And on our side here, we're gonna have a couple more. (drill whirring) Now, we're gonna have two of these plastic nuts. And the best way to get these is just take a flathead and just keep backing these off. It's gonna stay in the panel, it's not gonna actually come out. But once we get those down, it'll come down with our panel. At this point, you'll wanna hold that up. With all of our hardware out, we'll just remove our panel and set it aside. We need to get our exhaust pulled down just a little bit to give us some room. So I like to take some soapy water and spray it on my isolators up in here on both sides. Then I'll just wiggle my exhaust around, and that will work the soapy water into our isolators. We're gonna have one here towards the back, and then we're gonna have one here at the front we're also gonna be removing. Now, I have a cam buckle strap here that's holding up my exhaust, so when we back it off, it doesn't fall down too far. So I'm gonna start at the back and I'm gonna take a pry bar and I'm gonna try and find a good place to pry on this. And then, I'm just gonna push off our isolator off of our exhaust. (tool clanks) Now, due to the location of where this is at, it can be a little bit tricky. But just take your time and you will end up getting that to pop off for you. The key to this is just to find the right place to pry on that and get that to pop loose. And you may need to hold onto your exhaust to get that to break free. Usually, once you get it started, you can pull the light off by hand. Now, we can do this front one the same way, but I'm just gonna use my isolator tool to save me a little time. Same thing, just wanna pry that off and get that out of the way. As we can see, my strap is gonna hold our exhaust up. Now, with our isolators removed, I just wanna back off my cam buckle strap and we'll pull down our exhaust. Next, we'll remove our heat shield, and we're gonna have two of those plastic nuts we're gonna need to remove, and we'll just use a 10-millimeter socket to get those backed off. (drill whirring) With those off, we can pull down on our panel and set that aside. On our driver's side, on the back of our frame, we're gonna have this little 10-millimeter nut, that's gonna be a ground nut. We just back that off. (drill whirring) And we'll get that out of the way. In our kit, we're gonna have our hardware and we're gonna have these spacers. We need to get our hardware put in place. We're gonna have the two short ones, and then we're gonna have this long one. Our two short spacers are gonna go in our rearmost holes here. And then, we're gonna have this next one down, and this is where our long spacer's gonna go. In our kit, we're gonna have these coiled wires. This is gonna be a fish wire. We wanna get our hardware here in this round hole. So what I'm gonna do is I'm gonna just run that through our round hole, run that towards our access hole, and just kind of use my finger to guide that coil through. We'll pull that down. Now, we'll take our short spacer block, put that on, follow that up with our carriage bolt, just thread that on to our coiled end. Now, that we've done that, we'll feed our spacer block and our carriage bolt into our frame, then we can pull that through and pull that through. And then, we're gonna leave that coil on the end. Now, I'll do the same thing with this hole here. For our access hole towards the front, we're gonna use our long spacer block. And, again, we're gonna use our fish wire. So what we're gonna do is we're gonna call this reverse fish wiring. We just wanna put our spacer over our coiled end, and then we're gonna thread on our carriage bolt. Now, that we've done that, we're gonna feed our carriage bolt up into that hole we used for our access hole, followed by our long spacer. Then we can just pull that down through. And, again, we're gonna leave our fish wire attached. For the rest of our hardware, we're gonna have our conical tooth washer, it's gonna have teeth on one side. When we get this going up and we're putting our hitch up, we wanna make sure that these teeth are gonna be facing our hitch. And then, we're gonna have the nut, and this is just gonna be followed up with that and hold our hitch in place. So we just wanna run our fish wires into the corresponding holes. And these wires are pretty long, so you shouldn't have to worry about those coming out when you're trying to get this in place. We're just gonna start lifting our hitch into position. May need to pull your wires down some. What we wanna do on each side is just get one up started and run up finger tight as far as you can. It is a little tricky to get this in place because it is pretty heavy. And so just get our hitch where we want it, and all we're gonna do is we're gonna pull off our fish wires, run our conical tooth washer up with the teeth facing the hitch. And you may need to push that bolt over just a little bit to get that nut started, and just pull down on that to keep it in that spacer as you're bringing that up tight. Now, with everything held in place, we'll just get the rest of our hardware started and in place. With all of our hardware in place, I like to get to the back of my vehicle and make sure that I have my hitch centered up where I want it. Now, I'll just come back through and snug down all of my hardware. And I'm gonna be using a 19-millimeter socket, but you should be able to use a 3/4 socket as well. (drill whirring) Once we have all of our hardware snugged down, we'll come back through with our torque wrench and get everything torqued down to the specifications listed in our instruction manual. Now, if you don't have a torque wrench, you could pick one up here at etrailer, we do have some options available. Or you can take a look at your local auto parts store, you should be able to rent one there. (torque wrench beeps) Get our exhaust isolators put back in place. And, again, it's easier to go ahead and spray these down. Your pin that it slides on and the isolator itself, go ahead and spray them down with your soapy water again. That's gonna help you out. Your hitch will come with a bracket, as you can see, that I did get installed here because our neighbor did get 4-pole wiring with that. Now, you can put other bracketry on here, it just depends on what type of wiring you are getting. So, other than that, now I will have to trim a little more to get this set up. But, after I get everything trimmed out, I'll get my underpanel put on and we'll show you how that looks. Now, here we have our lower panel put back in place, I just wanna give you an idea what you're gonna have to cut out. It's best to just follow your instructions. But if you do end up putting the bracket on, you may have to go ahead and just hold it up in place and just kind of mark that out, and just cut back a little bit just so you have enough room to get that in place. Other than that, I think it turned out really good. With our panel back on and everything looking good, that'll do it for our look at and our installation of our Blue Ox hitch on our 2018 Chrysler Pacifica. I'm Scott with etrailer, and thanks for watching.
Ratings & Reviews

Info for this part was:
At etrailer we provide the best information available about the products we sell. We take the quality of our information seriously so that you can get the right part the first time. Let us know if anything is missing or if you have any questions.






















Thank you! Your comment has been submitted successfully. You should be able to view your question/comment here within a few days.
Error submitting comment. Please try again momentarily.