


To see if this custom-fit item will work for you please tell us what vehicle you'll use it with.


B&W is known for building hitches people trust. Made in the USA and made to last. This one bolts right on, with the receiver just below the bumper for easy access. Powder-coated steel holds up against rust, grime, and plenty of road trips.
With a 675-lb tongue weight, this hitch is ready for your multi-bike rack or a fully loaded cargo carrier. Whether you're hauling electric bikes or extra gear for a weekend trip, it handles the weight with ease.
The 4,500-lb towing capacity makes it ideal for hauling small travel trailers, utility trailers, or lightweight boat trailers, giving you the flexibility to take your adventure wherever you want.
This custom-fit hitch lines up with factory holes, and the 3-piece bolt-on setup makes installation quick and drill-free with no special tools or welding needed.
Videos are provided as a guide only. Refer to manufacturer installation instructions and specs for complete information.
Hi, I'm Daniel with etrailer, and today we're going to take a look at, and I'm going to show how to install the B&W Trailer Hitch on our 2025 Hyundai Tucson. You can do a lot with your Tucson, and adding a hitch to the back is going to allow you to put accessories back here. So if you need some extra room on those trips, you can put a cargo carrier, you can put a bike rack back here, or you can put a ball mount and do some towing. I really like how the B&W hitch looks on the Tucson. All you really see is that hitch receiver, that cross tube is completely hidden, and the safety chain loops are on a plate welded on the back. They're so far back, you really can't see those standing up, and it's kind of an angle.
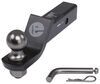
Now, if you are planning on towing, you'll attach your safety cables to them. You can easily put an S-hook (hook clangs) or a clevis style in these. (hook clinks) This hitch is going to be a two inch by two inch opening, and that's going to fit most of your standard accessories. You will need a five-eighths inch pin and clip (pin clinks) to secure whatever accessory you get in here. I would always recommend getting a locking pin so you can lock up your accessory so no one can come and take it.
(pin clinks) Now I'll get you a couple measurements. So from the ground to the top of the inside of the hitch receiver, (tape measure crinkles) that's going to be about 15 inches. (tape measure snaps) So that measurement can help you level out a trailer with a ball mount accessory. All you have to do is level your trailer, measure from the ground to the bottom of your coupler, and then take the difference with that 15. And that's going to be the size of drop or rise in your ball mount to keep everything level when you're towing.
Now, the next measurement's gonna be from the center of our hitch pin hole (tape measure clicks) to the edge of our bumper, and that's going to be about six inches. So that'll help you determine if you have a folding accessory like a bike rack and can fold that up without contacting your rear bumper. When towing either a flatbed, camper, or maybe a boat down to the lake, it's important to know your weight ratings and what you can handle when you're towing. So for this hitch, it's going to be 4,500 pounds total towing. That's for your trailer plus what's inside of it.
And your tongue weight, that's the weight pushing down on the hitch, that's going to be 675 pounds. Now it's always a good idea to check your owner's manual and make sure you're towing what your Tucson can handle as well. If you are planning on towing, it is important to get trailer wiring installed with your hitch so you make everything safe and legal when you're out on the road. And if you're wanting to tow a trailer that has brakes, you want to look into a brake controller for your Tucson. If you have any further questions on how to install those or what you're going to need for your setup, please feel free to reach out and be happy to point in the right direction. As far as the install process goes, this one's really straightforward. The hitch actually comes in three separate parts. So it'll ship to your house in a smaller box and it's going to be a lot lighter. So if you're doing this yourself, it'll be a lot easier. And it's not going to take you too long at all, but if you don't have the time or tools, you can check out our installer locator and we can find an installer local to you to get this installed. But if you want to do this yourself, follow along in this video, I'll walk you through the process. Starting off, I do have our vehicle up in the air and that's just so you guys can see this a lot easier. You can do this on the ground. We're going to be taking off these two underbody panels, the one on our passenger side and this middle section. And to do this, we use a flathead, stick it in the push pins, get this intersection out and then pull the whole thing out. (push pin clicks) Just go around, getting all these out. (tool rattles) (push pin pops) And we'll do the same thing with our panel over on our passenger side. On this smaller panel up by the frame, it needs a 14 millimeter and there's some plastic nuts. (tool buzzes) These are attached to the plastic, so you just want to pull down while loosening these up (tool buzzes) and that'll help you get this removed. We will be putting this back on after we get the hitch on. For this intersection, there's gonna be three more of those plastic nuts. (tool buzzes) I'll do the same thing and get these removed (tool buzzes) (tool buzzes) and this will not be reinstalled. We need to locate the threaded holes in the side of our frame. This is the side facing our tire. We need to take our hardware and it's a good idea to run these in and out on all of these just to make sure there's nothing in there that could hang us up. I'm going to use a 17 millimeter. (tool buzzes) (tool buzzes) Make sure that goes in smoothly. Now, if you're not able to get this in smoothly, you can use a wire brush and some silicone spray and clean this out really well to make it a little easier. If you have a ton of rust in this hole, those threads might be unsalvageable, so you may need to get a tap and die set. We do offer these here at etrailer and we're basically just creating new threads. So just make sure to get the right one. The instructions do tell you, it's gonna be an M10 by 1.25. You can use a wrench and stick this on here and then create those threads (tool rasps) just like that. Now most of the time these holes will be completely fine, but sometimes if you live near the ocean, these can be really rusted. Now we can take our side plates. You want this to be curved in towards the center of the vehicle. We'll take our bolts with a conical tooth washer, make sure those teeth are facing the metal. (plate clunks) We'll get this lined up on those two holes and get our hardware threaded in. (hardware rattles) (plate clunks) (hardware rattles) And on the passenger side, you just want to repeat that same process. Now we can get the center section lifted up. (section clunks) I'll get it in one side and then I can take our carriage bolt, (bolt clinks) and put it through the outside and to the inside. (plate clinks) (hardware clicks) Take our flange nut and get that tightened on. And with one side on, I can lift the other side up (section clatters) and I'll do the same thing. (section clatters) Carriage bolt in there and a nut on the other side. We can get our other two carriage bolts in, closer to the front on both sides. Now we can tighten everything down. So I'll start with that 17 millimeter up into the frame. (tool buzzes) (tool buzzes) (tool buzzes) I'll switch to a 19 and tighten down all of our flange nuts. (tool buzzes) (tool buzzes) We can torque all of our hardware down to the specs in the instructions and there's two different sizes, so they're going to be different torque specs. (tool rattles) (tool rasps) (torque wrench beeps) (tool rattles) And if you don't have a torque wrench at home, you can usually rent one from a local auto parts store. (torque wrench beeps) (torque wrench beeps) (torque wrench beeps) (torque wrench beeps) With everything torqued down, we can put our passenger side panel back up. (panel rattles) (panel clicks) (push pin pops) (push pin pops) Once you've done that, you're good to go. You can start using your BMW trailer hitch on your 2025 Hyundai Tucson.
Customer Satisfaction Score:
94% were satisfied with this product
6% of customers were not satisfied
Ratings & Reviews

Do you have a question about this Trailer Hitch?
Info for this part was:
At etrailer we provide the best information available about the products we sell. We take the quality of our information seriously so that you can get the right part the first time. Let us know if anything is missing or if you have any questions.


















Thank you! Your comment has been submitted successfully. You should be able to view your question/comment here within a few days.
Error submitting comment. Please try again momentarily.