Memorial Day Deals Are Here!
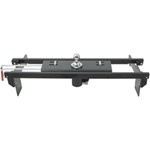
We offer many styles of top quality gooseneck trailer hitches, installation kits, adapters and accessories. They come from the best manufacturers like Draw-Tite, Reese, Bulldog, Blue Ox, Curt, Convert-A-Ball, and Colibert. There is also a how-to section of frequently asked questions, gooseneck hitch information, and installation tips![]() .
.
Gooseneck Hitch Manufacturers
Towing
Cargo Control
Performance Accessories
Vehicle Trim