


Thank you! Your comment has been submitted successfully. You should be able to view your question/comment here within a few days.
Error submitting comment. Please try again momentarily.


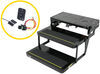
When you’re flat towing, it’s important to know your towed car’s brakes are actually being pressed—not just that a system is trying to apply them. This 12-volt Roadmaster Stop Light Switch Kit wires directly into the fuse box to send a true signal from the brake pedal itself. Your RV’s monitor lights up only when the pedal is physically depressed, giving you a clear, reliable confirmation that your supplemental braking system is doing its job.
If a braking system is installed out of alignment, it can rest against the pedal and keep it slightly pressed, wearing tires and brakes before you even hit the road. This kit helps prevent that by alerting you whenever the pedal is actually engaged. You’ll catch improper operation early and avoid costly damage caused by a pedal that doesn’t completely release.
Some vehicles don’t have an ignition “tow” position that lets brake lights work while being towed. This kit solves that by supplying a constant current connection, ensuring the monitoring circuit and brake lights still function correctly. It keeps your setup compliant and your braking communication consistent no matter the vehicle design.
The Stop Light Switch Kit connects straight to the fuse box for a dedicated 12-volt feed. Once installed, it’s always ready—no extra switches or temporary wires to fuss with before a trip. The solid wiring design gives your braking monitor a dependable signal every time, so you can focus on driving instead of wondering what your towed car’s brakes are doing.
Flat towing can be a much more convenient way to take your car RVing with you than using a trailer or a tow dolly. It'll save you storage space both at home and at the campsite, and it takes less time and hassle to hook up.
To flat tow your vehicle, there are 5 basic components you're going to need: a tow bar, a base plate kit, a safety cable set, tow bar wiring, and a flat tow braking system.
| For the RV | Between the RV and Towed Car | For the Towed Car |
|---|---|---|
| Hitch | Tow bar | Base plate |
| Wiring plug | Safety cables | Braking system |
| Wiring adapter cord | Wiring kit/diodes |
The custom-fit base plate installs on the frame of your toad so you can connect the car to your RV with a tow bar. Hook up safety cables between the vehicles to ensure that the toad does not separate from the motorhome if the tow bar becomes detached. Tow bar wiring syncs your vehicle's signal lights with your motorhome's tail lights, as required by law in most states. Finally, the flat tow braking system - also required in most states - activates the brakes in the toad when you hit the brakes in the RV, making for smoother, safer braking, and preventing wear on your motorhome.

Videos are provided as a guide only. Refer to manufacturer installation instructions and specs for complete information.
Hi, everyone. Steve here with etrailer.com. Today, we're looking at a Roadmaster stop light switch kit. Folks, this is a custom fit application, so make sure you're checking our fit guide here at etrailer.com to be sure you're in the right parts the first time. Now, if you don't know already, this basically activates your motorhome's brake-monitoring system whenever the brake pedal in the towed car is applied. So, what it's telling you is that the braking system on the towed vehicle and the motorhome are talking, number one, and it's ensuring that that supplemental braking system is functioning properly.
It works great for any application that does not have a tow position in your ignition system from the factory, and it wires directly into the towed car's fuse box to give you constant current, and you get all the included wiring and harnesses, the bracket, the stop light switch, and the inline fuse to tap into that fuse box safely, quickly, no cutting or splicing as far as your factory stuff, so it's a very nice, simple install. If you have questions about this installation, you can reach out to us at etrailer.com. Check our dealer locator tool if you don't wanna tackle it yourself or reach out to us for some quick help as well. I'm Steven. Stay safe while you're towing.
.
Ratings & Reviews


Victoria H.
1/14/2025
That's quite impressive Fred, nice ride!

Fred

1/8/2026
Everything works just fine! Great product and support! Thanks E-t


Alan
9/8/2026
Its been a year and to be honest, I never have to think about my tow setup. Its there, it works perfect like the day I got it. I cant recommend this any higher. Smooth towing without worrying about it.


Kate F.
12/17/2025
I wish you could mount it there Donald, but those stop-light-switch studs are only designed to hold the switch bracket. Adding the pulley bracket changes the spacing and alignment, which can make the brake lights stay on, not come on, or throw off the Invisibrake’s operation. The studs also aren’t meant to handle the side-load from the cable, so Roadmaster doesn’t recommend using them. For drilling stainless, the trick is a cobalt bit (M35 or M42), slow speed, steady pressure, and cutting oil so the metal doesn’t work-harden. Are you new to flat towing, or just getting a different vehicle set-up?

Michael R.
1/18/2024
Still working great
Mark S.
11/3/2025
Its a good choice because its easy in easy out. I have two jeeps that can flat tow, so i was covered for braking in either one
Info for this part was:
At etrailer we provide the best information available about the products we sell. We take the quality of our information seriously so that you can get the right part the first time. Let us know if anything is missing or if you have any questions.



















Kate F.
4/23/2026
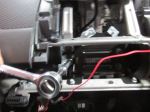
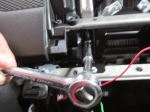
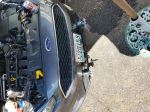
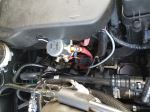
Thank you for the detailed review and for sticking with the install George. That is a tight space to work in, and we really appreciate you sharing both the challenges and your thought process along the way. You make some very valid points about the alignment sensitivity and adjustability of the switch. I agree, that kind of precision fit without an easy lateral adjustment can make the install more tedious than it should be. It does not make it right, and feedback like this is exactly what helps highlight areas for improvement. It is great to hear that it has been working reliably for you over a few thousand miles so far. Your habit of checking function during hookup is a solid practice and definitely the way to go with setups like this. I will be passing your feedback along to the manufacturer for review, especially your notes on the switch design and mounting adjustability. Also, thank you for including photos even with the tight space. They are very helpful for others tackling the same install.