


Trying to pack more without cramming your camper? If you've already got a bumper-mounted cargo carrier, this kit turns it into a lockable, front-loading cargo cage so extra bags or muddy gear can ride outside, covered and out of sight.
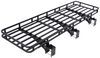
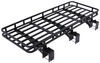
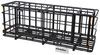
Some gear just doesn't belong in your RV, or maybe you just packed too much and ran out of room. This kit turns your existing 84" bumper-mounted cargo carrier into an enclosed hauler, giving you a lockable cage and a weather-resistant cover so your gear stays protected from road grime, bad weather, and sticky fingers. Extra duffels, camping gear, coolers, even that generator you swore you'd leave behindit all rides secure without eating up your interior space. And because it's front-loading, you won't need to hoist heavy gear overhead or wedge it in through a top lid.
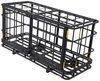
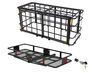
If you're hauling a full load or just a few bulky items, this cage adjusts to fit your needs. The built-in horizontal and vertical bars give you plenty of tie-down points for smaller hauls. Just add straps (sold separately) to keep things from shifting. Need to haul something taller? Use the included hex key to remove the two retaining tabs at the back of the carrier, then lift off the top enclosure to turn it into an open cargo tray. Secure your cargo and you're ready to roll.
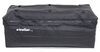
Locking your gear in a cargo cage is smart, but pairing it with the included, weather-resistant cover takes it to the next level. It wraps snug around the cage to shield your load from rain, dust, and road grime, so your sleeping bag doesn't come out smelling like wet asphalt and covered with who knows what. And while the cage keeps everything secure, the cover keeps it out of sight, turning your carrier into a clean, sealed hauler that won't draw attention when you're away from your rig.
 Alternate Instructions
Videos are provided as a guide only. Refer to manufacturer installation instructions and specs for complete information.
Hi Matt with etrailer. Today we're gonna be talking about the etrailer cover with the cage and lock core. This is gonna be a great way to give your stuff extra protection from the elements and security as well. Now, if you need the full kit with the carrier itself as well, you can actually find that here on our webpage. But today we're just gonna be focusing on the cage cover and lock. Now what this is gonna work with since the kit we're talking about today is designed to work with your 84-inch large cargo carriers.
If you have a cargo carrier that size, this is gonna be compatible. Or if you have the etrailer bumper mounted one, it will be compatible too. (zip zipping) So, you notice we have a zipper here, and this is gonna open up, and allow us to access our doors here. You'll notice right now I have two pins in place. What your kit will have is this lock core instead, (metal clicking) and this here will give us security.
So, you'll notice it is threaded. That's the way it works. (metal pin clicking) Here, I put it on this way so you can see a little bit better. So, when you go to put it on, line it up and just twist this and then it will lock in place. Let take this off real quick so we can actually open it up to see what the interior looks like.
(metal clinking) You notice with these doors sometimes they don't wanna grant you full access without getting some resistance. It's kinda coming back at me, and we are a little bit at a slope right now too. But an easy solution to that is just use my hand grab what I need to take it out. So, really it's not gonna block you from anything you really do need. Now, let's say you've got something extra heavy.
A lot of times I'll just use my hip to hold that door in place, (object scraping) reach in here and I can grab what I need. Or if you have a friend by, they can just hold the door open for you 'cause we really just need to open just by a couple inches. And what's really nice about this since we are getting the full coverage is great for protecting it from rain or any type of wet environment. So, today we got a little bit of forecast for rain so I don't have to worry about my generator getting wet or any other sensitive items. And in here you'll notice, like I said earlier, we do have a bottom section. And this is great because when we're driving down the road we don't have to worry about any of that road grind coming up and drenching the bottom of our gear. I actually had the smaller cargo carrier for your hitch-mounted accessories, and I test that with a hose so I was spraying it all over the top, the sides underneath and that held up really well. And this is gonna be the same exact design doing the same thing. So, I have tested it, and it does do a great job at keeping water out of here. And this is gonna be a pretty large carrier. And with this having the cover on top of it, you won't be able to see through it. So, you won't be able to see your license plate or your lights in most cases. So, what we actually have built in here is gonna be a license plate and relocator kit. So, you're notice these zippers, if I undo these, that'll let those relocator kits for your lights and your license plate be visible so you can be safe on the road. Now something to keep in mind is just making sure you get the right one for you 'cause again, this is gonna be for your 84-inch large cage, whether that be the etrailer one or one that is an equivalent size to this. And it's important that you do have the cage as well. 'cause if you don't it's not gonna work. But if you're still unsure if this is gonna be the right fit for you and your carrier, you can just let us know here at etrailer, ask us any questions if you have 'em, or even just leave a comment so we can answer it for you. Now, when it comes to getting this installed, it's a pretty simple process. The biggest thing is making sure you do everything in the right order. You don't miss any of those straps, but we covered that in the video today. So, let's check it out now. So, the place I like to start with for the installation of this, is to start with the bottom piece. This is gonna be much smaller than the top piece, and we wanna make sure it's gonna be in the right orientation. So, you'll notice the inside, it's gonna be this more glossy finish. The outside, it's gonna be this more matte finish, which we've done that. I can start putting it in here just kind of matching it up (material shuffling) to the contours of the cage. We're just gonna make sure this is fully spread out inside of here. (material shuffling) Now that this is kind of roughly in place, we're gonna go underneath now so we can hold this into place. This is gonna be these longer straps. They might be kind of bound up all over the place. What we want to do is make sure we start at the very beginning and wrap around all these railings here, making sure it's relatively not tangled up, reach across. Same thing for the feed ball end. Make sure it's on the very outside, connect them like that. Now you're gonna have a bunch of other straps underneath. So, we're gonna go across and make sure they're all connected. (trailer shaking) (cage rattling) With all those straps underneath secured, we'll come up top, and you're gonna have a bunch of these smaller straps. They're gonna have hook and loops on them. And what I'm gonna do with this is I'm gonna wrap this around the bottom rung here underneath the cage, pass it through. On the other side, you're gonna have this little clip. Make sure it passes right through the center of that, and we'll pass underneath that cage once more. You can see how that's passing through now, and then secure it down. Now, there's gonna be a bunch of these so make sure you just take your time with this and find them all. Let's move over to the top piece, and we wanna make sure when we put this on, it's in the right orientation. So, again, the matte side facing out and we want to make sure that the zipper, you can see the etrailer logo on the front of it too is gonna be on the front side. So, once we've double checked that we can just start putting it on. (material shuffling) And this is gonna be fairly large so it might be kind of difficult you doing it by yourself, but it's definitely still doable. (material scraping) What I'll do typically is just lay it up top (material scraping) and make sure like everything's facing the right direction. And then, (material scraping) we'll just start with one side and get it lined up. (material scraping) Once we get that one side lined up, then we're gonna do the same on the other side. (material scraping) We're just gonna pull it down, little by little on either side. You don't wanna pull it too much on one side 'cause it's gonna get caught and won't wanna pull it down fully. (material scraping) We wanna make sure we're getting to the very top of this so I'm gonna keep going until it feels snug. (material scraping) So, with the cover completely on, what we're gonna do is we're gonna find a couple straps inside of here. I'll show you where they're at. They'll be on this front side. I have already unzipped that opening, so we can see it better. And what I'm gonna do here is we're gonna go on this same rung we did earlier to secure this down. Going through it, back through that clip. There are gonna be just a couple in the very front of it. Make sure you get 'em all secured down. Once we're done with that, we're gonna go underneath. So, you're gonna notice there's a lot of different straps, so we're gonna keep it simple. What we're gonna do is just connect the ones that begin with that are going in this direction. So, we're gonna start from one side. And just go over to the backside and make sure all those straps will pull through. 'Cause sometimes they can get caught up there. We'll reach across, secure these together. Tighten them up just a little bit, not too tight yet. We can adjust it later on. And then just go down that line. (traffic humming) (clip snapping) (strap whirring) (clip snaps) (strap whirring) We're gonna go to the other side. One side should have these extra long straps and there should be two of them. And I'm gonna probably not be length enough to reach all the way across. So, we're just gonna loosen that up a bit, until it does. (strap whirring) With that loosened up now I'm wanna reach over here, and we wanna make sure we're connecting to the correct one. So, if this strap is closer to the front side, make sure you're connected to the other one closer to the front side. (clip snapping) Just like that, and tighten up some. Same thing for the one on the inner side. We have all those traps secured down now, and this is gonna be a good point just to see how the zipper is gonna close on this. If it does, you can tighten things down a little bit more. You don't wanna over tighten these 'cause it'll cause too much strain on where that door is. and it won't zip right. But yeah, that pretty much does it. I think this is gonna be a great kit because like I was saying earlier, not only does it offer you protection just from the elements, but it's gonna give you a little bit more peace of mind knowing that your gear is gonna be nice and secure in here. 'Cause we do have this cage and the lock core at the very top of it. Now, I do wanna recommend that you just make sure that you're getting the right one for your needs. 'cause this is designed for your 84-inch bumper mount cargo carrier. 'cause we do have a 60-inch one out there as well. If you guys have any other questions, let us know here at etrailer. And again, I'm Matt and thanks for watching.
Ratings & Reviews

Info for this part was:
At etrailer we provide the best information available about the products we sell. We take the quality of our information seriously so that you can get the right part the first time. Let us know if anything is missing or if you have any questions.


















Thank you! Your comment has been submitted successfully. You should be able to view your question/comment here within a few days.
Error submitting comment. Please try again momentarily.