


Thank you! Your comment has been submitted successfully. You should be able to view your question/comment here within a few days.
Error submitting comment. Please try again momentarily.


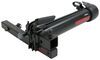
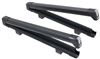
Modular ski carrier swings away with skis loaded for cargo area access. Swap the ski carrier for a bike rack or cargo carrier without removing the base from your vehicle, or add a 2nd tier to carry 2 accessories (all sold separately).
Features:
Specs:
Notes:
This modular ski rack carries 5 pairs of skis or 4 snowboards. It also swings away, while fully loaded, for rear cargo area access. But the EXO system is more than just a swing away ski rack, it's the ultimate gear-carrying rig! You can easily swap the ski carrier for a bike rack or cargo carrier (sold separately) without removing the base unit from your vehicle. You can also add a second level to pair the ski rack with a cargo carrier to haul all your skiing gear, or swap accessories for a biking or camping adventure (all sold separately). Lastly, because you can carry so much gear on the back of your vehicle, it frees up space on your roof to carry even more gear.
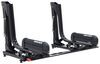
The ski carrier holds 5 pairs of skis or 4 snowboards. It has DoubleJoint hinges that accommodate thick skis and snowboards.
The arms have sturdy yet flexible rubber grips. The rubber lines the top and bottom of the arms and protects your gear from being scratched or scuffed by the carrier.
Push buttons make the arms easy to open, even when wearing heavy winter gloves. Simply push the buttons and raise the arms to load your gear.
The hinged arm on the base lets you swing the unit away from your vehicle. This provides full access to your vehicle's rear cargo area and eliminates the need to remove your skis when you're unloading your vehicle or letting your dog hop in or out of the back.
To open the hinged arm, simply rotate the release knob counterclockwise until it's unscrewed from the arm, pull out on the spring pin, and swing the rack away from the rear of your vehicle. The arm will lock in place when it's fully extended, so your hands are free to open your hatch and remove cargo.
To close the base, just pull the release lever at the hinge and swing the extended arm back into position. Once you hear the spring pin lock into place, rotate the knob clockwise until it's tight.
To install the EXO system, simply slide the shank on the base unit into your 2" hitch receiver, insert the threaded hitch pin, and tighten it down with the included 24-mm wrench. The threaded hitch pin also reduces noise and movement in your hitch.
Dual arms on the base have tracks with cleats and SpeedKnobs that secure EXO accessories. To swap the ski carrier for a different accessory, undo the latches on the sides of the arms, rotate the SpeedKnobs to allow the cleats inside the tracks to free the carrier, and remove it. Next, put the new accessory in the tracks, rotate the SpeedKnobs so the cleats secure it, then close each latch.
This EXO system includes 5 SKS locks to secure the system, the carrier, and your skis. A lock secures the base to your vehicle's hitch receiver and locks in the arms secure the ski carrier. Finally, the ski carrier has 2 locks to secure your skis.
Because the EXO System is modular you can swap out the ski rack for a bike rack, cargo carrier, or accessory. You can also add a second tier and another accessory for whatever adventure you have planned. The various configurations are outlined below.
The DoubleUp 2-bike rack (Y24VR - sold separately) has ratcheting hooks that grab your bikes firmly by the front wheel - not the frame. It's perfect for carrying nearly any bike, including bikes with carbon frames, disc brakes, thru axles, or full suspensions.
The GearLocker enclosed cargo carrier (Y44VR - sold separately) has 10 cu ft of storage space for carrying helmets, clothes, and other gear. It keeps your gear secure, dry, and away from prying eyes. It also has built-in handles, so it's easy for you to tote all your gear to the campsite in a single trip. Collapsible totes with removable dividers (Y64VR - sold separately) keep your gear organized in the carrier.
If you want to carry coolers, luggage, and other larger, bulky gear, you can add the GearWarrior cargo carrier (Y37VR - sold separately). It has a weight capacity of 250 lbs. A wheel kit (Y97VR - sold separately) converts the GearWarrior into a wagon, so you can wheel your gear to the campsite.
To transform the system into a 2-tier carrier you will need the TopShelf (Y94VR - sold separately). It attaches to the base unit and holds 1 accessory. With the base rack swung away, you can swing the TopShelf back 180 degrees, with your accessories and gear still attached. This will provide unfettered access to your gear on the lower level.
For your skiing adventure you can pair the ski carrier with an enclosed cargo carrier or a cargo carrier to transport all your gear to the slopes.
For your biking adventure you can swap the ski rack for a bike rack and add an enclosed cargo carrier or a cargo carrier. On a 2-tier system the bike rack will need to be installed on the top tier to have room to mount your bikes. Using the bike rack on the top level reduces its weight capacity to 40 lbs per bike.
If you just want to carry gear, you can swap the ski rack for a cargo carrier and add a second carrier. You can outfit the system with an enclosed cargo carrier and a cargo carrier, 2 enclosed cargo carriers, or 2 cargo carriers.
Note: The cargo carrier has a weight capacity of 250 lbs when it's installed on the single-tier system. If you install it on a 2-tier system, it can carry 110 lbs on the bottom tier or 80 lbs on the top tier. Similarly, the enclosed cargo carrier's weight capacity changes based on where it's installed. When utilized on the bottom tier, either alone or in a two-tier system, its weight capacity is 100 lbs. Installed on the top tier, it's weight capacity is 80 lbs.
The BackDeck camping table (Y84VR - sold separately) is perfect for use at the campsite. It lets you prep meals, lay out your gear, and even mix drinks at the end of the day. Simply remove the top accessory and replace it with the table once you get to the campsite.
 Alternate Instructions
Videos are provided as a guide only. Refer to manufacturer installation instructions and specs for complete information.
Hi, everyone it's Evangeline here at etrailer.com. And today we are looking at our Yakima EXO SwingBase system with the snowbank ski and snowboard carrier. Now, if you're interested in the EXO system which allows you to build up and out with different accessories but you've really into skiing or snowboarding this kit is a great way to start because you get the swing base with the ski and snowboard carrier and then you can build up from there. The maximum length of ski you can fit on this is 185 cm which is around a little bit over 72 inches. Also note how we clamped it down on the skis binding. So, just keep that in mind, in terms of your bindings.
If you notice here, I have prefix bindings on my ski so I wasn't able to load them up and down. You can see here even with the double joint hinge at the end I can't bring it to a close. So just keeping that in mind with your bindings. So my measurement here from the bottom of my skis it's half of my bindings it's an inch and three quarters. Now with this depend on where you are placing it for when you mount it so if you do find your bindings or those too thick you can still mount them side by side.
As for the crossbar spread, which is a business from one point to the others from center to center, we have 21 any half inches. Now for the dimensions of our snowbank here itself for length, from one end to right where that button is, it is 32 and a half inches. I do like how our skis and snowboards are mounted here because it's super quick and easy to just open that button and grab my skis for when I want it to go. But the downside of it in this position on our swing base is that it is lower to the ground. So that means as you are driving be mindful that there may be snow and possibly dirt kicked up towards your equipment.
At the end, you do have that big button. And one thing to note is that you can use this with your thick gloves. You just press that and it pops up and stays into place. It also has this ratcheting here at the bottom just to help you secure your skis of different heights. With a swing base kit, which is our base right over here, you have the option to swing this away.
And to do so, you have this knob right here at the end that you need to loosen. So just rotate that until it releases the base. Once that is loosened, you can then pull this lever and push out until it swings all the way out and locks into place at that end. When you have your whole crew with you, your whole family with you, having an option to swing it out is awesome because then someone can be taking off the skis while the others access the hatch and maybe grab all your bags, your coats, your gear all in one quick and easy process, without having to take your rack off. To swing it back you need to unlock this knob by just lifting it up. Hold on to the support handle as you ride it up that ramp, that lever pops into place and then you rotate that knob to tighten it down again. To install this kit, you first need to start with your swing base. So, once you have that installed into your hitch and tighten down, you then start by releasing these arms. So pull on that lever, start with the left arm and just push that out and it snaps into place. Then go over to the passenger's side arm, pull that lever, swing it out and it snaps into place. Make sure your tab is in the open position and just rotate your knob counter-clockwise to open up those tracks. Once your tracks are available make sure you have the carrier with the button facing out and just pop those in there. Just like that. And then tighten it down. When it fully tightened down, you can then pop this tab into there and that will lock it into place. Once you've done the same on the other side, you can then use the key to lock the knob and that will cause it to freeze spin once it's locked and then your whole system is complete. With your snowbank installed, let's throw some skis and snowboards in there. At the end you have a double joint. So not only does it swing upwards, but if you have six skis we have another joint to give you a little extra space to accommodate those larger snowboards for skis. On the inside, you have this nice, big rubber lining that will support your skis and snowboards and will be flexible enough to accommodate them as you lock them into place. Now it's the way it looks like loaded up. We have two sets of skis and two snowboards. It's really up to you with the size of skis and the size of bindings you have on your skis for what you can fit in here but you should be able to fit five pairs of skis or four pairs of snowboards. My final thoughts about this whole system is I love how the swing base allows me to swing this out and gives me plenty of space to work with to take off my skis, grab my gear. It's a nice, simple, easy process. I do highly recommend picking up the other accessories though just to make sure you use it to its full effect but it does have nice features like that hinge and that big button, as well as, the space to work with. So, if you are really into snow sports I think adding this to your repertoire is a pretty good idea..
Ratings & Reviews


Do you have a question about this Modular Hitch Rack?
Info for this part was:
At etrailer we provide the best information available about the products we sell. We take the quality of our information seriously so that you can get the right part the first time. Let us know if anything is missing or if you have any questions.























Justin
9/23/2023
I still have a need for this rack and enjoy using it as well. My biggest problem with this rack is the bike rack on the top tier leaves the bikes sitting high on the back of my ‘06 E-350 van which is too too heavy and like a to rock back and forth when hitting a bump or pot hole. When both tires hit a bump simultaneously the rack handles it just fine. When one tire hits a bump or a pothole it can send the rack whipping side to side. Once I had not tucked the J-hook tensioner up close to the fork and the bike did come half out of the rack but it did not fall to the ground. I have since seen the racks now with an expanding hitch receiver end that locks the rack in position and greatly reduces the sway in the rack. For the price others and I paid on This rack I hope they use that to incorporate a “hitch cam system” to reduce the extreme swing the rack can have when driving roads with potholes and bumps. Even entering a parking lot can mean slowwww down. Also my rack has been hit twice by others in parking lots. Lost the license plate light but was able to just barely wire it and tape it back in place. The gear box has been backed into as well and left a good size crack in the box. And just a couple weeks ago I had failed to remove a small couple bags of trash from a camping trip and a Black Bear tore into the cracked corner of the box and had a snack on the expense of my gear box once again. My tip here to you would be to find a good parking spot where you can over hang the rack system where a vehicle can’t run into it. I suppose the fact it’s black doesn’t help others, to see it easily anyway, in a night time scenario. Don’t forget to grease the swing away large locking wing bolt. Mine is starting to get rusty and a little harder to screw in and out. I wish there was some other tensioning system other then a big bolt. Maybe a hinged latch of sorts. I like the rack but at this high price I am keeping my eye out for whoever makes the next best thing. It wouldn’t be too hard to engineer this rack a little better.