
# 1
WeatherTech Mud Flaps - Easy-Install, No-Drill, Digital Fit - Front and Rear Set
Just finished installing both sets of mudflaps. Took me 20 to 30 minutes in 25 degree weather. Very impressed with the Fit and ease of the installation.. Thank You for a fair priced quality product, that install's just like the instructions said they would... I would HIGHLY recommend these. Dan Yankton SD
Great product. Installation was very easy and the instructions were accurate. I wish that the rear flaps were longer as I often pull a boat and want some greater protection from stones being thrown off the tires.
# 2
Rock Tamers Heavy-Duty, Adjustable Mud Flap System for 2" Hitches - Matte Black
Easy to install and remove.
I recently added a 6-inch lift and larger tires to my truck. The tires stick out approximately one inch outside of the wheel well. This immediately increased the amount of rocks I was slinging every time I pulled out of my 400-yard-long gravel driveway. We bought a travel trailer and the last thing I wanted to do was sling rocks at it non-stop or take the chance of busting a window. We all know how high the RV tech labor rates are. I opted for this product to prevent a more expensive issue down the road. The pros: They work as you'd expect them to. They are adjustable, both in height and width. You can shorten the actual flaps by cutting them and a hole punch is provided to create new bolt holes. They are easily removed when not in use. The cons: Whoever wrote the directions may have been half asleep. In one step they'd say do something one way, then the next step another way. Super confusing but most of us can figure out how to install them. The flaps are not attractive to the eye but they get the job done. They are overpriced but I convinced myself to purchase them by knowing if it saves one puncture to the front hull of my camper or one busted window, they've paid for themselves. I'd buy them again, even though I'd still mumble under my breath how much they are overpriced.
# 3
WeatherTech Mud Flaps - Easy-Install, No-Drill, Digital Fit - Front and Rear Set
Yes, the mud guards were delivered about 4:00PM today. At 6:00 I was done with the installation, cleaning up and putting tools away. The fronts installed just like the instructions with all the holes lining up perfectly with the inner fender holes and stock fasteners. The flares on my truck are not OEM but aftermarket "OEM Style" so I was apprehensive about the fit. But the flaps fit perfectly. With the rears I had to get a little creative. My truck is a stepside which doesn't come with flares as factory equipment. I guess the Flare manufacturer paid attention when he engineered them because the flaps fit the profile exactly. I used the mounting slots on the flaps to attach them to the wheel well. They look great on there too!

Arrived quickly and fit perfect. Weather Tech is the real deal.
# 4
WeatherTech Mud Flaps - Easy-Install, No-Drill, Digital Fit - Front Pair
# 5
Husky Liners Custom Molded Mud Flaps - Rear Pair
Seond set purchased this year, good quality, design works well with dirt and avoiding rock chips.
# 6
WeatherTech Mud Flaps - Easy-Install, No-Drill, Digital Fit - Rear Pair
Do not know why I waited so long to get these. Less than 5 minutes to install once I opened the box. Fit and finish is great
Nice fit and easy install.
# 7
Rock Tamers Heavy-Duty, Adjustable Mud Flap System for 2-1/2" Hitches - Matte Black
Simple to put together. Arrived quickly. They have accessories that you can add. Bought them to use on our Alaska trip.
These, Rock Tamers perform as advertised! We were looking for some type of defectors when on dirt roads and when hauling our Fifth-wheel. The installation is easy and allows us to change the angle and length as needed. Great purchase and owning them a year has shown how much additional piece of mind having them, has been.
# 8
RoadMaster RoadWing Removable Mud Flap System for Full Size Trucks - 77" Wide
The product did what I wanted it to do. It kept stones and debris from hitting the camper. However, when you cut the flap to a height that is compatible to a good running height ( 4" above the road) the flap drags going in and out of parking lots. On one trip it drug so often the flap had a tear at the mounting bracket. I sent an email asking if I could purchase just the flap but I got no response. So I improvised and put another metal bracket joining both sections of the flap.
Very easy to install and looks great. I shimmed my receiver hitch to ensure it did not wobbel. Protects my fifth wheel from gravel and road debris.
# 9
WeatherTech Mud Flaps - Easy-Install, No-Drill, Digital Fit - Rear Pair
Great product and fit like glove. Thnks for great product.
Perfect fit. Looks great. Super east to install without drilling new holes.
# 10
WeatherTech Mud Flaps - Easy-Install, No-Drill, Digital Fit - Front and Rear Set
2001 GMC YukonFantastic product. Very easy installation. High quality. Very fast delivery! Etrailer is the best as always!
Very pleased with our order. The first one wasn't right, but you were so helpful, happy , and made it very easy to return it and help me find the right one for our need. Refund was quick. We're very happy with this company and will use it again.
# 11
WeatherTech Mud Flaps - Easy-Install, No-Drill, Digital Fit - Rear Pair
Really nice product ! So easy to install and look perfect on my truck ! Delivered sooner that i was expected . Good quality !! Thanks etrailer , will recomand this product to anybody .
Easy to install and fit perfectly. I recommend this product.
# 12
WeatherTech Mud Flaps - Easy-Install, No-Drill, Digital Fit - Rear Pair
# 13
WeatherTech Mud Flaps - Easy-Install, No-Drill, Digital Fit - Front Pair
This is a great product just as described. Ordering was a breeze and shipping was extremely fast! Thanks for everything!
# 14
WeatherTech Mud Flaps - Easy-Install, No-Drill, Digital Fit - Front Pair
# 15
WeatherTech Mud Flaps - Easy-Install, No-Drill, Digital Fit - Front and Rear Set
Easy to install great product
Wow, first what GREAT service from Heather at etrailer, outstanding!! Excellent product from Weather Tech! Easy to install looks great!! Thanks Heather! Don
# 16
WeatherTech Mud Flaps - Easy-Install, No-Drill, Digital Fit - Front and Rear Set
Always spot on.
For someone who is "old school" and reluctant to install plastic onto a machine, I'm impressed with the ease of installation and durability so far. I've put about 7500 miles on them without an issue. And thanks to Etrailer for carrying great products and providing great info to consumers. You folks have a great Business model!
# 17
WeatherTech Mud Flaps - Easy-Install, No-Drill, Digital Fit - Front and Rear Set
# 18
WeatherTech Mud Flaps - Easy-Install, No-Drill, Digital Fit - Front and Rear Set
Awesome product!!! I would recommend them to anyone looking to purchase mud flaps. etrailer is fantastic as well. There customer follow up is excellent
# 19
WeatherTech Mud Flaps - Easy-Install, No-Drill, Digital Fit - Front Pair
Installation was a snap and their mounting system is a really ingenious idea. I replaced my factory rigid front flaps as they routinly get ripped off going off-road. I run 285 tires so I had to dremel down the inside edge to clear the tire. These should hold up better than OEM. Quick shipping and great service from etrailer.com
I have 245 75 19.5 tires on my 07 f550. They touch severely on the inside of mud flaps. I also had to drill 2 simple holes. The quality looks good though
# 20
WeatherTech Mud Flaps - Easy-Install, No-Drill, Digital Fit - Rear Pair
Installed the dually mudflaps in 10 minutes, perfect fit and easy to install with basic hand tools.. Excellent product !!
Fit extremely well and super easy to install
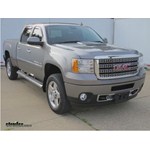
Setting up the WeatherTech Mud Flaps on your 2013 GMC Sierra

Alright, today on this 2013 GMC Sierra, we're going to install part number WT110011-120011. This is the front rear mudflaps from Weathertec. To start off our install, it's always a good idea to make sure the paint around the fender well is completely clean. That way, when we install the mud flaps, there won't be any dirt and debris caught inside to mess up the paint. Now, these mud flaps are very easy to install. We're going to start with the back of the truck, first. We'll work with the passenger side.
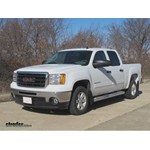
2013 GMC Sierra Husky Liners Custom Molded Mud Flaps: Complete Installation
Today on our 2013 GMC Sierra, we'll be installing the Husky Custom Modeled Rear Flaps, part number HL57801. To begin our install we'll go ahead and put the mud flap in position and then mark it with our pencil. This will mark the top of the decal that will be the protective film between the mud flap and the paint. Now we'll go ahead and set the mud flap down, use our spray solution and then install the decal starting just above our marked point working our way down. Once in place, we'll then take a squeegee and push out any excess solution from underneath the decal. Now we'll go ahead and wait for everything to dry and for the decal set up. Now with the decal set up we're ready to install the mud flap. We'll go ahead and put in place and using the pre-drilled holes in the mud flap as a template, drill out our four attachment points.
Husky Front Mud Flap Installation - 2013 GMC Sierra

Today on our 2013 GMC Sierra we'll be installing the Husky custom molded mud flaps for the front wheels, part number HL56801. Note: in order to access the mud flap easily, we're going to go ahead and turn the wheels all the way out, for easier access. To begin our install, we'll first need to remove three of the manufacturer's fasteners. Starting at the lower inner most fastener working our way up, we'll remove the two push pin fasteners and one screw. We'll set these aside as they will not be re-installed. Then we'll pull back on the wheel well liner, exposing the metal lip underneath where the fasteners just went through. Again starting at the bottom inner fastener we'll install two metal clips where a push pin fasteners were. Quick note: you'll want to make sure the paint is very clean and dirt free as the decal will lay over any dirt that's left on the paint. Once we have the metal clips installed, we're ready to go ahead and test fit our mud flap. We'll set the mud flap into position then using a pencil we're going to mark the top of the mudflap. This will allow us to line up and install the protective liner to protect the paint from the mud flap wearing over time. Now with our mark made we're ready to go ahead and apply the application solution.
Step-By-Step Installation Tutorial for the Husky Liners Custom Molded Mud Flaps on a 2012 GMC Sierra
Today on this 2012 GMC Sierra, were going to install part number HL57801. This is a rear mud guard set. Our first step involves cleaning the body work of the truck and inaudible to install the protective film on the back edge of the inaudible. However, in this case the truck has already a protective film installed on it so were going to skip that step. This is where the protective film prom the factory is and our mud flap will be stopping just right here. So well go ahead and hold our mud flap up.
Husky Front Mud Flap Installation - 2012 GMC Sierra

Today on this 2012 GMC Sierra, were going to install part number HL56801 from Husky Liners. These are front mud inaudible. Our first step is to install the inaudible protection film. This is installed it along the edge right here. Well clean off the body work area based on the solution of 1 pint water with four drops of liquid dish washing detergent. Take the film, peel it loose back a little bit, and keep everything wet.


What our customers are saying:
"The people answering the phones were professional & knowledgeable. All this and the best prices on the internet, How can you go wrong?"