Most Popular Concealed Cross Tube for 2014 Subaru Outback Wagon
change vehicle# 1
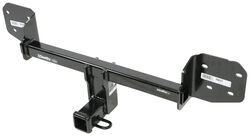
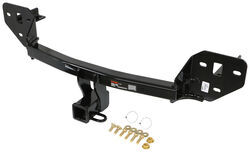
Draw-Tite Max-Frame Trailer Hitch Receiver - Custom Fit - Class III - 2"
- view all Trailer Hitch
- Custom Fit Hitch
- Class III
- 600 lbs TW
- 4000 lbs GTW
- 2 Inch Hitch
- Concealed Cross Tube
- Draw-Tite
More Information >
I had my mechanic install (2015 outback) so I can’t speak to that but it looks good and towed a 2K trailer so I’m a happy customer
As always I am very happy with the prompt service and shipping as well the quality of the product. My only disappointment is, I chose this Draw Tite hitch because it had the extra hole for the J-Pin (anti rattle device). Mine did not come with it. That was a let down

# 2
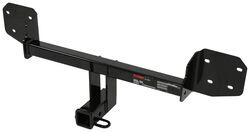
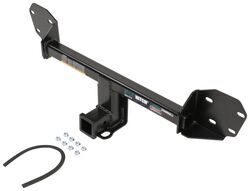
Curt Trailer Hitch Receiver - Custom Fit - Class III - 2"
- view all Trailer Hitch
- Custom Fit Hitch
- Class III
- 600 lbs TW
- 4000 lbs GTW
- 2 Inch Hitch
- Concealed Cross Tube
- CURT
More Information >
The hitch arrived via UPS yesterday, Oct.17,2024. The box had a gouge in the cardboard, but the hitch was not damaged. I have not begun to install it. In fact we had snow today and I will be working outside when I perform the installation. At this point having taken the hitch out of the box I can only say that it looks good in its shiny black coating and it appears to fit the bolt pattern on the rear bumper mounts of my Outback.
The hitch is awesome and bolted up perfectly to my 2014 Outback. Took me 3 hours to install it solo. The second video on the product page is very helpful. I watched it about 5 times before starting. I also recommend buying a bag of new push fasteners in advance of starting the installation. The cut out in the bumper cover to clear the hitch ended up being 3 5/8" wide x 5 1/4" deep, and dead center on the center mounting tab hole. That less than 1/4" gap all around. Check the fit over the receiver and the bottom push fasteners before completely re-installing the bumper cover. Awesome product!


# 3
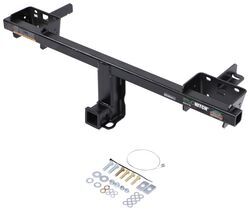
Curt Trailer Hitch Receiver - Custom Fit - Class III - 2"
- view all Trailer Hitch
- Custom Fit Hitch
- Class III
- 350 lbs TW
- 3500 lbs GTW
- 2 Inch Hitch
- Concealed Cross Tube
- CURT
More Information >
Installed easily and took just under 2 hours to install. Will say video is very helpful but it does leave out the hardest to reach bolt which is the one next to the exhaust, need to hold it to the side while tightening the bolt.


This hitch is solid. Installation couldn't be easier, with the help of etrailer videos, that are top notch. This thing took probably 90min to install, including setting up all my tools, installation, cleaning up, all while pounding beers between steps.
# 4
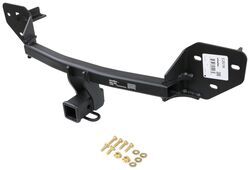
EcoHitch Hidden Trailer Hitch Receiver - Custom Fit - Class III - 2"
- view all Trailer Hitch
- Custom Fit Hitch
- Class III
- 525 lbs TW
- 3500 lbs GTW
- 2 Inch Hitch
- Concealed Cross Tube
- EcoHitch
More Information >
Great instructions and product delivery arrived fast, and unscathed. Install was straightforward and measurements to cut fascia on the bumper worked well.
 Subaru Outback Wagon
Fit my Outback pefect, well hidden. I only use it for bike rack. Would definitely endorse for others
# 5
EcoHitch Hidden Trailer Hitch Receiver - Custom Fit - Class III - 2"
- view all Trailer Hitch
- Custom Fit Hitch
- Class III
- 300 lbs TW
- 3500 lbs GTW
- 2 Inch Hitch
- Concealed Cross Tube
- EcoHitch
More Information >
Just finished installing this a few moment ago and I have to say that it really looks good on our 2014 Outback 3.6R. The low profile of the receiver barely extends beyond the line of the mufflers. I dont think it will be as much of a consideration when backing into a parking stall as other systems that I have seen. There were minor issues that I ran into with the install, so it took me about 3 hours to get this mounted at home with no extra help. I also decided to do the bumper removal method. I felt comfortable removing the trim, and it had the added bonus of giving me more room to work. If you dont have an extra set of hands to help align the hitch to the bolts, you can use a ratchet strap thrown around the hinges for the rear hatch. Hook into the loops where you normally place your trailer chains and take up the weight of the hitch. This will allow just enough support so you can have both hands to start aligning the bolts to the hitch. Lastly, I decided to torque everything down and suspended the muffler before I reattached the bumper bar and trim. The part that was the most difficult for me was getting the dual exhaust remounted onto the rubber bungs. I ended up having to grind off about 3/4-1 inch of the rearmost post on the muffler to get it back into the bung hole. I look forward to pulling a trailer and seeing how everything holds up down the road.

 2011 Subaru Outback Wagon
Great product! We have used this hitch for several road trips and it has been very useful. I was looking for a 2" hitch for our 2011 Subaru Outback that was hidden well and this did the trick. I would normally install my own hitch, but this time I had a shop do it because the amount of modification justified using a proper lift to do it right.
# 6
EcoHitch Hidden Trailer Hitch Receiver - Custom Fit - Class III - 2"
- view all Trailer Hitch
- Custom Fit Hitch
- Class III
- 525 lbs TW
- 3500 lbs GTW
- 2 Inch Hitch
- Concealed Cross Tube
- EcoHitch
More Information >
Follow the installation video and you can't hardly go wrong with this receiver hitch. It was intimidating but very straightforward installation. Very happy with the final product, I just wish it would have been packed better. A little bubble wrap around the sharp edges would go a long way.
Easy instal, looks great!
# 7
etrailer Trailer Hitch Receiver - Custom Fit - Matte Black Finish - Class III - 2"
- view all Trailer Hitch
- Custom Fit Hitch
- Class III
- 350 lbs TW
- 3500 lbs GTW
- 2 Inch Hitch
- Concealed Cross Tube
- etrailer
More Information >
This thing is heavy duty! Following the videos to remove the rear bumper facia made this a quick and simple install. I have a Subaru Outback Wilderness edition - so it has two exhausts, and although installing the bolt on each side with the fishwire was easily done; it was a bit challenging to torque the corresponding nuts which required a deep socket (and required some manipulation of the mufflers to try to get a straight path for proper torque). Other than that - it was a smooth and straightforward install. I love the fact that this hitch is hidden, only a small (and unseen) section needs to be cut out of the facia (unlike the factory hitch), and the receiver alone barely sticks below the facia (which maintains maximum ground clearance). I even designed and 3-D printed a TPU cover with the Subaru logo to finish it off (Goto MakerWorld - 2 inch Subaru Hitch Receiver Cover)


Perfection!! Super high quality powder coat. Simple installation and no BS, just the stuff you need. So glad I went with this instead of OEM. Fantastic value for the money


# 8
etrailer Trailer Hitch Receiver - Custom Fit - Matte Black Finish - Class III - 2"
- view all Trailer Hitch
- Custom Fit Hitch
- Class III
- 600 lbs TW
- 4000 lbs GTW
- 2 Inch Hitch
- Concealed Cross Tube
- etrailer
More Information >
Installation went very well on my 2014 Outback! Only thing I would mention is that the cutout for the hitch is dead center on the bumper, which other reviewers have mentioned as well. A 4" wide by 6" deep cutout did the trick for me.
Perfect fit for the Subaru Outback 2013. The instructions are a bit sparse, but this is the same as the Curt Hitch:so all the videos there work for this as well! Quick tips: 1) The cut out in the fascia needs to be much deeper than 4.5". We had to unfit and fit the bumper 5 times trying to get it as close as possible - something close to 6". Furthermore, the instructions say it should be off center the center push pin tab, but in fact, it should be dead center! 2) You will need deep sockets (along with socket extension) to get to the bolts on the back. The bolts stick out quite a bit so it's not possible with normal sockets. We couldn't find a 14mm, so we opted for a 9/16th inch instead and that worked like a charm! 3) Plastic trim pry/removal tool is most essential. Have not used the hitch yet, will post a review when I use it the first time. Installed on a 2013 Subaru Outback


# 9
Draw-Tite Max-Frame Trailer Hitch Receiver - Custom Fit - Class III - 2"
- view all Trailer Hitch
- Custom Fit Hitch
- Class III
- 750 lbs TW
- 5000 lbs GTW
- 8000 lbs WD GTW
- 2 Inch Hitch
- 800 lbs WD TW
- Concealed Cross Tube
- Draw-Tite
More Information >
Well made, well finished and heavy duty product! If you are even halfway handy, you can install this yourself. Like anything, fitting is exact.


# 10
Draw-Tite Max-Frame Trailer Hitch Receiver - Custom Fit - Class III - 2"
- view all Trailer Hitch
- Custom Fit Hitch
- Class III
- 525 lbs TW
- 3500 lbs GTW
- 2 Inch Hitch
- Concealed Cross Tube
- Draw-Tite
More Information >
This fits perfectly on 2023 Subaru Outback Touring XT. I have been buying hitch receivers from etrailers for years and never had any problems. These guys are fast to respond when I needed help or had questions. I had no problem to return a piece cause it didn’t arrive on time for a full refund.

Exactly what it was shown









What our customers are saying:
"That was the best service that one could expect. Thanx so much...hitch went on perfect...thanx again, Randy"