


To see if this custom-fit item will work for you please tell us what vehicle you'll use it with.


Thank you! Your comment has been submitted successfully. You should be able to view your question/comment here within a few days.
Error submitting comment. Please try again momentarily.

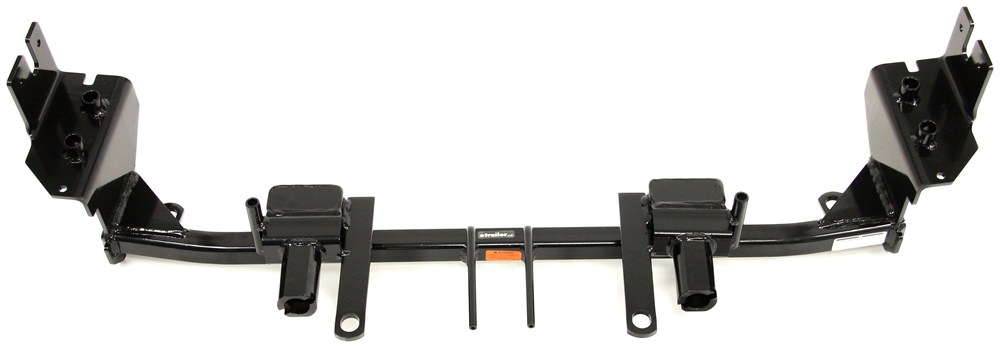


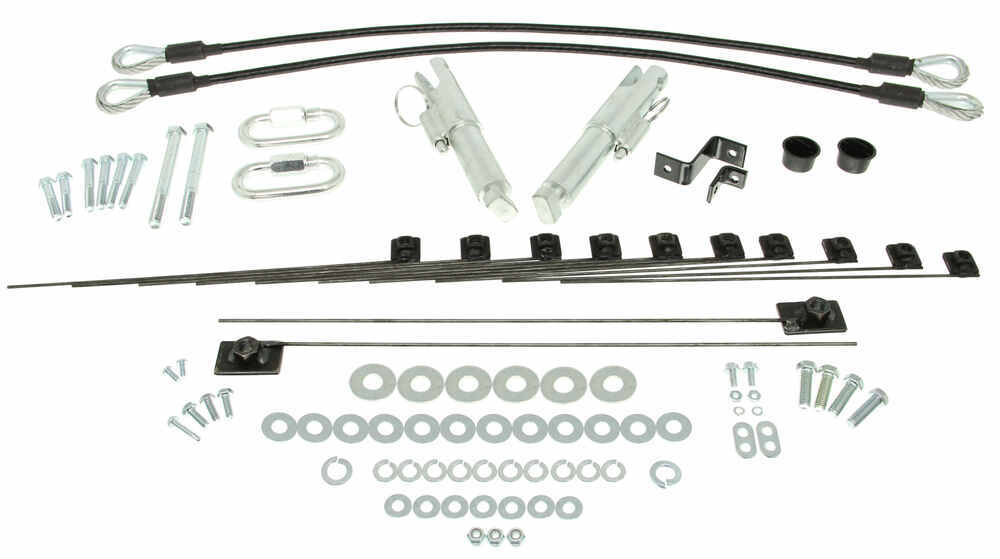
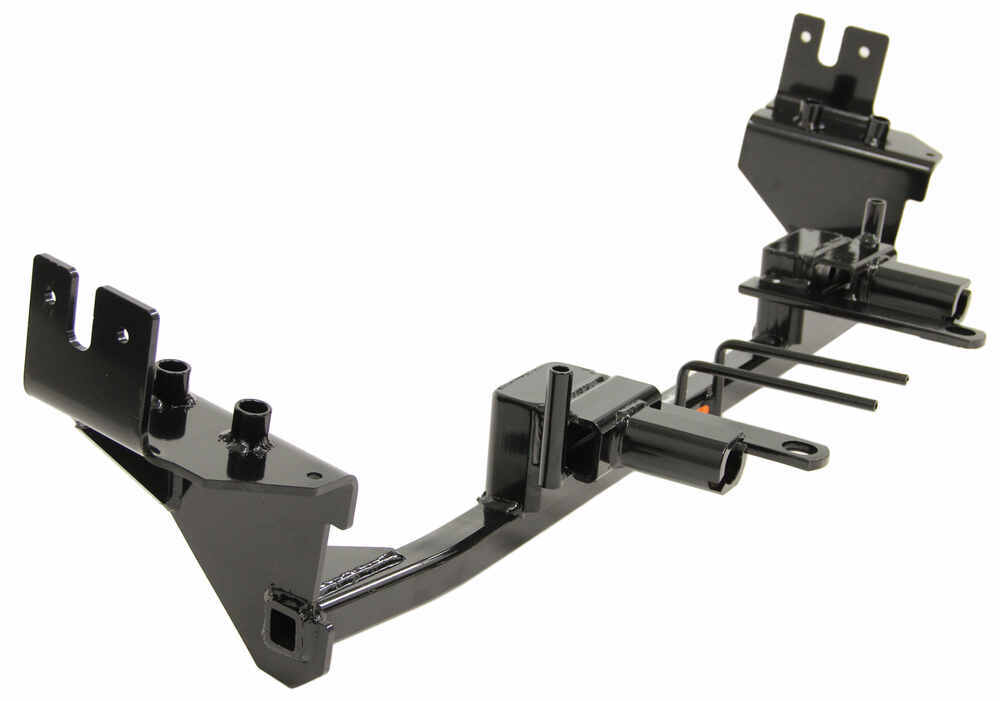



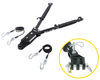
If you like to keep your rig looking stock when it’s not hooked up, this base plate makes that easy. The hidden design keeps brackets from sticking past the front end, and the removable arms leave things looking clean once they’re off. Receiver covers plug into the openings to keep dirt and debris out and give it a finished look until the next trip.

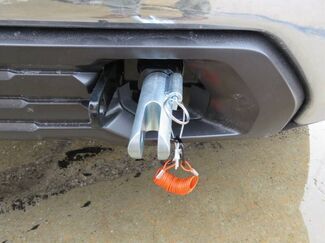
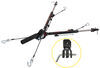
Getting ready to roll doesn’t take long with the twist-lock connection. Each arm slides into the receiver, rotates to lock, and pins in place. When you’re done towing, just pull the pin, twist, and remove. It’s quick, solid, and easy to do solo.

This setup bolts directly to the chassis—no welding required. The durable steel construction is powder coated to resist rust and corrosion, while the sturdy design spreads towing forces evenly across the frame to help prevent stress on suspension components. The bracket distance is 20" with a height of 15", giving you a clear reference for tow bar alignment.
If you already have a tow bar you like, this base plate is ready for it. The sturdy lugs pair directly with Blue Ox tow bars for a secure connection. It’s also adaptable for Roadmaster tow bars with adapter RM-031 or RM-031-5 (sold separately) and for Demco tow bars with adapter DM9523041 (sold separately). Integrated mounting points make it easy to add an electrical connector plug bracket if needed.
For folks who prefer tackling the job themselves, this kit keeps it straightforward. The base plate bolts securely to your vehicle’s chassis using the included hardware—no welding required. Once mounted up, you’ve got a clean, heavy-duty setup ready for long hauls behind your motorhome.


Videos are provided as a guide only. Refer to manufacturer installation instructions and specs for complete information.
Hi, I'm Daniel with etrailer, and today we're going to take a look at and I'm going to show you how to install the Blue Ox baseplate kit for our 2019 Ford Flex. When setting up a flat tow, there are five main components you'll have to keep in mind. We have your base plate, your tow bar, your safety cables, a braking system, and your diode wiring. Something else you may need is going to be a stoplight switch kit. Because that battery's going to be disconnected, you can't tap into that factory stoplight switch wire, so you'll need this kit on some braking systems like the Stay-IN-Play Duo. But in this video, we are going to be focusing on the baseplate kit, and that's just a kit that's going to attach directly to your vehicle's frame, and it gives you attachment points for your tow bar, which is your in between, between the motor home and your vehicle.
And right off the bat, I really like this base plate. I like that it gives you attachment points for all of your components, like your safety cables here on these loops, as well as an attachment point for your six pole plug on the front. And it also gives you a bracket that you can put your breakaway switch on, which is really nice because a lot of other kits, they kind of leave you to your own devices, you have to make custom bracketry to get everything to fit. But with this one, they give you instructions on how to put everything together. And taking this off is super simple, so when you arrive to that campsite, you don't have to struggle with anything.
Take those safety cables off and to take your tow bar off, just get this pin out of there. Have that go back. And I will mention that your attachment point, that's going to be compatible with your Blue Ox tow bars as well as your Curt. So if you're starting from zero, I'd recommend getting something that works with it. But if you already have a different tow bar, like maybe a Roadmaster, we do offer adapters that will make this setup work.
And to take these arms off, it's really simple, you just pull this pin, give it a turn, and these will pop right out. So then when you're ready to take your vehicle out, you can pop these out, store them in your vehicle or your motor home, and drive to the grocery store or wherever you need. Now I'm going to give you a measurement from the ground to the center of our base plate. And for us, it's going to be about 14 and a half. Yours might be slightly different but that's going to help you determine if you need a high low adapter.
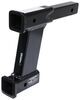
So for us, we just measured from the ground to the center of our hitch, and we got about 26. So we ended up having to have a 10 inch drop in this adapter. So just take the difference and figure out what you need. You want to be within plus or minus three inches, so you want your tow bar to be as level as possible. Now, if you have any further questions about base plates for your vehicle or any other flat tow component, we know it can be a lot, so please feel free to reach out and be happy to point in the right direction. Now, as far as getting this installed, it is fairly in depth. You are having to take off your entire front fascia and drill 12 holes in your frame. So if that's not something you're interested in doing yourself, you can check out our installer locator and we can find an installer local to you to get this or whatever else you need installed. But if you want to do it yourself, follow along, and in this video, we'll walk you through the process. Starting off, I got our hood open. I have a 10 millimeter socket. I'm going to be removing two bolts (power tool sound) on both sides here and a little closer to the center, it's going to be these push pin style fasteners. Use a Phillips to get that center section up. And we'll use a trim panel tool and take it out. We have to take this chrome trim piece off. And the best way I found to do this is to get a trim panel tool with a 90 degree bend in it. I looped it in the back and I gave it a twist. And that got us to pop this out. And just work at it, make sure you don't break anything. I'm going to work my way down. I'm going to keep doing that until I get this off. These are really tight in here, so I actually did use some soapy water to help this come out a little bit easier. But I kept working my way, getting all those disengaged. Eventually I was able to pop this off. With that piece off, now we can get to our fasteners. (power tool sound) Just using a 10 millimeter socket. (power tool sound) We can remove this section of the grill. So I'll pull back. And there's going to be some yellow push pins. I'll get a trim pull tool back here so I can disengage that. And we can set this to the side. Once we took that center section off of our fascia, there's going to be two more fasteners. I'm going to use that Phillips head. Get that center section popped up. Over on our wheel wells, it's going to be another plastic push pin. I'll get that center section out and I can get the whole thing out. And if that center section falls out, no big deal, we can pop that back in. It's going to be three screws we're going to take out that's holding in our wheel well liner. I'm going to be using a 5.5 millimeter socket. And as you can see, I did turn the tire all the way to the left to give me some more room to work. (power tool sound) Underneath the vehicle, there's going to be three more fasteners. Use a flathead. Pop that center section out. Now we can get our fascia removed. I got Scott over there giving me a hand. We're going to start over by our wheel, pull back on the fascia, metal unclip. Start working my way around. And don't pull it out too far because there is some electrical connections we'll have to remove. So on the bottom here, there's a plug. There's going to be a tab that we'll push in. I'll get that pulled out. We'll do that on the other side. And we can set this to the side. On our driver's side, we're going to be removing the horn. So I'm going to take a 10 millimeter. (power tool sound) There's just one bolt. And I can let these hang for now. In our passenger side, we're going to be removing the washer fluid reservoir. Still using a 10 millimeter, (power tool sound) there's going to be two fasteners on top. And then one on the back side. (power tool sound) With those removed, I'll get this pulled off. And this will come down. And I can unplug these lines to make it a little easier on us. These unplugged by pushing in on the tab, pulling straight back. Attach down here. So I'll get this pulled off as well. So we didn't have to take these lines off and plug them so they don't drip. I just got this zip tied to the frame out of the way. On our passenger side, there's going to be a temperature sensor. Get this taken off. And we're going to be removing this top block and getting this put back up. Now we need to trim our plastic shroud and you need to determine if you have active shutters or not. We do not have any shutters, so we're going to be cutting off this shroud from the bottom of our bumper. We're going to use an oscillator tool. (power tool sound) I got that pulled off. There is a push pin right here and I'll just get this removed. We'll do that to the other side, just make sure you're not cutting in anything. The radiator hose is pretty close. (power tool sound) On our driver's side only, there's a welded nut on the inside of our bumper. We're going to need to get this off for clearance. I'm going to use a flathead and a hammer and get this broken loose. (hammering) I did have to hit this pretty hard, but I just repeatedly hit it until that weld snapped off and that bolt came out. Now we can get our base plate lifted up. I got Scott again. He'll help me lift it up. We did have to fight this quite a bit to get this in. I used a mallet. I did have to hammer this in quite a bit and use some C clamps to secure it. Now, it is very tight and it needs to go up still, so I'm just going to use a floor jack and get this up where it needs to be. Our base plate still wouldn't fully sit up against our frame. As you can see, it's a bit of an angle here. So I'm going to drill out the two holes on each side that are closest to the rear of the vehicle with a 13 32nd drill bit. And then I'll get the nuts put on and that should suck it up to our frame. (power tool sound) And any of the holes I drill into the frame, I do like to cover up with some spray paint. This will just prevent rust in the future. We can take our three-eighths bolts that are two and a half inches long. I'm going to get a lock washer. Put that on. And then all the hardware, we're going to be putting some red Loctite on here. Now I can get these put up through those holes I just drilled. I'll take the weld nut that comes in our kit. I'll get this slid through the hole in the frame. You may need to bend this a bit, make it a little easier. Get that put over our bolt and get this threaded on. With all four of our bolts and nuts secured, we can get this tightened up. I'm using a nine 16th socket. (power tool sound) If everything's snugged up, I can torque these down to the specs and instructions. There's going to be a table in the front and it'll tell you the bolt size, the grade, and then what you can torque those down to. And if you don't have a torque wrench at home, you can usually rent one from a local auto parts store. With those torqued down, I can move up to the side and these two holes in our base plate, we'll drill with that same drill bit. (power tool sound) With those drilled out, I can take our hardware, this is going to be the inch and a quarter bolt. I'll put that in there. Get our weld nut. And sometimes they do have weld spatter in there, so I'd recommend getting a bolt and just making sure that this thread's on nice. Once you've done that, we can get this attached. With all of our weld nuts attached, I'll go back through and tighten and torque these down. (power tool sound) With that same drill bit, I drilled through the last hole or the hole closest to the front of the vehicle on our base plate up into the bumper beam. Now we can get our bolt as the two inch bolt. Place that up. And I do give you washers as spacers. On ours, we didn't quite have enough. It says to use six. Get those put up. As you can see, there's still space, so I did have to source some other washers. (hammering) I just added three washers. And I did have to hammer the side in a little bit just to match the other side. Now I'll use our three eighths weld nut. The tube that's right by our attachment point, you can use a 17 32nd drill bit. I just used a half inch, which is slightly smaller. Drilled up all the way through into the bumper beam. And we can use our larger bolt. Put a washer on this. And I did put a washer on the top. There's a little bit of space. So depending on your space, you could put two washers or we just put one. With our lock washer in there through, I'll take our larger weld nut and get this to threaded on. And we'll tighten and torque everything else down. And for our bigger bolts, I am going to be using a three quarter inch socket. We can get our washer fluid reservoir back in place. We are going to have to trim off this tab on the right. I marked where I'm going to trim. I'll get this cut out. (power tool sound) For our stud on the top, we're going to be putting our smaller washers on. There's going to be seven of them. Those all put in place, now I can put our reservoir back up. I'll take our nuts and get this tightened back down. (power tool sound) On our driver's side, we want to put the horn back where it was. And then I have our quick link, and this is going to go on a loop on the back of our base plate. And I'll take our safety cable and we'll get this wrapped around the frame. Get that underbody panel dropped down. I'll put both of these on our quick link and get this tightened up. And I'm going to throw some zip ties around the slack, get this tied up against the frame just so this doesn't rattle around. Now we can put the fascia back in place. And what we did, we put it back on a few times just to make sure we're going to cut it right because we do need to cut it to make clearance for the attachment points. And I do like to run some of our other components as well, like our diode wiring. It's a lot easier with that fascia off. So I already got those ran and I already put our breakaway switch in place. Now, the base plate kit does come with a bracket and we use that. We just got this self-tapped to the bumper beam. And I put some spacers in there just to get this a little bit lower, just so this can come out one of the slots in our fascia. But with all of that done, I'll get this connected and finish our work on here, zip tie this all up. Now we can put the fascia back in place. After test fitting our fascia, I marked where we needed to cut this. I just cut that center section of our grill out as well as the support here so that our attachment points can fit through. Now, when we did test fit it, we also noticed, I'll show you on the back, that it wasn't going back enough. So on our fog light housing back here, we did have to trim out some of this plastic because this was hitting our base plate. So if that happens to you, just take it off, trim it out a little bit, and retest it. Once you got everything trimmed up and you got your facial put back on, the last thing to do is connect everything to your motor home and hit the road with your new Blue Ox baseplate on your 2019 Ford Flex.
Customer Satisfaction Score:
72% were satisfied with this product
28% of customers were not satisfied
Ratings & Reviews


Palebiker
12/21/2021
Perfect fit and easy to install. Hard to beat the price as well.


Katrina D.
12/5/2023
That is not good to hear! Let me get you over to customer service so they can get a replacement sent out to you.

Mike L.
9/9/2026
Thanks Douglas, nice truck you've got there! Nice job on the install.....

Heather A.
5/1/2026
The install looks great Ed! Where are you planning on taking the Encore? I will let Royce know you reached out.


Nick S.
1/5/2026
I am glad you were able to get it installed with no issues and a little help from our video! What kind of coach are you pulling the Kia Soul with?
Roger
12/12/2025
Still the same no issues...fine product
Matthew
10/12/2026
Its been two years since installation of the Blue Ox Baseplate. Since then, Ive flat towed the CRV from NJ to FL and back three separate times with many other shorter trips in between. Paired with a Blue Ox Tow Bar, the system has worked flawlessly since installation.


Kate F.
12/17/2025
Thanks for the detailed review Chris, and the pointers! This will be most helpful to others. What was your favorite stop in those 7,000 miles? Where did you go, what did you see?
Perry
10/1/2026
Follow up. Ive put about 8000 miles on the setup and its been great. A 34 ton suburban pulls nicely behind my Dutch star, and they dont have a steering lock so its nice not to have to retrieve keys when stopping for the night. I have used the safety cable attachment a few times for straight line pulls with a small shackle when working as a rally racing volunteer, its been fine but I wouldnt side pull on it.
Nick S.
12/1/2025
I am glad it worked well for you! What kind of coach are you pulling that Jeep with?
Do you have a question about this Tow Bar Base Plate?
Info for this part was:
At etrailer we provide the best information available about the products we sell. We take the quality of our information seriously so that you can get the right part the first time. Let us know if anything is missing or if you have any questions.


















Kenneth
12/16/2024
Works perfect and I use it with no fears of having a problems with it.