


To see if this custom-fit item will work for you please tell us what vehicle you'll use it with.


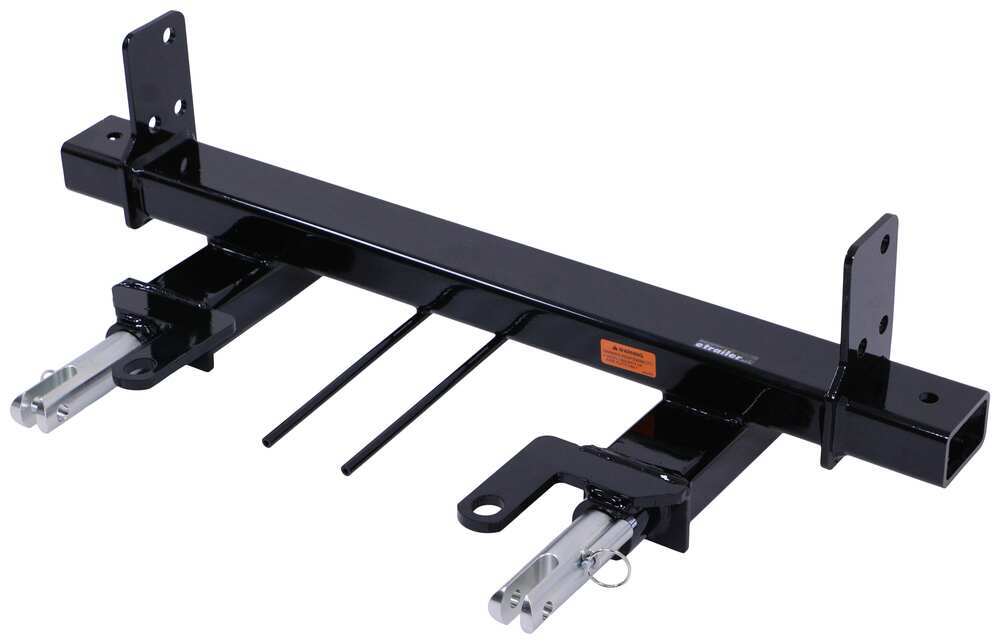
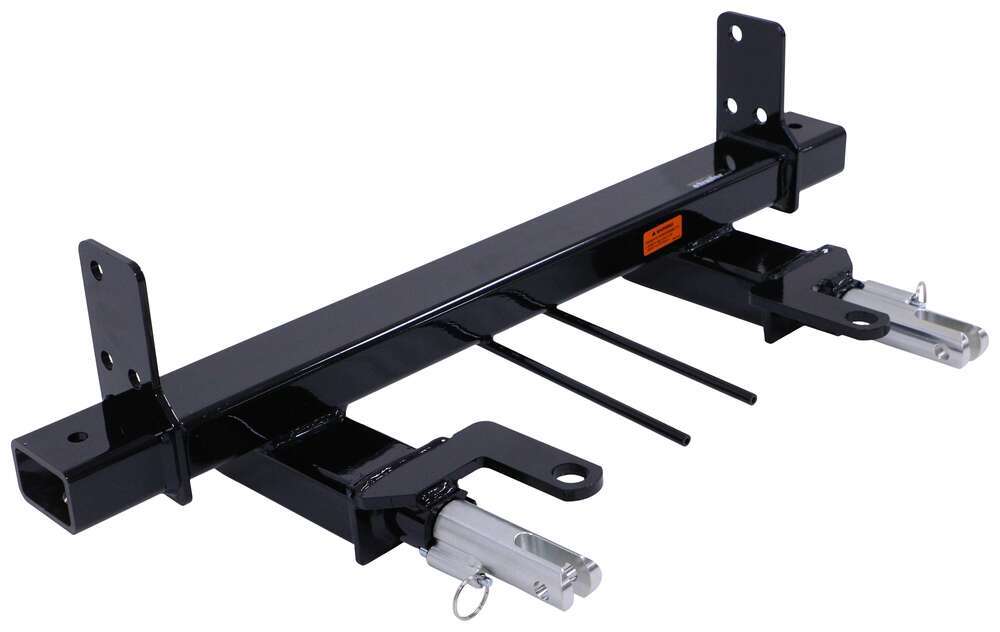
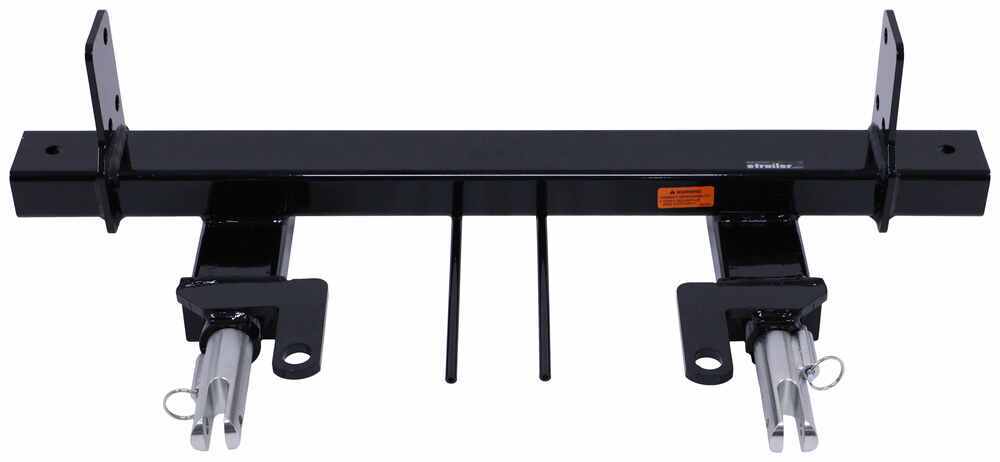
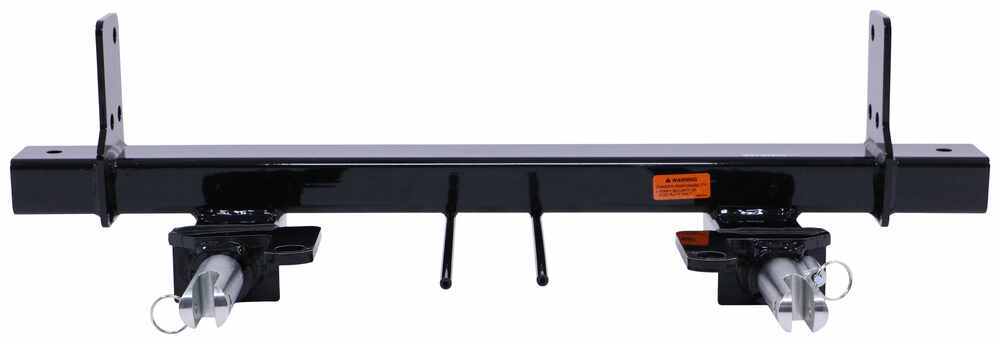
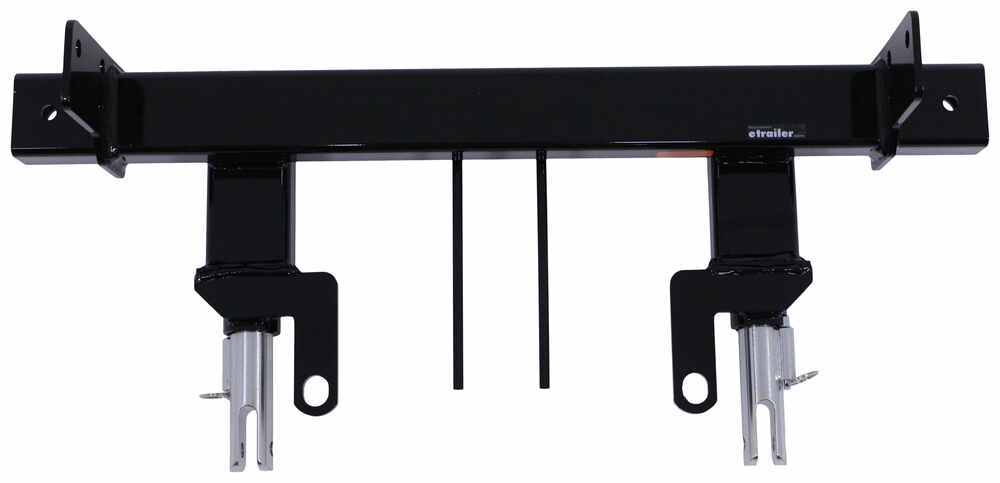
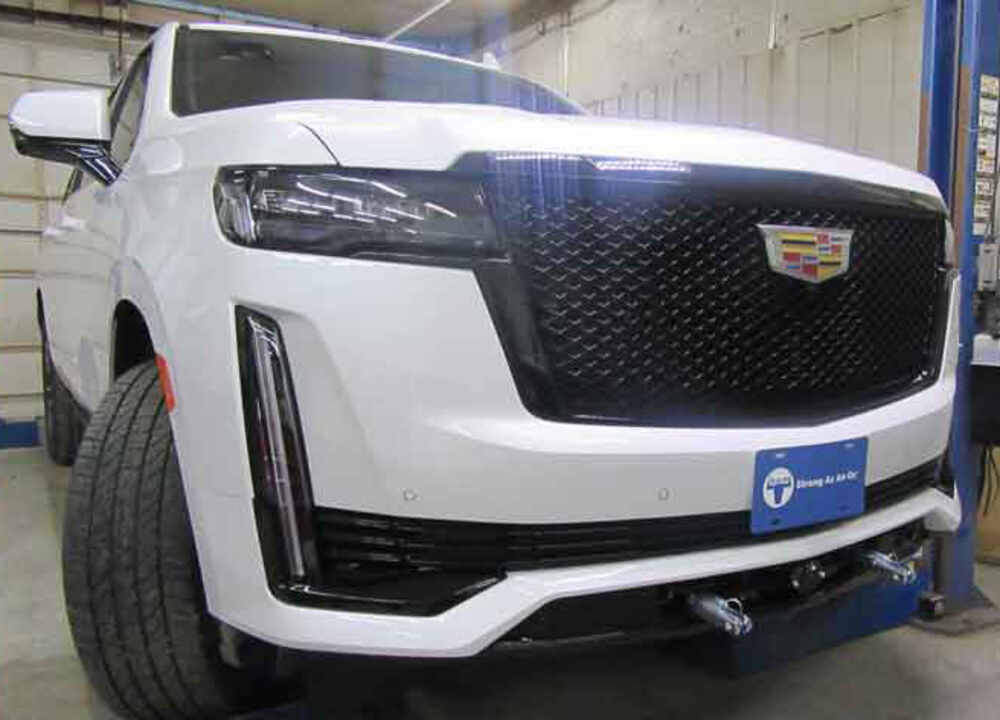
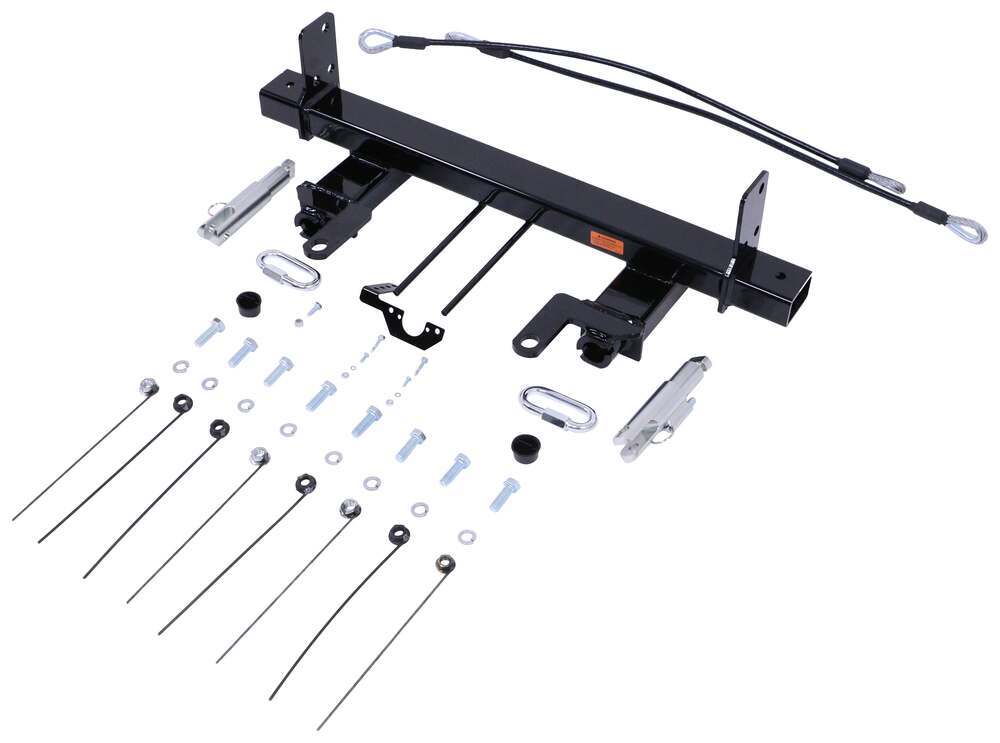
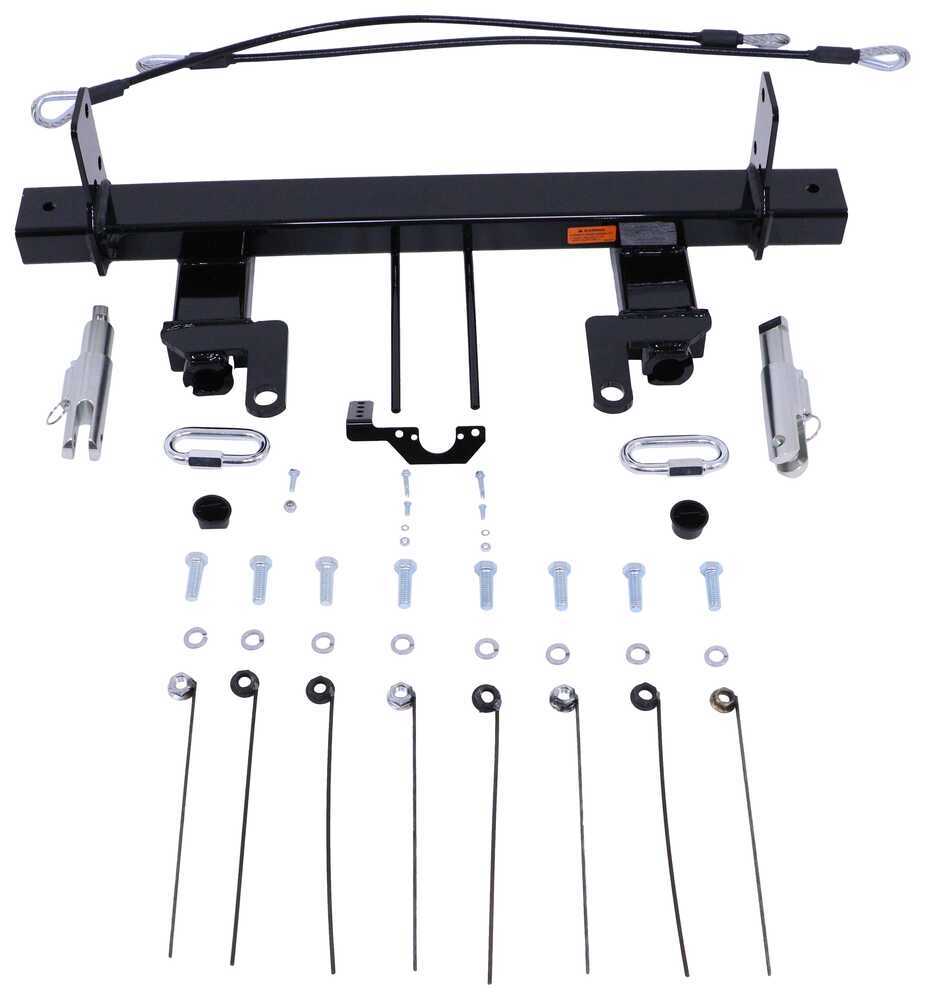
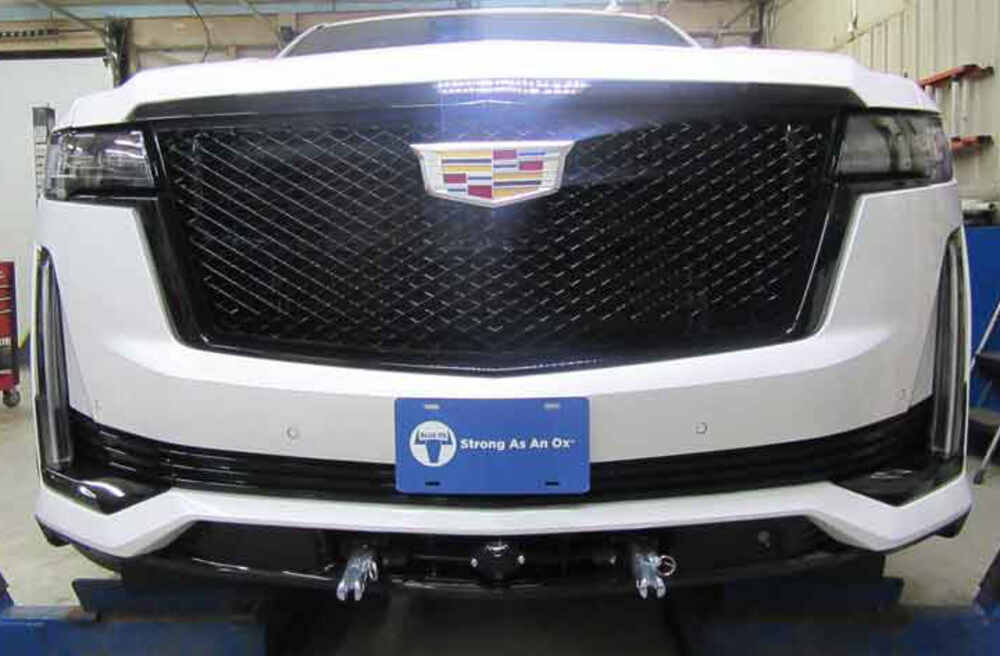



This setup keeps your front end looking sharp when you’re not towing. The completely hidden design means no bulky crossbar or brackets sticking out, and the removable arms twist out easily so nothing gets in the way. Snap-in receiver covers keep dirt and debris out of the base plate, making it look clean and ready for your next trip.
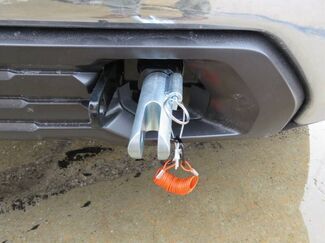

Connecting your tow bar is quick and simple. Each arm slides into the receiver, twists to lock, and secures with a pull pin. When it’s time to unhook, just pull the pin, rotate, and pop them out. It’s a solid, repeatable process whether you’re doing it alone or with help. The distance between brackets is 27" and the bracket height is 15", so you can line up other towing components easily.

The base plate bolts directly to your chassis—no welding required—and its sturdy steel design spreads towing force evenly across the frame to help prevent stress on the suspension. The powder-coated finish resists rust and corrosion for long-term reliability through every mile of towing.
If you already have a favorite tow bar, this base plate fits right in. It pairs directly with Blue Ox tow bars for a secure connection and can be adapted for use with Roadmaster or Demco tow bars using adapters (RM-031, RM-031-5, or DM9523041, sold separately). Integrated mounting points make it easy to attach an electrical connector bracket (sold separately) so your wiring stays tidy and accessible.
This kit is designed with at-home installers in mind. It bolts securely to your vehicle’s chassis using included mounting hardware, so there’s no welding needed. The clear layout makes alignment straightforward, giving you a reliable flat tow setup you can count on for years to come.


Videos are provided as a guide only. Refer to manufacturer installation instructions and specs for complete information.
Hey guys, it's Jake here with etrailer. Today we're gonna be taking a look at and I'm gonna show you how to install the Blue Ox Direct Connect base plate on our 2024 Cadillac Escalade. Adding this base plate to the front of your Escalade's gonna allow you to safely flat tow your Escalade down the road behind your motor home. It's something that you will want to check with your Escalade before you even look into any type of tow bar or any of these or a base plate or any of these components is you want to check whether or not your vehicle is flat towable. There are only specific models that are flat towable and it has to do with the drivetrain. So look in your owner's manual, compare it to the drivetrain that you have, specifically the transfer case for these, you wanna make sure that it matches up to the flat tow version that you need to have in order to flat tow it, otherwise you can damage your vehicle.
But it's a very clean installation. We've got everything hooked up here, but when it's not hooked up, it looks very, very clean on the front of this vehicle. I went one step further and ended up painting the components that we inchesre not black on the front of this to black so that it matched our all black vehicle. A few things that I really like about this base plate is that it's gonna have two tabs that you can mount your 6-pole to, which is not uncommon for a base plate to have, but it is nice because you'll mount your six pole directly in the center of your vehicle. The other thing that's nice about this is that it comes with a bracket that mounts behind your 6- pole so that you can put your breakaway switch safely on the front.
To get this base plate installed, it can seem a little daunting to have to remove the entire front fascia yourself, but truthfully, out of this whole install, that's really not too bad compared to, we are gonna have to drill a couple holes on the side of the frame rail, but that's every base plate that is available for the Escalade. You will, you're gonna have to drill two on the one side. Three are already drilled on the driver's side, but it's really not too bad. If you don't feel comfortable doing this install yourself, please check out our dealer locator. It'll direct you to a dealer closest to you if you put your zip code in, it'll find a dealer closest to you that we have confirmed with them that they can do this installation.
But with that being said, let's go ahead and pull it inside and show you how to do it. To begin our installation, we're gonna have a bunch of push pin fasteners on top that are keeping this plastic trim piece in place. We just need to take all those out. We'll take a flat edge screwdriver, probably straight out on the center and then pop out the base and we'll take this plastic piece out and just set it to the side. Now grab a 10 millimeter socket.
There's gonna be six bolts holding the front of this grill in place or the top of this grill in place and it's gonna take this out. (socket whirring) In our wheel well, we're gonna have four screws. There are T15 head Torx bits that you'll lean. We'll have four along the edge up here, starting right here and going down. And then there's gonna be one straight in here towards the bottom. So we'll just take a T15 Torx bit and remove these. Next we're gonna need to pull back the wheel well liner, pull it out and there's gonna be a bolt that is attaching these two panels right here and it's gonna be right on the edge. You should be able to see it actually, if I pull this out of your way, you can see it right here. This is gonna be a seven millimeter head screw. Now we'll take our seven millimeter socket down here below and we're gonna take the three screws from each of our web flaps. Now we're gonna have a bunch of T15 Torx bit screws under here, but you can see a center of our vehicles is right here. We've got this screw right next to it and then one over here. And all these screws in between, these two that are closest together, we're gonna have that same combo on both sides of the vehicle. Those will stay, the rest of them come out, so there's 12 total down here. We have to remove eight of them. Now on the skid plate, we're gonna have 12 screws that are holding it in place. Some are here on the bottom, some are here on the front of it. We'll just have to use a seven millimeter socket, remove all of them. After you have all 12 of those removed, this actually came down pretty easily. This should come down. And then our two mud flaps should also come down. On this bracket here underneath our vehicle, you wanna hold your wheel well liner back a little bit. There's a 10 millimeter bolt. Good reference point is there's two holes in the frame rail right above it. We're gonna take this out with a 10 millimeter socket. On our passenger side, we're gonna have two connectors we have to disconnect, this one right here, which is a much larger one and then the smaller one up here. On the front side of this where you can see my fingers up here, there's gonna be a little red tab. I'll have to open that up. This is very tricky by the way. Open that up. Push a little black tab and then we have to essentially pry this gray lever open. There's not a whole lot of room to work with here, so just be patient and we'll eventually get it. So on this bigger plug, the locking red tab is on the other side of the gray lever. And then the little black tab that you have to push is on this side. So we'll push that little gray tab, rotate this gray lever over like this and that usually they unplug themselves because it's a cam style, but we'll just pop this connector out. And then for the one above it, that one's gonna be a little trickier. We might have to get a screwdriver in to pop the red tab back and pull it straight out. Over on our driver's side we have another electrical connector that we need to disconnect. You see this little red tab here, we'll pop that back. And then there should be a little black tab on the back side. And if we push it down, might be another one where we need the screwdriver to push down on the tab. Now we've got two 10 millimeter screws we need to remove, one right here and the other one is going to be up there. (drill whirring) Now with an extra set of hands, we'll start peeling off our fascia. It's good to have one person on each side just because these fascias can get pretty clumsy after a while. We'll just slowly pry out on this edge until we get all the fasteners to pop loose. And what you want to do here is once you've got the bottom a little loose, there's a cup in there that if you just pull up, it'll unsnap from there and then we can lift up on our fascia and keep popping 'em out. Just like that. Then we'll take our fascia, make sure there's nothing still connected, and we'll set it in a safe place. Now we can take a trim panel tool with our fascia off and setting off to the side. We'll take this trim panel tool and we've got these little white clips that we need to take out. We're gonna do is we'll push down on the white clip until you get those to pop out. Like so and this is just gonna help us get this center plastic piece out. Now depending on how this base plate ends up going on the front of our vehicle, we may end up putting this back on after we trim it. We might end up leaving it off. Just kind of depends on how it's gonna look. Now if you have the adaptive cruise control, there's four seven millimeter bolts here that we have to remove and we're just gonna let this bracket hang, do some work to our frame rail and then we'll put it back up later once we get everything mounted. Now on these two plastic braces, you can see these upright, I drew some lines on it. We're gonna need to cut 'em off here at the bottom. And then where this little jet out is, we need to cut that straight across there too. So on both of these we'll cut those two pieces out. I'm using a multi-tool. You can use a rotary tool or a Dremel tool if you want. You may even be able to use like a little hacksaw, just anything that can cut through this plastic. (multi tool whirring) On the underside of this bracket attached to our frame rails, we're gonna have two 10 millimeter bolts that we have to remove just to set this aside and then we'll reinstall later. Now with an extra set of hands, we can grab our base plate. It's gonna go up on the inside of our frame rail here. You gotta push up at the same time on both sides. We may end up having to hit it up, tap it up with a soft blow hammer just because it's a very, very tight fit and then we're gonna take a hex bolt, a little bit of red Loctite on it, and then a lock washer and we'll slide it into the corresponding holes. (hammer slams) (hammer slams) Now what you wanna do is you'll get one bolt started on each side to hold the base plate up in place. And then on the driver's side we can, you should be able to get all three pieces of hardware in once you put your handle nuts on the other side, what I would recommend doing is get your three bolts over here, put all three handle nuts on 'em, and then on the passenger side you're just gonna be able to get the one. But what I would do is I would get all three of those tied on the driver, get this one tied on the passenger side and then we could drill our other two holes on our passengers. (drill whirring) (drill whirring) Once we've got everything tightened down, I took a half inch drill bit and you wanna just use it kind of as a guide. That'll mark the center of these two holes. And now we're going to step up our drill bits all the way up to that half inch and drill these two out. (drill whirring) Once you get your two holes drilled out to a half inch, we'll take the, take two more bolts with some lock washers, throw those in and then put the panel nuts on the backside, To get these handles off of them, there's just a little pinch weld holding them on so you can just wiggle it back and forth and eventually that weld will break. Some people will like to just take these and they'll bend them up and twist them up inside the frame. I try to break them off personally if I can, 'cause then they're not in your way in the future. Now we've got all six of our bolts on the side of our frame rail. There's one that goes in each end and there's a little pre-drilled hole right here. But we will have to drill out a hole in the bottom of our frame rail, same thing up to a half inch. (drill whirring) Now we'll take our last two bolts and put 'em up through the bottom of this frame into our handle nuts. (drill whirring) And you'll want to come back with a torque wrench and torque all of your hardware to the specifications in the instructions. If you have this, what we've got going on here, as you can see we're spinning the bolt, but the nut is also turning. Just take a 19 millimeter socket and put it on top of that nut. Now for our safety cables, what we can do is we're going to run it through this opening in our frame rail, run that around, and then we need to connect it with our quick link to the, I like to put one inside of the base plate and one on the outside and we'll just put the quick link down through the top. From here, we can take that lower trim piece, put it back up into place. And then I'm also gonna put our sensor back up into place. But other than that, I'm gonna leave everything else off of the vehicle so that we can run all of our wiring and the stuff for our braking system and then we can come back and do any trimming on the front fascia that we need to. Well guys, hopefully this video is able to help you decide whether or not this kit is right for you and your 2024 Cadillac Escalade.
Customer Satisfaction Score:
90% were satisfied with this product
10% of customers were not satisfied
Ratings & Reviews

2025 Jeep Grand Cherokee Overland. Good fit. Requires some cutting. Baseplate is heavy, so I paid an installer to do the job.
Installation was a breeze and it is still working flawless a year later. Purchased the entire towing setup from e-trailer. Fast delivery within the week after the order. Great follow-up from staff.
This Blue Ox Baseplate was easy to install and fit great. etralier sent me a video of my same make and year car showing the baseplate installation. Armed with the knowledge the video provided really made my installation job easy. Quality parts and quality service by etrailer.
An added bonus was that the baseplate and tow bar I ordered arrived in 2 days.
Great products from etrailer. The videos were very helpful as I was determined to do the install myself. I’m 72 years old and thought I could do it and I did with the help of my lovely assistant, my wife. The tip on running the taillight wiring through the frame rail was great. The one problem I had was that I was never able to unplug the taillights no matter how hard I tugged on them so I had my wife hold each light while I spliced in the diodes. Very happy with the Blue Ox products and the finished look on my Jeep. Thanks again etrailer.
Installation was fairly straightforward. Only thing I would add the video doesn’t mention. The hole that needs to be drilled on passenger side. I put a piece of 1x4 wood between the radiator hose and the frame when I was drilling as the hose is pretty close to the frame and could be damaged if you drill too deep. I also put the bolt heads inside engine bay with the threads sticking to roadside as I felt again to close to radiator hose. I removed washer bottle completely to give easier access.
I wasn’t real happy about how much bumper I had to trim . The activ model has a different bumper c er than the RS. The studs for mounting wiring connector wound up really gut under the tag bracket so that was a win.
The bracket seems heavy duty and well made . Follow directions in the etrailer video. Very simple install. Drilling the hole was the hardest part.
Instructions could have been better but was straight forward and easy to figure out. Had to widen two holes on vehicle a tiny bit to align up with plate. Was shorted two connectors to attach the safety cables to the vehicle and base plate. None mentioned on inventory but two were included. Picture showed using four.
Well designed and solidly built base plate. Very good product support from Etrailer and Blue Ox.
The four 1/2 inch by 1 3/4 inch bolts are category 5 bolts. I had a bag full of identically sized bolts which were category 8. But I did not have any whizz nuts that were category 8 nuts so I stayed with the standard Blue Ox Hardware. We used POR 15 rust preventing paint at every location where we cut the steel or drilled holes. The distance from the center of the attachment tab assembly holes to the ground is 20 inches on our 2025 Wrangler Rubicon JLU with "Xtreme" 35 inch tire package. Easy five stars for Blue Ox and etrailer.
The 2025 Trax license plate frame sits lower than shown in the instructions provided with this kit, to the point where it obstructs access to the 7-way electrical connector. An alternate scheme for mounting the plate will be required if your state requires the front plate to be displayed.
Base bar bend dimension tolerance is OK. Hole true position tolerances are pretty poor relative to the frame holes. The steel is powder coated black, but they didn't bother to clean the weld spatter off before painting, and lots of sharp little bumps cut your hands as you try to fit the bar.
The instructions are mediocre and the photographs are terrible. This is the worst instruction set photographs I have ever come across. They give you little bad bat black and white one and 1/2 x 2 inch photographs on the little booklet pages. Paragraphs are poorly written for referencing hard to see photographs. Correct and professional instruction sets should have exploded diagrams not photographs the step-by-step instructions are overly detailed for some things and totally leave out critical instructions. For example, what do you do when your clearance to the back face of the hole is much smaller than the bolt length than therefore you have to pry the hell out of the radiator support. I ended up cracking the radiator support doing this. The booklet should be twice as big, contain good diagrams, and be an 8 1/2 x 11 page in color. So you can actually figure out what it is. I stared at some of these pictures for five minutes each.
I tell you, were it not for having a lot invested in my motorhome, this job alone would make me consider selling it to not have to tow the car. For the price you pay on this bar I would've expected better.
The job took me most of a day because I had to do it over and over again. Because of the bad instructions.
Product: B+
Final fitment: A
Process instructions: D
Buying experience: A-
(Photo taken before I installed the safety cables)
The Blue Ox base plate kit was installed without a hitch on our 2024 Maverick Hybrid. It was a perfect fit! It was installed by Fantasy Truck, a referred installer of etrailer, in Odessa, MO. Brett was very easy to work with and did an excellent job! I highly recommend the Blue Ox baseplate and Brett @ Fantasy Truck!
Fits my 2013 mini cooper non turbo. Does take a few hours to install this Fit was good. The hardest part is removing the front bumper and reinstalling it. You do have to cut the lower bumper grill in three places take your time locating the exact spots for cuts. I have pulled Mini Cooper about seven thousand miles now with this Blue Ox and has worked great
I was given a Blue Ox Tow Bar and needed Base Plates for my Ford F150. In my online search, E-Trailer had the best price, so I ordered them. Delivery was a few days earlier than expected. I read the installation instructions and it sounded fairly simple to install, so I decided to tackle it myself. I began it about six pm and had the job completed and cleaned up in just over two hours. The job required removal of the bumper and tow hooks and drilling of two holes. Also William at E-trailer was of great help in the correct parts and keeping me informed of the delivery.
The safety Cable installation left a little to be desired. I'm not sure if I installed it as designed. The cables we're really long enough to go aroiund the frame rails on our Jeep, under the Radiator mount, Aluminum Frame, I was only able to go around the Raditor mount on both sides. Didn't really seam like it was the right way, but I suspect it's only for if something comes loose that there isn't a catastrophic breakaway.
After installing over 500 baseplates on various vehicles, this one was probably the toughest one . It had the off road package on it . But it fit great after I had to remove a lot that had been bolted up for 27yrs.
Tried to install this baseplate. It was a challenge to say the least. It did not fit the frame of my Jeep YJ without making modifications to the mounting plates on the driver side. I had to use a cut off wheel and remove 3/16 of an inch from the driver side spacer (which is too long. See pictures) in order to get it to clear the frame. Also, instructions say to drill an additional 1/2 inch hole in the frame for a third mounting bolt. BUT....the internal frame construction doesn't allow the nut on a stick to pass under the existing reinforcements for the bolts that mount the steering gear to the frame. Nut is way too thick to pass under the internal tubing in the frame from manufacturer (AMC).
This was instilled on a 2024 Chevrolet Colorado Z71 truck. I watched your video online with this exact model truck and the words I remember most was “and we did not have to do any trimming”. Well my truck was certainly different than what was on video. Guess it’s because it’s a late build 2024 (end of September 2024) and the grill system was maybe what would appear on the 2025 models? There was lots of trimming involved. I also will tell you the mounting holes both for the frame and the bumper back plate did not line up and required some modifications to fit. I would like to say this job is not for the faint of heart. I luckily have a mechanical/machinist background so was able to get the job done. Have not tested it yet but will be soon. Good luck to those of you who are planning on installing it yourself. Just remember it can be done. Just take your time.
Items arrived in 2 days, free shipping. All appeared in new undamaged condition.
The Blue Ox base plate for my 2015 Kia Soul is well manufactured and, with a little bit of mechanical skill, easy to install. It fit perfectly without issues. Brad from etrailer provides a step-by-step installation video that is outstanding and nicely guides through the process from beginning to end. I highly recommend this Blue Ox base plate from etrailer.
Well the blue ox base plate actually fits my turbo engine. The Curt didn't fit as advertised.
Super high quality baseplate for towing by Blue Ox. Instructions, videos, shipping (one day!) and overall experience was awesome. A bit pricey but their quality and the additional support by E Trailer cannot be beat! BTW (E Trailer) the baseplate fits three different Jeep configurations but did not call out the Recon package. After looking at other brands which showed there's to fit the 3 variations AND the Recon, I figured it would fit and it DID. You should definitely upgrade to include the Recon Edition.
lways great to shop at etrailer, especially the tech experts. Royce did an awesome job with our order. Everything fit perfectly and the help video provided the guidance I needed.
We installed the baseplate on our 2023 Encore GX AWD as well as the light harness and breakaway switch. A couple of items were incorrect but Royce corrected the issues with no problems.
Thanks again etrailer!
2019 Ford Ranger baseplate worked and fitted fine for me. 73 yrs old took me a couple hours but took many breaks. Younger could do it less than hour I'm sure.
Also works fine with my Blue Ox tow bar.
It came reallllyyyy fast good service
Do you have a question about this Tow Bar Base Plate?
Info for this part was:
At etrailer we provide the best information available about the products we sell. We take the quality of our information seriously so that you can get the right part the first time. Let us know if anything is missing or if you have any questions.





















Thank you! Your comment has been submitted successfully. You should be able to view your question/comment here within a few days.
Error submitting comment. Please try again momentarily.