


Features:
Specs:
Application: Rocker studs, rocker adjustment, valve cover, cam cover and oil pan bolts, disc brake calipers, intakes, alternators and pulley assemblies.
The shaded areas in these diagrams illustrate where threadlocker should be applied in various types of assemblies:
Threadlocker 243 is applied as a liquid to the threads of screws, nuts and bolts before assembly to keep them securely tightened, even when vibration occurs. Its special formula works on surfaces with light oil contamination (especially the light oil used by machinists and rebuilders to prevent rust).
This threadlocker also seals out air, water and grime to prevent rust or other corrosion from forming. Nuts and bolts that aren't corroded last longer and can be taken apart more easily. Standard hand tools can break the seal of the threadlocker, allowing you to remove treated nuts and bolts, which then can be reused.
This threadlocker is anaerobic (hardens in the absence of air) and requires contact with an active metal to cure. Active metals (those that tarnish, corrode or rust) include brass, copper, bronze, iron, soft steel and nickel. If both parts to be joined are made of inactive materials, Loctite Klean 'N Prime primer must be applied to one of the surfaces for curing to occur. Inactive materials include plated parts, stainless steel, galvanized steel, magnetite steel, pure aluminum, titanium, magnesium, gold, silver, plastic, cadmium, Iconel, zinc, natural or chemical black oxide and anodized aluminum.
Klean 'N Prime can speed the cure rate of Threadlocker 243. This is especially helpful when you are applying the adhesive to any material, active or inactive, in colder temperatures (below 70 F).
This product is OEM specified: It is approved to meet specifications of original equipment manufacturers.
Replaces LT37419
California residents: click here
Videos are provided as a guide only. Refer to manufacturer installation instructions and specs for complete information.
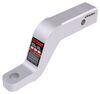
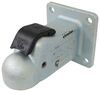
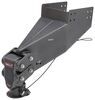
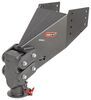
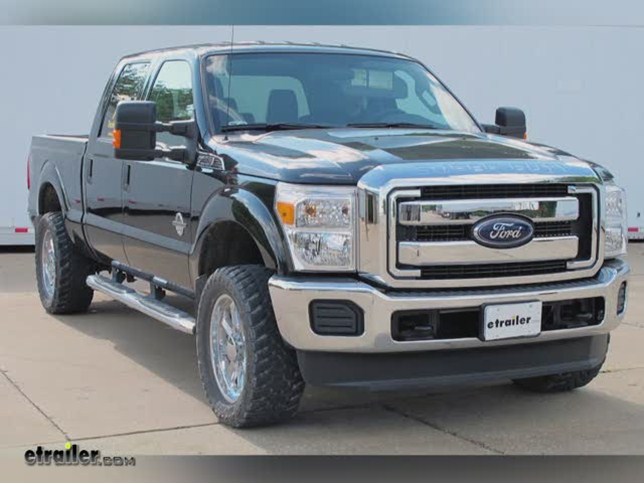
Today on our 2012 Ford F250, we'll be installing the Blue Ox under-bed Gooseneck hitch, part number DH1204. We can now go over operation of the new Gooseneck head. We'll take our ball, line up the cut out groove in the side of the ball with the nipple in the Gooseneck throat dropping the ball in place, turning it, and locking it into position. Then to remove the Gooseneck ball, we'll simply press on the lock, rotate it, and pull up and out removing the ball from the throat. To put the ball into the stored position, we'll simply turn it over, line the cut out with the nipple and then drop it into place. Now, we'll go ahead with our install. Note that we've already gone ahead and lowered and removed the spare tire and both rear wheels. Using the mark in the center of the bed, already premade by the manufacturer, we'll use it as the mark for our pilot hole that we'll eventually enlarge for the throat of our Gooseneck.
Now, we'll use our hole saw bit to cut out the large hole. With out hole cut out of the bed, we'll go ahead and go underneath the bed where we'll remove the tailpipe section of the exhaust starting from the flange just behind the rear muffler. First, we'll go ahead and spray each of the fasteners at the flange, total of 3, spraying each one with some liquid lubricant and the 2 fasteners for the rear tailpipe hanger with some spray lubricant. Then, we'll go ahead and remove the 2 tailpipe fasteners that secure the hanger to the frame. Next, we'll remove the nuts at the exhaust flange. With all 3 fasteners removed and set aside for installation later, we'll need to remove the 2 rubberized inaudible 00:01:48 still holding the tailpipe.
Before we attempt to remove them, we'll spray each one with some spray lubricant and then use our pry bar to remove the rubberized inaudible 00:01:56 from the metal hanger. Be careful as you will need to support the full weight of the tailpipe at this point. Quick tech tip: Pay extra special attention to the gasket between the 2 exhaust flanges as we do not want to ruin it because we'll be reusing it when we re-install the tailpipe. Now, with the rubberized inaudible 00:02:11 removed, we'll go ahead and remove the tailpipe from underneath the bed. We'll set it aside and re-install it later. We're ready to go ahead and start installing the front and rear rails for the Gooseneck head.
Note: You'll want to line up the 2 rails next to each other as the front rail will be 1" longer than the rear rail. With our rails marked, we'll go ahead and put them in place. Starting with the front rail, we'll slide it up over the frame on the driver side bringing the passenger side up over the rail and then into position pushing it forward of our cut out hole. Now, we'll go ahead and repeat the same process with the rear rail, only we'll bring it back behind our cut out hole. With both rails in place, we'll be securing it with a 1/2" nut, flat washer, and 1/2" lock nut. Note: As per instructions, each one of our fasteners will get red LockTite, part number LT1330799.
Now, with our fasteners ready, it's a good idea to get an extra set of hands to help you hold the Gooseneck head as you install the fasteners through the rail, into the head, and then secure it with the flat washer and lock nut. At this point, we'll install all 8 fasteners, 4 for the front rail and 4 for the back rail finger tight. Now, with our hardware securing the head into position, we'll move to the side plates on the outside of the frame rails. You'll wan to lay out your side plate first to make sure you identify the driver and passenger side, as they are slightly different. We're going to go ahead and mark ours, and now, we're ready to install them. Note: We're going to go ahead and install a portion of our hardware for our lower 1/2" fastener. This is a 1/2" bolt and flat washer going through the frame, through a spacer block and then through the side plate where it will get secured with a 1/2" lock nut. Now, we're ready to go ahead and put the side plate in position. Then, we can install the two 5/8" fasteners noting that the side plate has a slotted hole for one that will get an additional 5/8" flat washer. Now, we'll install the forward and rear fasteners for our side plate, which will be additional 1/2" bolt and 1/2" nut. Each one of these attachment points will line up with pre-drilled holes in the frame. Now, with all the hardware in place, we'll go ahead and repeat the same process on the opposite side. Now, with all our hardware in place, we're ready to tighten it down and torque to specifications. Now, with our hitch assembly secured, we're ready to go ahead and install the chain hold downs. Using our final size drill bit and the Gooseneck head as a template, we'll go ahead and drill out the holes that line up with the valley of the corrugated bed. With using a our bit as a centering point of the hole, we can then go ahead and drill out a pilot hole. With the pilot hole drilled out for all 4 attachment points, we'll go ahead and get in the bed and drill down through our Gooseneck head. With all 4 holes drilled out, we can go ahead and install our U-bolt chain hold downs. Next, we'll get underneath and install the fasteners. To secure the chain hold downs, each leg of the U-bolt will get a flat washer, spring, second flat washer, and then a 1/2" nylon lock nut. With all our fasteners in place, we'll go ahead and tighten it down. Well tighten it down just enough to hold the washers and spring in position but not to compress the spring. With out chain hold downs in place and secured, we're ready to go ahead and re-install the exhaust. Note: It can be mad easier by getting an extra set of hands to help you hold the weight while you re-install the tailpipe. With our tailpipe secured, that will complete out installation of the Blue Ox under-bed Gooseneck hitch, part number DH1204, on 2012 Ford F250. .

Loctite 243 (blue) worked great on my Harley Road King Custom primary asse3mbly. Great service and fast shipping. Would recommend etrailer to anyone. Will buy from in the future.
Great customer service
Fast shipping

Good product.
Do you have a question about this Lubricants Sealants Adhesive?
Info for this part was:
At etrailer we provide the best information available about the products we sell. We take the quality of our information seriously so that you can get the right part the first time. Let us know if anything is missing or if you have any questions.


Thank you! Your comment has been submitted successfully. You should be able to view your question/comment here within a few days.
Error submitting comment. Please try again momentarily.