bing tracking image

How To Tow a Trailer

Customers compare 2923 to these similar products


Products Featured in this Video


Towing a Trailer


Today we are going to review the components needed to pull a trailer. Basically, this video is designed for somebody who just decided they have a need for a trailer, so we will cover all the components in the most basic form, so you know exactly how to update your vehicle. What we are going to do is start from the truck and work our way back to the trailer. First off, we are going to show you the hitch itself. All vehicles require a hitch to pull a trailer. What this device does is makes an attaching point on the frame of the vehicle, or body components, and transmits the forces from the trailer to this one point here. This point here is the receiver part. Consequently this hitch is called a receiver hitch because this hitch can receive a draw bar, or also called a ball mount. It is held in place by this pin which we just ed, and this clip holds it in place. There are more fancier pins, like locking pins, but that is the basic thing you need right there to get the job done. 1:12

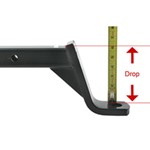
This part that I am shaking right here is the ball mount itself. It comes in a variety of weight categories and drops. Drops being that this part of the hitch right here can go down to lower the ball, or raise it up to the rise position. So when the ball is lowered down here, it is a . If it is up, its in a rise position. If you notice too, we are shaking it, it has to be like that so you have room to slide the ball mount in and out of the receiver hitch. It is the nature of the beast, some will be quieter, some will be louder, this one is about in the middle of the range. It can be looser, it does not hurt anything, or sometimes it can be a little bit tighter in there. The hitch balls come in three different sizes, 1- 7/ 8 inches, 2 inches as shown here, and 2- 5/ 16 inches. Basically, the bigger the hitch ball, the more weight capacity it can handle. It is easiest to think of it that way. 2:23

What the hitch ball does, is allow the coupler on the trailer to go onto the hitch, to connect to the truck, to give it the flexibility to rotate left, right, up, down, in a rotating position. Especially if you take the trailer off road or if you go over uneven surfaces. Next I will show you the components on the trailer itself. Now shapes will vary from trailer to trailer, but the basics will always be the same. This right here is the coupler, and the ball fits inside right here in the round part that matches the ball. The one thing you want to know is you have to match the coupler to the ball itself. In this instance, if you do not know what size ball to use, it is supposed to be stamped on the coupler or comes with the paper work for the trailer. It will say 2 inch, so you will have to use a 2 inch ball, if you use a 1- 7/ 8 ball, even if it is a 1/ 8 inch difference, you have the possibility of when you hit a bump the trailer may pop off. You must use the right size ball. What usually latches the coupler onto the ball is this mechanism up here. This is what is typically called a latch. What this does is lock onto the ball so the trailer cannot come off. Again, the hitch ball fits inside here, and this part moves to catch the bottom edge of the ball to keep it from coming off. Right now it is in a locked position we will pull it up, you can see how it moves out of the way, that allows the ball to fall into place, then we latch it back down, and that catches the ball. There are different varieties, this is a lever style. It can also be called a trigger style, which has a trigger you can pull up like this. There is also a style called a hammerblow/ bulldog where the coupler actually splits like this. That is pretty much it for the coupler. Again, the coupler comes in different weight categories and ball sizes depending on the trailer being towed. 4:34

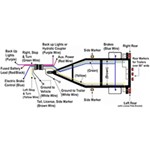
The next component we are going to show you is the safety chains. In most applications there are going to be two chains that are either welded or bolted on each side of the frame. These are hooks on the safety chains that go onto the safety chain loops on the hitch. This is the jack assembly. This is what raises and lowers the trailer on and off the hitch ball. Crank it clockwise and it goes up, counterclockwise it goes down. This jack can be located in a few different spots. It can be in a recessed location like we have shown here, it can be up very close to the coupler, or can be mounted on the side of the frame. The last thing we are going to show you on the trailer is the electrical. In this case, this trailer has a 4-pole flat, that means it has 1,2,3,4, poles and the whole assembly is flat. This is a basic connector that will allow you to have running lights, brake lights, and turn signals on your trailer. There is also a 5-pole which also has a reverse lead for a surge coupler if it has it. It is kind of optional. The 4-pole is the most popular one out there and there are also some socket type connections, that is the 6-pole, which is a small round one which you find on industrials trailers and stock trailers. Then you can find the bigger 7-pole with the flat blades in them, that is more for recreational vehicle industry. Now we will go back over to the truck and show you where the electrical is on that. On the tow vehicle, here is our 4-pole flat which is generally mounted in this general vicinity of the hitch usually on the driver side of it. It could be mounted in different spots as well too. It also depends on the connector too. The bigger 7-pole connector will probably have a bracket going from the hitch or from the bumper and then mount it to that. 6:39

At this point we are going to hook the truck and trailer together to show you how all of the components fit. Once you have the hitch ball underneath the coupler, make sure your latch is opened up and then you can lower the trailer on to the ball. Lower it on the ball until the weight is all on the hitch ball itself and the jack will be a little off the ground. At this point you can lock the coupler on to the ball. On a lighter trailer you can probably pick it up and move it around. On a heavier trailer, not so much but that is one other thing you can try. We are going to hook up the safety chains. You would think it is a good idea to go straight back across to the safety chain loops that are on the hitch itself but actually you do not. What you want to do is take the one on the right hand side and go underneath to the loop on the left hand side. When you criss cross both of them it basically makes a cradle for the trailer to fall into if it ever comes off the ball. Now we can plug up our electrical. To hook up the electrical it is pretty simple. Just match end to end, these three holes are going to go to these three poles and just push them together. When you hook up your electrical make sure you have enough slack to go around turns. Basically if you match the safety chains or are about 1/ 2 way in between the coupler and the safety chain usually you have enough slack that way. The last thing we need to do is retract the jack fully. You do not want to leave it down part of the way because it could hit something when you go over a bump, bend it, and damage it even more. You will also notice we have a block underneath of it. That reduces the amount of time it takes to crank the trailer up and down. Take the wooden block and put it safely away. The last thing you want to do is take a good look over at everything and make sure everything is secured. The chains are hooked up, the wiring is tight, and the coupler is locked down on to the ball. Then you want to try out the lights on the vehicle to make sure you have got running lights, left turn, right turn, and brakes. When you are ing your ball mount for your truck and trailer combination, if you are in doubt and can not get it level exactly, start off a little high and let the weight bring it down to level. With that everything checks out and you are ready to pull your trailer down the road.


Christopher L.

11/12/2014

Thank you so much for the transcript to the video. I appreciate it as I am deaf and cannot hear what is being said in the video.

Marcel L.

9/1/2014

Hi, in the last part of your video where you lock the coupler on to the ball, I will also lock the coupler with a padlock or even a bolt and nut to prevent it from accidently opening.

Kate

9/1/2014

Thanks for the video. You didnt secure the coupler latch with a pin to prevent it from popping open. Why not?

Peggy S.

6/7/2014

Would I do better with bias tires or radial on my two horse slant load trailer?

Etrailer Expert

Rachael H.

6/9/2014

A radial tire would be the better option for your horse trailer. Radial tires run cooler when under load, are more flexible, and would be a smoother ride for your horses. Just make sure that you have the properly rated tire, and you will be good to go. I have included a link to one of our FAQ pages about tires for your reference.

Andy

3/28/2014

I think you should add another section on how to properly connect the emergency breakaway connection and the care of the breakaway battery. Other than that , it was a very good video.

Info for this part was:

Employee Joe V
Test Fit:
Joe V
Employee Patrick B
Test Fit:
Patrick B
Employee Rick A
Test Fit:
Rick A
Employee Matthew K
Test Fit:
Matthew K
Employee Cole B
Test Fit:
Cole B
Employee Randy B
Test Fit:
Randy B
Employee Andrew K
Video by:
Andrew K
Employee Patrick B
Video by:
Patrick B
Employee Adam E
Video by:
Adam E
Employee Jeff D
Installed by:
Jeff D
Employee Chris R
Installed by:
Chris R
Employee Jacob T
Video Edited:
Jacob T
Employee Kathleen M
Video Edited:
Kathleen M
Employee Sue W
Video Edited:
Sue W

At etrailer.com we provide the best information available about the products we sell. We take the quality of our information seriously so that you can get the right part the first time. Let us know if anything is missing or if you have any questions.


^
About Us
photos and videos
1,056,204
Original Photos & Videos

Produced to make sure you know what you are getting and you get exactly what you need.

installations
35,570
Installations Completed

To make sure products work and fit the way they are supposed to.

etrailer call center
2,476,511
Phone Calls & Emails Answered

1,125,924 phone calls and 1,350,587 emails to help find the right solution.

etrailer training
400+
Average Hours of Product Training

We get to know our products firsthand so experts can better help you.

etrailer service
77
Years of Quality Customer Service

Assisting our neighbors and customers, face to face at the counter.

etrailer experts
193,357
Pages of Expert Information

Created to make sure you have all the answers to your questions, from real experts.