


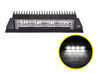
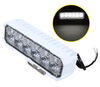
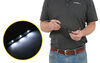
6-3/16" x 3" Rectangular, heavy-duty work light with 6 LEDs produces a bright white flood beam to illuminate a wide area. Powder coated white aluminum housing resists impact and corrosion. Pedestal-mount bracket and hardware included.
Features:
Specs:
California residents: click here
Videos are provided as a guide only. Refer to manufacturer installation instructions and specs for complete information.
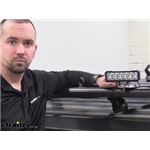
Hello our buddies, this is Jeff for the etrailer.com Today we are gonna take a look at this technique, White aluminum steel head LED flood beam work light. Has a 1900 lumen output. Now this is a nice rectangular LED work light provides a nice bright white light for industrial agricultural and even recreation applications. It does give off a flood beam, which will illuminate a nice wide area. So it is great for work trucks, utility vehicles and fishing boats. It does use a nice clear lens over six wide LEDs.
And the LEDs, they use a premium LEDs which are energy efficient, long lasting and vibration resistant. They are desi. are rated for up to 50,000 hours of operation. Now at the end of this video, I am going to hook this up to some 12 volt power to show how bright the light is. But first I want to go over some features on it.
It does use a military grade construction of the circuit board. Uses urethane potting, which offers better protection in common epoxy potting. Does use thermal regulation to protect against overheating. And if you can see it's a nice durable white powder coat, aluminum housing to resist corrosion, and it uses a sealed waterproof housing and lens unit. It has a very easy installation.
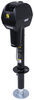
You can see it say single bolt, pedestal style bracket using stainless steel hardware for installation. And as you can notice, it is an adjustable bracket. So basically when you install this, it'll let you adjust the angle of the light as needed, and then you can tighten it down. It does hard wire to your application. You can see the two wire pigtail right here has a power and a ground wire.
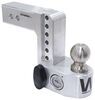
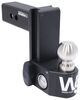
The wire length is about nine inches. It says compatible with 12 volt and 24 volt DC systems. Give you a few dimensions on this. The overall length on into the other is right at 6 and 3/16th inches long, the overall height, and we're gonna to include the mounting bracket. So from the mounting bracket to the top of the light coming right about three inches tall. And then the total depth from the front to the very back it's coming right at two inches deep. The light output is 1900 lumens. The power draw at 12 volts is 1.2 Amps. And at 24 volts is 0.6 Amps. So what we're going to do is go ahead and hook this up to some power. And we'll turn off the overhead lights. Just to give you an idea. now that we got it hooked up, turn ON the power. Anyway, the power ON you can see how bright the light is. As I mentioned, we'll turn off the overhead lights. And you can see with the lights off how it's a wide flood beam, very bright six LED light. And I am gonna do is zoom out so you can see at a distance how much it lights, So. Lights up the area, put it up on the back wall there. We'll go ahead and turn back on overhead lights. And go ahead and turn off the power, but that should do it for the review on this technique, White aluminum steel head LED flood beam work light with the 1900 lumen output..

Fast service great product
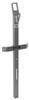
Have not installed yet, but I think it will as a flag light.
Very nice product thanks
Info for this part was:
At etrailer we provide the best information available about the products we sell. We take the quality of our information seriously so that you can get the right part the first time. Let us know if anything is missing or if you have any questions.


Thank you! Your comment has been submitted successfully. You should be able to view your question/comment here within a few days.
Error submitting comment. Please try again momentarily.