
To see if this custom-fit item will work for you please tell us what vehicle you'll use it with.
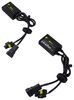
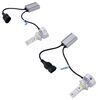
Get increased visibility and range from your high beams with these powerful 9005 single-beam LED headlight bulbs. Xtreme series bulbs feature automotive-grade LED chips that are 5 times brighter than halogen bulbs. Plug-and-play installation.
Features:
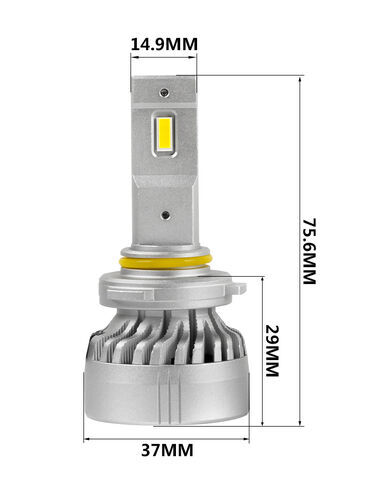
Specs:
Lumens are used to measure the amount of usable light that is put out by a light source. Raw lumens represent the number of lumens that the manufacturer claims the LEDs are capable of producing. It does not include the light's drive method or the amount of light lost from the lens or reflector. Effective lumens take these factors into account and represent the number of lumens that are actually produced by the complete light assembly, not just the amount of light that the diodes are capable of producing. Stable lumens builds off the idea of effective lumens by measuring the amount of light produced after 30 minutes of usage, or once the diodes have reached their average operating temperature. These bulbs have a 5,000 raw lumen capacity per bulb and produce 4,565 effective lumens per bulb. The stable lumen capacity per bulb is 4,033 lumens.

Videos are provided as a guide only. Refer to manufacturer installation instructions and specs for complete information.
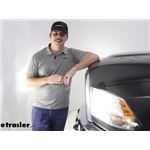
Hi everyone. Aiden here with etrailer. Today we're taking a look at the ARC LED headlight bulbs on our 2014 Ram 2500. He's gonna be utilizing the 9005 connector type. So on our RAM today that's going to be for the high beams down here. You wanna make sure you pick up the right bulb for the right side because it is going to be a different connector type for that low beam versus the high beam.
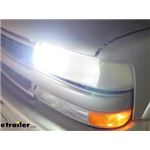
So these are gonna be the look at and installation of those high beams. Let's check it out. And with the two lights side by side we've got our aftermarket one installed closest to me and then we've got the factory one on the side closest to the camera over there. Now I might be a little bit hard to kind of see it on camera. We are sitting very close to the wall so the actual output pattern isn't the greatest but we can definitely tell a difference in overall brightness.
The aftermarket one being much brighter and the color temperature. While we have a more warm yellowy look on the factory side we do have a really nice, crisp, cool white here on the passenger side where the aftermarket light is. I think it's a lot nicer to look at and it's gonna give you much better visibility going down the road. And even in this spot it's kind of overpowering the low beam a bit. So if you're looking for better output for your high beams this is definitely gonna give you that.
So the big thing here is going to be the increased output. The LEDs have an effective lumen rating of 4,565. After about 30 minutes of use though those lights are gonna heat up and dim down a little bit. Totally normal for LEDs, but that effective kind of stabilized lumen rating is gonna be 4,033. But regardless, it is still gonna be much brighter than the factory bulbs that we had in here and give a much nicer color temperature at a 6500K color temperature which is more of a pure cool white.
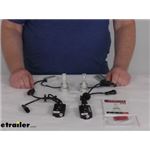
So when upgrading your headlights to LED there's a couple things you might run into. Because LEDs have such a low power draw compared to the halogen lights they can sometimes have flickering issues or the vehicle might not even register that there's headlights on because they are drawing such little power. This does come with an anti flicker harness. It's gonna plug in line with those lights. It's a whole plug and play system, so it's really easy to do and it's gonna make sure that everything's working properly. There's no flickering and the headlights work like they should. The other thing is that sometimes the dials don't quite align well with the reflector housing. So to ensure that these work properly and fit to that reflector housing, you can rotate the light in there and rotate the collar to make sure it lines up right. We'll go over that process and the install but it is pretty simple to do and that makes sure that our beam pattern is as it should be. Speaking of that install process, let's go through it now. The big things you need to watch out for are the fact that we need to get the grill removed, which isn't too bad it's only a few pieces of hardware. And then for the actual headlight housing you will need some sort of sealant because you do need to cut a hole. That anti flicker harness does add quite a bit of bulk to the light, so we do need to run some wires out and make sure everything inside is sealed up. But the process isn't too bad. Just follow along and see how we did it. We'll start off the installation inside the engine bay. There's a few things we need to do to get to the back of the headlight housing, like removing the grill. To start that process we're gonna remove this plastic panel from the top. There's four plastic push pins one there, there, there, and there. It's symmetrical. So these two are the same on the other side. And let's use a trim panel tool to pop those up and remove the plastic panel. They may be a little bit tricky to get up depending on if you've ever removed them before or not. And sometimes getting a different trim panel tool can help. This one is probably the best for these ones cause it wraps around it and gets you pretty good leverage. But we'll go around do that for the remaining three push pins. Once those are all popped up we can remove the panel, set it to the side and now we're gonna have some bolts to remove. It's gonna be a 10 mil socket that we use. There's gonna be four bolts, one here, here and then same on the other side but mirrored, here and here. We'll get those removed now. And once the screws are all off you can remove the grill just watching out for the clicks at the base and the sides of the grill making sure those release properly. And then set this to the side. With the grill out of place you can remove the headlight housing. It's gonna be easier to get the connectors back there. And to do that we'll use our 10 millimeter socket to remove one screw up top, one screw down at the bottom, and then another one right here that you'll probably need to use a wrench for or a socket with an extension. We'll have one final connection in the back that we'll touch on in just a second. But get these screws removed first and set them aside somewhere safe. So in the fender liner directly behind the headlight you're gonna have this door, open that up and deep inside there's going to be a white tab. I don't know if we'll be able to get it on camera but basically what you want to do with that tab is pull it down. So I'm gonna reach in and feel around for it and once I find it, I can just push down and that will release the back of the headlight. So you can probably hear that click on the microphone I'll maybe see if I can pop it up back down again. So all I'm doing is taking two fingers and just pushing straight down. There's a lip on that tab. And from there the headlight should be released. It should hold itself in right now. But I'm gonna grab a cart with a towel down so that we don't scratch the outer lens of the headlight and then just pull this out from the vehicle. So you will have to give it a bit of a tug just to release that tab in the back to just pull straight out. And this bit right here should release itself from this white plastic lip that we we're on earlier. From here if you want to, you can remove some of these push pins here just to give yourself a little more room with the wires. And then I'm going to put it on the cart with some assistance from my cameraman, John. Thank you. Then we can get the back of the headlight housing opened up. We know that right here is the top, right here is the bottom. The top hole right here is gonna be for our low beam. That's the connector right in there. That's not the one we're using today. They are different connector types. So if you are looking for the low beam option make sure you get the right kit for you. That's the H11 connector type. The high beam down at the bottom is the 9005 connector type and they look very similar, that 9005, the metal pins are gonna be a little bit wider apart and there's no tab in the middle. The H11, it's gonna be closer together with the pins and have a small plastic tab in the middle. So they are different. We'll start by getting the old one removed just giving it a twist to the left pulling it straight out and lifting up on the locking tab to release the old headlight. Just like that. We'll set the old one to the side. And now the things we need to take note of is the fact that we've got our headlight but then we also have the anti flicker harness. So this module box is actually gonna go outside of the headlight housing. So we're gonna need to drill a hole in the back of the cap for this dust cap to sit on. And all of our connections, the headlight and the box for the headlight are all gonna be inside the headlight housing with it. Before we get to any of that though I'm gonna actually just put in the headlight and see how it's fitting in. So you just insert it, twist it to the right to lock it. And then I'm gonna flip up the headlight housing. So the thing I wanna look for is actually on the inside. You can see that LED in the very bottom there and it's running horizontally, which means that the LEDs the actual diodes are pointing straight up and straight down. That's not what we want. To make it work properly with the reflector housing, we want them pointing perfectly to the left and right. So we do need to make some adjustments to this before we get everything installed and start cutting holes. So your kit's gonna come with a tiny little Allen wrench when you do that right on the side with the cord that's going to be where our set screw is. Loosen up the set screw and take note of where the collar is with the locking tabs. So I need to loosen that up just a bit more and rotate this around a full 90 degrees. So I'm gonna get it set where it's pretty much in line with the diode there and tighten it down. I always like to go back through, reinsert it into the headlight housing and double check to make sure it's fitting properly. And with that collar rotated, you can see that that light is facing up and down. It's honestly maybe a little bit crooked but ever so slightly. So I'll probably go back through and just make some very minor adjustments to get it as straight as possible. But that's about what it should be looking like. So the next step is drilling out our cap so that we can have these connectors run through to the inside of the headlight housing and leave this gasket on the outside to help seal it back up so that no moisture gets in. So you wanna grab a drill bit that's sized just a bit smaller than this part of the gasket right here. We want it to fit pretty snugly. So when you do that, we're gonna go for the middle of the cap. So I'm just gonna kind of set it on the cart here and start right there. With the whole drilled out the next thing you're probably gonna run into is the fact that the connectors don't actually fit through here. So what we're gonna do is actually take a burr bit and just widen it out a little bit since these are oval shaped just enough. So we're gonna go pretty slowly, go back and forth and try to make sure that we get it just wide enough to fit the widest connector through. Once it's wide enough that we can get the larger connector through. Can do that. And this one is a bit snug, but that's good. We don't want it to be any bigger than it really needs to be. Just like that. Pop the other one through as well. And then we can make our connections. So over towards the headlight housing remember we've got the headlight installed already. So we'll have this male end go to this female end, click together like that and then the female end on the anti flicker harness will go to the factory connector right here. Now when you're making these connections just make note of how you're connecting it. For example, on this side we've got a plus and a minus for positive and negative, but they are polarity sensitive so you may need to actually rotate that 180 degrees. What we're gonna do is just go ahead put the car in accessory mode and test out the light and make sure this is all working. If it's not, we can flip these connectors and then experiment to make sure we've got the right connection. So we've got our low beams on and then high beams are working. So everything's all set. And at this point we're ready to get everything put back into the headlight harness and we can make our silicone seal. With everything verified that it's working. We can do our silicone seal now. So I'm just gonna peel up the lip on both the inside of the cap and the outside and just put some silicone underneath to seal it up on both ends. So after we do this, we are gonna wanna let it sit for a bit, at least 15 to 20 minutes as per the instructions on the bottle here to let this set a bit. We don't want any sort of gaps to be forming. So after that time I'll check it and make sure that it's all setting well. It'll fully harden within 24 hours, but before we put anything back on and start messing with that connection we wanna make sure it's at least started to set. To verify that the silicone is dry enough to get it put back on. You can kind of give this a little bit of a tug. Nothing's pulling away from the cap. And everything around here looks pretty well sealed, both on the inside and the outside. So I'm gonna go ahead and just replug it back in and then verify that it turns on. After that, put everything inside, close the cap and reinstall the light. All this can go inside the headlight housing. Just being careful, to get it all to fit in there and not force it in along with our two ends that we plug together and secure it all with the cap, making sure that it fully sits down, twists and locks in right about there. Everything's looking good. And we can apply some double sided tape that's provided in the kit to the back of this and stick it up inside this cavity. Probably back here where it's gonna sit behind the headlight housing. So what I'm gonna do to put this back in is I'm just gonna set our box down right there while I put back in these connectors. Just to hold everything where it was and where we removed it. And then I can peel back the other side of the double sided tape. Might be kind of hard to see right now and I will set that up back behind where it'll be out of the way. Make sure it makes good connection. Kinda hold it there for a second to make sure it sticks. And once I'm happy with that, I'll put the headlight housing back into place. Making sure to push this tab into that white connector that we pushed down earlier. Right there. I felt it kind of push in so I can go back re-secure that and reinstall my screws. Once both sides are installed, all the headlight housings are reattached, you can put your grill back together the same way you took it apart. Overall the install process is a little bit more involved. You do have to cut that hole in the back of the cap for the headlight housing but really the biggest thing there is just making sure that you've got that silicone to get it sealed back up so that no moisture gets in and builds up on the inside. After that though, you're left with a much brighter high beam on your 2014 Ram 2500. Thanks for watching..
Average Customer Rating: 4.9 out of 5 stars (14 Customer Reviews)
Get increased visibility and range from your high beams with these powerful 9005 single-beam LED headlight bulbs. Xtreme series bulbs feature automotive-grade LED chips that are 5 times brighter than halogen bulbs. Plug-and-play installation.I received my new lights and thanks to you, everything fit and worked like a champ. My Toyota 4-Runner looks great. I can't thank you enough for all your help and professionalism!
Bulbs are awesome! No flicker and extremely bright!
all good
So I bought these a year and a half ago. These are the sh*t! Nice and bright with a good beam pattern. Just make sure you have a idea to cable manage with both harness with this package. It was plug n play on my 2004 Tacoma Xrta cab. Bite the bullet on the price and get them. Also so people don’t flash you every 2 seconds angle your lights a little lower. Don’t be a weenier with stupid bright lights blinding old lady’s.
Great lights. I have tried the cheap ones with no luck. These are the best by far.
Everything from placing the order delivered on time and they work thanks e trailer
Good product, quality appears to be good. I’ve had the bulbs installed for three days now and I am pleased. I would buy these again. The only reason I did not rated this five star is I was hoping for something a little brighter.

The system works great and improves my night driving visibility for my jeep. Good instructions on the install and a fairly easy process as well.
Your service is unbelievable. I tell all of my RV friends how great it is buying from Etrailer
Info for this part was:
At etrailer.com we provide the best information available about the products we sell. We take the quality of our information seriously so that you can get the right part the first time. Let us know if anything is missing or if you have any questions.


Thank you! Your comment has been submitted successfully. You should be able to view your question/comment here within a few days.
Error submitting comment. Please try again momentarily.