
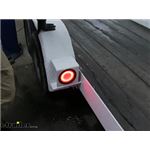
This red and white GloLight is bright, easy to see, waterproof, and just looks cool. The outer ring is a tail light, the center a turn signal, and both are a brake light. Mounts in cutout with grommet (sold separately) and works with 3-prong plugs.
Features:
Specs:
This GloLight has a standard 3-prong plug that connects to your vehicle or trailer with a PL-3 pigtail adapter. Pick up the right-angle pigtail (A47PB - sold separately) or the straight pigtail (A45PB - sold separately) if you don't have one already.
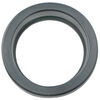
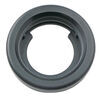
This light installs in a grommet (A45GB - sold separately) and requires cutting a hole into your trailer if it doesn't already have one.
If you'd rather not cut a hole in your trailer, you can use an optional mounting bracket (BK45BB - sold separately) instead. You will still need the A45GB grommet.
California residents: click here
Videos are provided as a guide only. Refer to manufacturer installation instructions and specs for complete information.
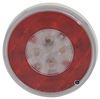
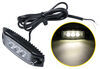
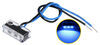
Today, we're going to be taking a look at and showing you how to install the GloLight LED trailer tail light with the clear lens.What sets this light apart from many of the others is its running light. As you can see, it has that circular halo design, and puts out a pretty good amount of light. Now, when you hit the brake lights, it really makes a difference in how bright it is, to let others know that you're applying the brakes. Same thing with the blinker. As you can tell, it's nice and bright.Another thing that separates this light from many of the others is its clear lens. In my opinion, when the light's not in use, it just gives off a little more of a clean look.
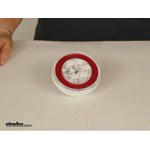
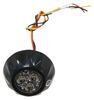
The light is going to have 21 diodes. Its power draw at 12.8 volts, to run the tail light, it's going to take .145 amps; and for your stop and turn, it's only going to use .375 amps. Now that's good, because it'll give you plenty of power to run all your other lights that you might have.This light is sonically sealed, which means it is submersible, however I don't recommend submersing it for any length of time or when you have power to the light.One thing I really like about this light is that it's LED, which that means it's going to be a lot stronger, brighter, and last a lot longer than your traditional style incandescent light, which means it'll be a great replacement or even an upgrade for it.Here on the backside of the light, you can see we have our three connection points. They are going to come covered in dielectric grease, so you don't have to worry about that during your install. Each one actually has a description of what each contact point does.I'll show you just how easy it is to get our light installed.
Just take our connector, feed it through the hole. Just plug it in. Sometimes these lights can be a really tight fit, so if you need to use some silicone spray or even some soapy water to help assist you getting it in, you can do that. Start at the top, put it in first. You'll feel it seat all the way down into the grommet.
It's just that easy. All right, now we'll go ahead and put some power to the light, and make sure it works. If you bought more than one of these lights, you go ahead and repeat the same process on the other side.That'll do it for our look at and installation of the GloLight LED trailer tail light with the clear lens.

Do you have a question about this Trailer Light?
Info for this part was:
At etrailer.com we provide the best information available about the products we sell. We take the quality of our information seriously so that you can get the right part the first time. Let us know if anything is missing or if you have any questions.


Thank you! Your comment has been submitted successfully. You should be able to view your question/comment here within a few days.
Error submitting comment. Please try again momentarily.