
 Product Experts Available Now!
Call 1-800-940-8924


To see if this custom-fit item will work for you please tell us what vehicle you'll use it with.


Thank you! Your comment has been submitted successfully. You should be able to view your question/comment here within a few days.
Error submitting comment. Please try again momentarily.


This hitch is built for real use, not just light hauling. Rated for 3,500 lbs maximum gross trailer weight and 350 lbs of tongue weight, it’s ready for small campers, boats, or utility trailers. When paired with a weight distribution setup, the capacity jumps to 5,000 lbs GTW and 500 lbs TW. The standard 2" x 2" receiver works with most bike racks, cargo carriers, and ball mounts you’ll find on the market, so you can easily switch between towing and gear hauling without adapters.
You don’t need a lift or a shop to get this one installed. The hitch bolts directly to the frame using the included hardware kit—no welding required. The precision, robotic welding ensures it lines up cleanly with factory holes, so you won’t be struggling to make things fit. It’s the kind of project that can be tackled right in your driveway with basic tools and a bit of time.
The sturdy, square-tube design and powder coated steel construction give this hitch its strength and corrosion resistance. A gloss black powder coat finish is applied over a protective base coat to guard against rust and road wear. It’s a heavy-duty piece that holds up through years of towing, rain, salt, and sun without flaking or fading.
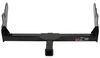
The concealed cross tube keeps most of the hitch tucked out of sight under the vehicle. Only the receiver opening is visible, giving it a clean appearance that blends in rather than standing out. You get all the utility of a full-strength hitch with a look that stays neat and unobtrusive when not in use.

Videos are provided as a guide only. Refer to manufacturer installation instructions and specs for complete information.
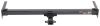
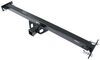
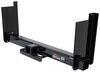
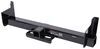
Today on our 2005 Ford Freestar we're going to be installing the CURT 2" receiver tube hitch, part number C13587. Here's what our hitch will look like once it's installed. Next I'll give you a couple measurements to assist you with selecting accessories for your new hitch. From the center of the hitch pinhole to the outermost edge of the bumper is 4-1/4". From the top of the receiver tube opening to the ground is 12-1/4". This will assist you with selecting accessories such as a ball mount, bike rack, or cargo carrier.
We'll now go ahead and with the installation. Now to begin our install we'll first need to lower the exhaust. The lower the exhaust we'll remove the rubber isolator from the metal hanger. To make it easier to remove we're going to hit it with some spray lubricant and then use a pry bar or pliers to remove the rubber isolator from the metal hanger. Once we have that off we'll be able to pull the exhaust down enough that we can get the hitch in place. Next, using an extra set of hands we're going to want to put the hitch up into position to make sure all our attachment points line up. There are a total of six attachment points, three on each side.
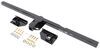
These attachment points are either slots or pre-drilled holes in the frame by the manufacturer. The forward and bottom attachment point is going to be this oval slot here that will get the large spacer block, a 1/2" carriage bolt, and a 1/2" flange nut. Then the side frame attachment points, there will be two of them. The forward one here will get the narrow spacer block with one of the shorter 1/2" carriage bolts and the same 1/2" flange nut. Then the rear attachment point, which is also in the side, is going to get the wide but shorter spacer block, a shorter carriage bolt, and then the flange nut. Now to assist in getting our hardware in the frame we're going to use the 1/2" bolt leader that's provided with the install kit.
Now before we attempt to install the hitch we're going to go ahead and look at the side attachment points. Here you can see where the metal overlaps but there's plenty of room that we'll easily be able to install our fastener. Here where the sheet metal overlaps, if the hole isn't large enough you may need to ream it out to make it a little easier to get the hardware in place. We're just going to use our file bit to open it up a little bit where the sheet metal overlaps. As you can see, the round file bit on the drill will make quick work of the overlapping sheet metal to enlarge to hole enough to get our hardware in place. Now once we have enough clearance for all our hardware we're ready to start putting it in place.
We're going to take the 1/2" bolt leader, go through the bottom frame attachment point, and out the large access hole. There we'll take the large spacer block and the longer carriage bolt, thread it onto the pull wire, feed the block and then the bolt into the frame, and pull them into position. Once in place I'll go ahead and remove the bolt leader and repeat the same process on the other side, because as we stated earlier, the attachment point are the same on each side so each process we do here on the driver side will get repeated identically on the passenger side. We're now ready to go ahead and put our hitch in place. It's a good idea to get an extra set of hands to help you hold the hitch while you install the fasteners. We're going to feed the passenger side up over the exhaust first and then bring our hitch up to the frame and install our flange nut to help hold it in place. We'll install our flange nut here to the bottom frame attachment point finger tight to help hold it in place. Now with our hitch held in place we'll go ahead and take our bolt leader, feed it through the attachment point, and out the same access slot. For the forward side attachment point we're using the narrow spacer block and shorter carriage bolt. We'll again feed them into the frame separately and pull them into place. Once in place we'll go ahead and remove the bolt leader and install the flange nut. We're going to install each fastener finger tight until we have them all in place. Now with all our fasteners installed and secured here on the driver side we'll repeat the same process on the passenger side. Now once we have all the hardware installed we'll go ahead and tighten it down and torque to specifications as indicated in the instructions. Now with the hitch secured and torqued to specification we'll go ahead and reinstall the exhaust. Once we have the hanger back in place that will complete the install of our CURT hitch, part number C13587, on our 2005 Ford Freestar. .
Customer Satisfaction Score:
91% were satisfied with this product
9% of customers were not satisfied
Ratings & Reviews


Jason, C.

3/31/2023
The hitch has been working well. No problems, high quality, durable. I have no complaints.
Jim J.
6/17/2016
Yes all is well with the hitch! Your spring bolt holder is a work of genius!Thanx,


Mike L.
10/6/2018
According to the owners manual for your vehicle, the 2004 Freestar can tow 2000 lbs, or up to 3500 lbs if equipped with the factory tow package. As long as the underside of the vehicle where the hitch would attach is still structurally sound not excessively corrosioded, theres no reason why the hitch could not be installed. Most folks with basic hand tools can accomplish the installation on their own. Ill link you to an install video you can watch to see if its something youd feel comfortable tackling on your own.
Helpful Links
Mike L.
10/1/2018
In some instances, if the hitch holes dont match up with the holes in the vehicle body, the holes might need to be enlarged. Ill have the notation about no drilling required removed.

Greg
8/2/2024
I use this hitch on a Mercury Monterey minivan. No issues after a year. Great product!
Do you have a question about this Trailer Hitch?
Info for this part was:
At etrailer we provide the best information available about the products we sell. We take the quality of our information seriously so that you can get the right part the first time. Let us know if anything is missing or if you have any questions.
























Larry
8/14/2020
Still working perfectly. Thanks for a great product at a good price!!