
Curt Trailer Hitch Receiver - Custom Fit - Class II - 1-1/4"


To see if this custom-fit item will work for you please tell us what vehicle you'll use it with.


Thank you! Your comment has been submitted successfully. You should be able to view your question/comment here within a few days.
Error submitting comment. Please try again momentarily.


This hitch is built for the kind of towing most people actually do—small campers, boats, and utility trailers. With a 3,500-lb gross trailer weight rating and 350-lb tongue weight rating, it’s a solid match for light and moderate jobs. The 1-1/4" x 1-1/4" receiver gives you the flexibility to attach bike racks, cargo carriers, or ball mounts for weekend trips and everyday hauling.
No welding or fabrication is needed here. The hitch uses a bolt-on installation that lines up with your vehicle’s factory attachment points. Everything necessary comes in the box—complete hardware kit and step-by-step instructions—so you can mount it using the tools most folks already have in the garage.
The fully welded steel construction is finished with a gloss black powder coat laid over a protective base coat to resist rust and wear. The round-tube design keeps the look clean and consistent under the bumper instead of bulky or industrial. It’s strong enough for regular use and built to handle years of road grime and weather without losing its shine.
The 1-1/4" receiver opening is compatible with common Class II accessories, so adding a cargo tray or bike rack is straightforward. Drawbar, pin, and clip are sold separately, letting you choose exactly what you need for your gear setup. Whether it’s moving tools, luggage, or bikes, this hitch gives you the versatility to carry more without taking up space inside your vehicle.

Videos are provided as a guide only. Refer to manufacturer installation instructions and specs for complete information.
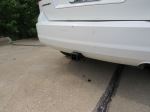
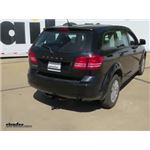
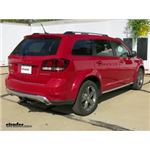
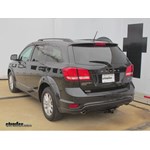
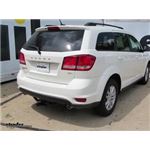
Today on our 2012 Dodge Journey we're going to review and install the CURT class two 1-1/4" receiver tube hitch, part number C12134. Here's what our hitch is going to look like once installed. As you can see, hangs down below the rear fascia. It's got a nice round crosstube design and a fully welded steel construction, which chain hold downs on either side of our receiver tube. Going all the way through our receiver tube is also a pre-drilled 1/2" hole for your hitch pin. Then we've got a 1-1/4" by 1-1/4" receiver tube for this class two hitch.
The hitch is capable of up to 350 tons of tongue weight and a 3,500 pound tow capacity. Next we'll give you a couple measurements to assist you with selecting accessories for your new hitch. From the center of the hitch pinhole to the outermost edge of the bumper is 2-3/4". From the top of the receiver tube opening down to the ground is 12-3/4". This will assist you with selecting accessories such as a ball mount, bike rack, or cargo carrier. We'll now go ahead and show you the minimum tools required for installing the hitch. We're going to have our safety strap for tightening them down, our 3/4" socket, our torque wrench, pry bar, and our spray lubricant.
To begin our install we first need to lower the exhaust. To safely lower the weight of the exhaust we're going to put a safety strap underneath. This will help support the weight. Next we're going to remove the ground strap that runs from the frame to the exhaust hanger. Now to remove the ground strap we'll just push the clip off of the metal hanger. Now to lower the exhaust we need to remove the rubber isolators from the metal hanger.
We have two here above the muffler and one just behind the rear axle in front of the muffler. Note, on vehicles equipped with dual muffler systems you'll need to do this on both sides. Now to remove the rubber isolators from the metal hangers we're going to spray each one with a spray lubricant and then use our pry bar or pliers to remove it. Now with the hangers remembered we can use the safety strap to safely lower the weight of the exhaust. Now that we have both frame rails exposed, let's go ahead and point out the attachment points. Our hitch is going to have a total of six attachment points, three on each side.
Our hardware and attachment points are identical so each process we do here on one side we'll repeat identically on the opposite side. Starting here at the frame, there's two pre-drilled holes towards the end of the frame. These pre-drilled holes will be our forward and center attachment points. Then inside the bumper structure will be our rear attachment point. Starting with the forward two fasteners, we'll secure the hitch with a 1/2" carriage bolt and spacer block. The carriage bolt and spacer block will get fed into the frame and down through the pre-drilled hole, and then we'll secure the hitch with a 1/2" flange nut. To get our hardware into the frame we'll use the 1/2" bolt leader supplied with the install kit. Starting with my forward attachment point, I'll take the bolt leader, feed it in and out through the end of the frame. Then I can slide on the block and thread on the carriage bolt. We'll feed them into the frame separately and pull them into position. Go ahead and remove the bolt leader and repeat the same process with the center attachment point. Now I'll go ahead and leave the bolt leader attached as it will assist with getting our hitch into position without pushing the hardware back into the frame. Now for our rear attachment hardware it will be the same 1/2" bolt, but a larger spacer block. We can go ahead and engage the two and then feed them into the end of the frame and into place. Now with all our hardware in place here on the driver side, we'll repeat the same process on the passenger side. Now before we install the hitch we're going to add a wedge block. The wedge block's going to have a thick and a thin side. The thicker side will face the rear of the vehicle. Now to help hold it in place so we don't have to worry about trying to get it in there while we're installing the hitch, we're just going to tape the wedge block over the attachment point and then our carriage bolt will drop down through it. Using some black electrical tape holds our wedge block in place. We're now ready to put our hitch in place. It's a good idea to get an extra set of hands to help you hold the hitch while you install your fasteners. We'll bring the hitch up to the frame and feed our pull wire through the center attachment point. Then we can install our flange nuts. Be careful as you put your hitch in place not to push the hardware into the frame. Now with our flange nut in place holding the hitch, we'll go ahead and remove our pull wire and install the center and rear fasteners. Keep in mind as we install our fasteners we'll install each one finger tight until we have them all in place. Now we can go ahead and tighten it down. Next we'll torque to specifications as indicated in the instructions. Now with our hitch tightened down and torqued to specifications, we'll go ahead and reinstall the exhaust. As we reinstall the exhaust hangers, we'll also make sure we put our ground strap back onto the metal hanger of the muffler. Once we have the exhaust back in position, we'll go ahead and remove our safety strap. Just like that, our hitch is installed and we're ready to hit the road. There you have it for the review and install of the CURT class two 1-1/4" receiver tube hitch, part number C12134, on our 2012 Dodge Journey. .
Customer Satisfaction Score:
83% were satisfied with this product
17% of customers were not satisfied
Ratings & Reviews


Brian G.

4/3/2020
Perfect fit and easy to install. All necessary was included. Good instructions. Great product.
Charlie S.
3/16/2020
Works greatThank you nice to have small hitches

Do you have a question about this Trailer Hitch?
Info for this part was:
At etrailer we provide the best information available about the products we sell. We take the quality of our information seriously so that you can get the right part the first time. Let us know if anything is missing or if you have any questions.

































Ken J.
2/13/2021
I use this hitch with great confidence, it’s solid and no problem with pulling either of my trailers. Number one in my book.