

To see if this custom-fit item will work for you please tell us what vehicle you'll use it with.


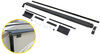
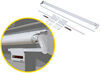
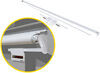
The Lorado roll-up tonneau has all the bells and whistles plus a low profile - it sits only 1" above your vehicle's bed. Features include an XT-Dial, Element weather seal, AutoLatch II, deluxe storage straps and the Access Slantback design.
Features:
The Lorado tonneau combines all the premium features of the original Access cover with a lower-profile design. This truck-bed cover rolls up so that you can haul bulky items and rolls down to shield and secure your vehicle's bed and cargo. The custom-fit cover sits only 1 inch above your truck box and keeps air from getting caught by the tailgate, thus reducing drag. That can improve your gas mileage by up to 10 percent. And the exclusive Access Slantback fit angles toward your tailgate to give your truck a stylish, streamlined look.
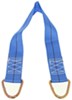
Velcro closures on the sides help seal the cover to your truck box and let you peel the cover back quickly for loading. The tonneau stores neatly behind your cab, secured by premium storage straps that are designed to keep your cover from rubbing against the cab.
The cover is constructed of double coated, reinforced UV-blocking vinyl, so it won't fade in the hot sun. The material stays flexible down to -40 F and won't shrink, regardless of the temperature. Black powder coated aluminum bows under the cover act as ribbing to support your tonneau and make it easy to roll up.
Customize the cover tension by simply turning the XT-Dial easy-grip tension adjuster at the front of the cover, near your cab. The Element weather seal at the cab end and a reinforced vinyl flap at the tailgate help to keep out dirt, rain, snow and ice.
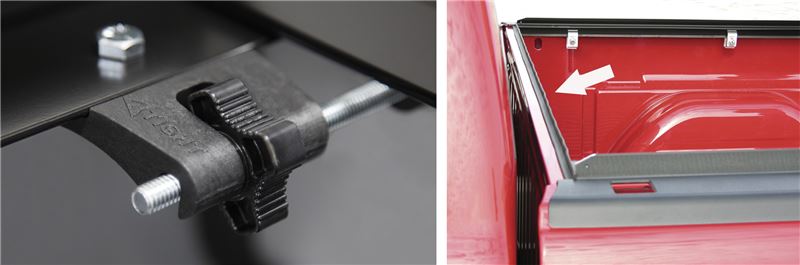
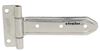
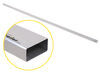
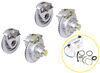
The contoured, black powder coated aluminum tonneau rails resist rust. They sit inside your truck-bed rails so that you can still use stake-pocket-mounted accessories, such as ladder racks and tie-down anchors. Easily install the rails on a truck with an under-the-rail, drop-in bed liner. Over-the-rail liners can be cut to allow room for the installation clamps. The tonneau's rails attach easily to your truck-bed side rails using Tight Bite clamps. The specially designed teeth on these clamps seize the integrated ridges in the rails, ensuring a firm grip. See the supplemental instruction sheet for a truck with a utility rail system.
Once the tonneau cover is unrolled and in place, the AutoLatch II dual locking system automatically engages 2 locks - 1 on each side - to hold the tonneau closed. And locking the cover won't interfere with your tailgate - open and close it as usual or add a tailgate lock (sold separately) to get secure storage for your cargo. To unlatch the cover, simply pull the cord for easy, one-hand operation. Cover your assets with this tonneau from Access.

California residents: click here
Videos are provided as a guide only. Refer to manufacturer installation instructions and specs for complete information.
Hi, this is Scott with etrailer. And today we're taking a look at our ACCESS LORADO tonneau cover for our 2017 Chevrolet Colorado. A tonneau cover is gonna give you a little bit more security and kind of keep prying eyes out of things that you have in the back of your truck. Say, you go to the store and you gotta put a bunch of stuff in the back of your truck and you don't have a tonneau cover. Anybody walking by can see all the stuff that you have in there, like when you're in the store, maybe you're going to a couple stores that day. They're really nice for giving you a little bit of security.
This one here is also gonna help keep a lot of the weather out. Say, you carry your camping gear and you leave a bunch of it in your truck. This is gonna help keep a bunch of that stuff dry for you. Something like this is really nice for in the future if you plan on getting any kind of ladder racks for on the side, this one will allow for that just by its design. See if you could see, if you look down the side, it gives you enough room to where a ladder rack can still sit on the top of your bed protectors here.
So, it's really nice and it's still gonna allow your tonneau cover to roll up with your ladder racks in place. Being that this is a vinyl cover, one thing about 'em though is it is gonna keep things out of sight, out of mind, but these can be cut into. So, it kinda limits the security a little bit. So, if anybody wanted to get in here, they really could with just cutting into it. There are other options available that up the security that have aluminum plates in them that roll up as well.
There's also the type that are the canister style that roll up and roll back into a canister. But with this being a five-foot bed, this is probably one of your best options because of the fact that it doesn't remove any of your bed space. So, when this rolls up, it's not gonna take up any more bed space in the floor of your bed. Another nice thing about this style is, like I said earlier, if you do plan on getting ladder racks, this will allow you to do that, where other styles will not. Another nice feature with this tonneau cover is if you have a locking tailgate.
When you have your tailgate locked, it essentially locks this in place so you can't get it open. In order to open it, you have to open up your tailgate, and you'll have a cord that you can pull and it'll flip open. And now you can rule your tonneau cover back. (tonneau cover screeching) It is going to have these bars down underneath of your tonneau cover, and that's gonna give you a little more support. (tonneau cover screeching) And once we get it to that point, it does have straps with it it so you can strap it in place. So, anytime you want to use your bed of your truck, you can just strap this up on both sides and you're good to go. And now that we have this rolled up, you can see that it doesn't cover any of the back of the window at all, where some of them, there'll be a folding style tonneau cover that fold up and they'll be sticking up and cover the entirety of the back window that you can't see out. So, this is a nice feature with this one that it rolls up out of the way and you can still see out the back of your window. As far as installation goes, it's pretty straightforward. There is gonna be a little adjustments you'll have to do, and there's three clamps on each side. And you just wanna pay attention to your instructions and make sure you have those the way that they're supposed to go on. Other than that, if you don't have time to do it yourself, you can always take a look at our dealer locator and you can get it done for you locally, or you can stick around and watch our video and we'll help you get it installed. To start our installation, we're gonna need to get our side rails in place. And to do that, we're gonna start out, we have shims that we need to get put in place. So, everywhere we're gonna put a clamp, we're gonna want to have a shim in behind our bed protector. The reason we're doing that is you can see, we get a little bit of movement when we push in on that. And once we get a shim behind it, what that's gonna do is toughen it up so we have a good area to clamp off of. So, we're gonna get these put in place. We will start with this back one here, and we'll show you how to get this one put on. We're gonna go right here. We're gonna have our clamp that goes in our bed pocket. So, what I'm gonna do is clean up right behind that. We're gonna have a shim that goes there. Just want to get that cleaned up. And along our side, we're gonna have another one that's gonna go right in this general location. So, I wanna get these cleaned up with alcohol. You can run all the way down it. Let's get that cleaned up. We'll let that dry up a little bit. To install our shims, we just want to get this protective coating off, and we have double-stick on the back. We're just gonna pull up. And one thing we want to do before we pull the sticky tape on these is you want to test fit it to make sure that you're not having any bulge. If you do have bulge, you're gonna need to move your shim down a little bit. For our middle clamp, we're gonna go right in the middle of our bed. It's gonna be between both of our clamps that are going here in here. So, we're gonna pick this location and we'll get 'em put in place. Okay. Now, we'll just get our rail held in place. and where we have our shims, that's where we're gonna put our clamps. We want our clamps orientated where they're opposite. You have the longer side and the shorter side, and we want the nut side out. (metal clacking) And just give it a little snug to hold it in place. Now, the front clamp, we're gonna do the same way as we did the middle one. The rear one's gonna be a little bit different. Right here in the side of your bed, you're gonna see there's a little rubber plug. We just wanna pop that out and clean up this area underneath of the hole we're gonna be using. And this is where our long clamp is going to be going. So, after we have that cleaned up, make sure it's nice and dry. We're gonna take our protective piece that is gonna go right underneath of that hole, right like so. Now we'll get it set up to install our clamp. Now for our long clamp, we're gonna want to use our bolt out of our clamp, and we're gonna use the fish wire that comes in the kit. We're gonna take our fish wire, run it up through the hole with the coil end first, and we'll take our clamp, and then we'll install our carriage bolt into the wire. Now, we can pull our clamp down, let it fall behind the bed protector, and then we can pull through our carriage bolt. (metal clacking) Now, if you can try and hold the back of the carriage bolt, remove your fish wire. (metal clacking) You want the shorter part of your clamp facing up, that positioned on your rail. (metal clacking) First, you can thread your nut on just a couple threads. (metal clacking) Then, you can get your clamp, put in place, and just bring it down finger tight. Now with our clamp in the position we want it at, we're just gonna snug it down. (ratchet cranking) After we snug it down, we wanna take a look down this part of our rail and make sure it's level, and we'll follow that procedure on the other side. On the back part of our rail, we want to clean up underneath of it with alcohol. And in our kit, we're gonna have a rubber seal. We're just gonna pull off the backing and push it up against the edge of our rail and just take our stickiness and stick it into place. Now that we have it in place, we can trim off this inside tab. And take a utility knife and go along the edge and along this backside. Now we'll install our rubber seal that goes along the back of our bulkhead. In your kit, you will have some alcohol wipes. So, you're just gonna wanna use that. I'm using a little bit of alcohol on a rag for this. You just want to get it good and cleaned up. So, our double stick tape will stick to the back of our bulkhead. Now, for your strip, you're gonna want to have it, so this little V, here's your your sticky part, you're gonna want that against this rail and as close to it as you can get. And then across. So, it's gonna pull off our red backing and just start working our way across. Wanna make sure we are snug up against the rail on this side as well. Just press it down along, make it stick well. Now we can trim off our extra. Get our cover assembly put in place. Just wanna make sure our aluminum part is gonna fit between our rails. Now with this part flipped up, we can see under here, we have square nuts down in this track. Just wanna get them where we can access those. Now for our mounts, our adjusters are gonna have an R and an L on those. The R is going to be for our passenger side. The L is going to be for the driver's side. In our kit, we're gonna have our long bolt and washers. We just want to take our long bolt and a washer. And we'll take our adjuster and pop it in the slot, line it up with the square nut and just get it finger tight. Now after we have both of those in place and able to slide back and forth, we want to flip this back over. And with this part, you're gonna have this piece of vinyl that sticks up on the front. We wanna make sure we roll this down and bring that back, like that. Now once we roll our cover back, we're gonna see where we can have holes on the ends of our rails. We're gonna wanna slide this over, get our adjuster lined up with that hole. (metal clacking) And you may have to push a little hard on the underneath of this to get it to pop into place. But once it does, just wanna make sure we have our hole lined up and we'll make sure we have lined up on both sides. Now, for our hardware in the kit, we'll take our short bolt, put that through our rail. We're gonna go with our washer and then a nut. Now we can just snug down our hardware. (ratchet cranking) Just a couple things we did notice after we got it all rolled out. Our cover is pretty tight. So, we did notice when we bring our tailgate up, it wants to make contact right there. Now, you can get it to close, if you pull it up just a squirt and get it to close that way. But we decided what we're gonna do is just adjust our rails up in the back just a little bit just to give us that little bit of clearance we need. This side seems to be okay, so we'll probably raise this side just a little bit and give that a shot. One more other thing we did notice is we noticed in the front that our vinyl kind of popped out. So, what I'm gonna do is once I roll this back up closed, I'm just gonna go along the back and just shove this back in where it's supposed to be. Just pull up on it a little bit and I'll tuck that back in along that backside. Once we have all our clamps in place and everything's adjusted where we want it, we'll come back through and we'll torque our clamps down to the specified torques listed in our instruction manual. (torque wrench cranking) (torque wrench beeping) With everything torqued down, we just wanted to show you a couple things. We do have tensioners on the front of our rails that we installed. And these are gonna be marked. You're gonna see on here where it says, "Tight," with an arrow. So, if you want to tighten it, you're gonna want to turn to the left. If you want to loosen it, you're gonna turn to the right. And we have those on both sides. We can get everything rolled out, make sure everything looks good. (tonneau cover thudding) And with everything looking good, that'll do it for a look at our ACCESS LORADO tonneau cover for our 2017 Chevy Colorado.
Ratings & Reviews

Installed easily and looks great
Great fit, easy to install!

So far it’s been great very easy install
easy to install fit the truck perfect. Stays tight. Happy with the product.
I cannot expect anything more than was advertised. I recommend this company to all my friends.
It was easy to install and stays tight. This is my second one. I had the other one 11 years and sold it with the truck
I love the cover. It is great for when we travel; keeps our things dry and safe. I have had no problems at all with the cover.
The product is just as good as day one that I have put it on. Item is perfect and has been through many storms and car washes and is holding up very well. great product. Thanks Joey
This is my 4th Access cover that I have bought. Each one is very good quality and super easy to install.
Great Tonneau, a lot like other manufactures. The release is accessible from all across the rear, not just on the sides.
Installed one year ago on my 2016 Ram 3500. Very satisfied with the tonneau.
Great product it holds its shape. I like the adjustment screws to tighten it also keeps my truck bed dry. Easy on easy off.
Excellent product. Had a few initial "install" issues that were handled in great fashion.
Good product,fair price,fast shipping
I ordered my tonneau cover and bike rack on July 3. I was supposed to receive the items by July 15, 2024. The bike rack was delivered early which was great. The tonneau cover did not arrive by July 15. Stacy from etrailer was responsive and helpful and said I would receive the tonneau cover on July 22, 2024. Received the cover on July 24, the necessary hardware for install was not included. Very frustrating and inconsistent service that just drags out, will not use this company again.
Easy installation. Durable. And still looks great after a year.
This is the 2nd Access cover I have owned. Outstanding quality, never leaked in the rain, even when I was living in Wisconsin.
Info for this part was:
At etrailer we provide the best information available about the products we sell. We take the quality of our information seriously so that you can get the right part the first time. Let us know if anything is missing or if you have any questions.


Thank you! Your comment has been submitted successfully. You should be able to view your question/comment here within a few days.
Error submitting comment. Please try again momentarily.