
To see if this custom-fit item will work for you please tell us what vehicle you'll use it with.
Just make connections and drive - chains will automatically align and tension. Lightweight chains are quick and easy to install. Provides consistent traction and a smooth ride when driving in snow and on light ice.
Features:
Specs:
Note: To determine whether you can use snow chains on your vehicle, or if they might affect your ABS/EPS functionality, consult your owner's manual.
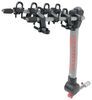
The Konig CG-9 tire chains are great all-purpose, winter weather chains. If you live in an area where you're likely to get periodic snow and ice, these Konig chains are perfect because they're durable, easy to mount, and give you constant traction - and they're lightweight and compact, so they store in your vehicle nicely too. If you're more likely to see seriously icy conditions, you may want a chain with V-bar links that can really bite into the ice to give you maximum traction.
These chains are among the easiest and fastest to install because they self-tension and self-center as you drive, ensuring a perfect fit, no matter the profile or wear pattern of your tire. Plus, you only have to get out of your vehicle one time - once they're installed, there's no need to drive forward, stop, and recheck their tension.
SAE Class S tire chains are designed for use on passenger vehicles with restricted wheel-well clearance. Most newer cars, vans, and small trucks - especially those with large aftermarket tires - will require Class S chains. If you're unsure about the class of your vehicle, consult your vehicle's owner's manual.
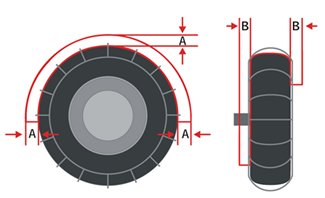
These chains will fit your tires provided there is both:
If you know your tire size, you may think you won't need to test fit your new chains. But there are a lot of variables that can affect whether chains will fit your specific tires, including your tire type, the amount of air pressure in the tire, the amount of tread wear, and the tire manufacturer. You'll also need to know how much clearance is in your wheel well, which you can determine by measuring from your tire tread to the sidewall of the wheel well.
We recommend that you order chains as early in the season as possible to give yourself plenty of time to test fit the chains and reorder if needed. This way, you won't be stuck out in the cold later with snow chains that don't fit.
You can test fit these chains in your garage or driveway, but you'll want to wait until there's snow on the ground to actually drive with them. Likewise, if you're out in the snow and come across bare pavement, you'll want to pull over and remove the chains. Even these low-profile chains can cause damage to the bare pavement, your garage floor, or your vehicle if they break from the wear of riding on a harsh surface.
Installing these chains is incredibly simple.
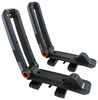
1. Lay out the chains on the ground to make sure there are no twists or kinks in them.
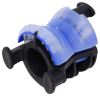
2. Slide the chain behind the tire and connect the ends of the blue cable, which will sit behind the tire.
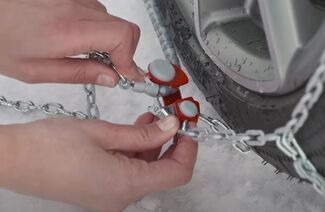
3. Around front, connect the red hook to the red link.
4. At the bottom of the tire, feed the tensioning chain through the large clip. Pull it and secure to the red hook attached to the tensioning cable.
Drive forward so that the chains can self-tension and self-center, giving you a perfect fit.
Quick Tips:
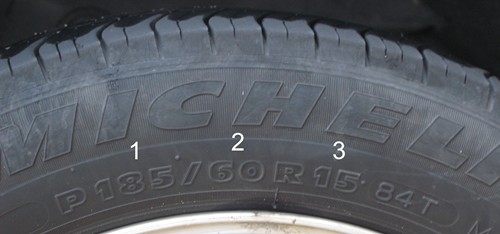
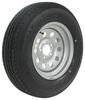
To choose the right snow chain, you must match your tire size. Those measurements can be found on the side of your tire.
185/60-15

These chains fit the following tire sizes:
Videos are provided as a guide only. Refer to manufacturer installation instructions and specs for complete information.
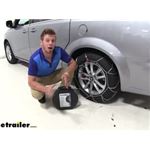
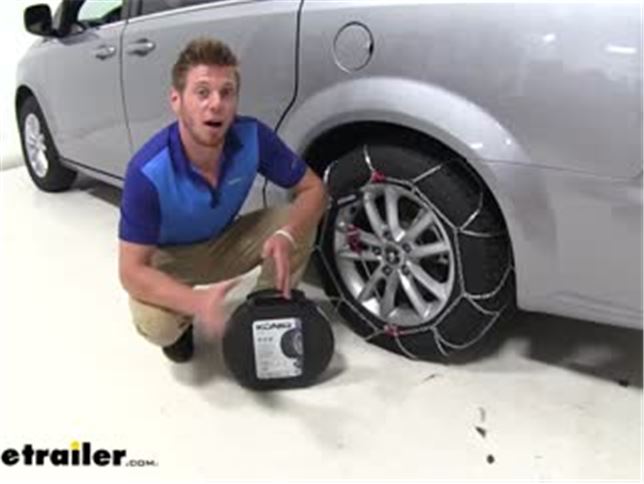
Adam: Hi, everyone. Adam with etrailer.com. Today we're going to be taking a look at the line of Konig's CG9 snow tire chains. So these tire chains are a really simple install. I know you're going to be using these in a probably not ideal weather, so being able to throw these on your tires in a quick manner is probably going to be the best way to do it. So it is very, very easy to install.
Like I said, it does come with a built in tensioner so you don't have to bring any extra materials with you. Also it was a tool free installation, so you don't have to worry about bringing those together either. It is a manganese nickel alloy chain, which is going to last a very long time and resist against all that salt on the road when there's snow. So it does have a nice diamond pattern to it.It's going to give you a lot more surface area compared to your ladder style chains. So these CG9 tire chains are going to have a very low profile.
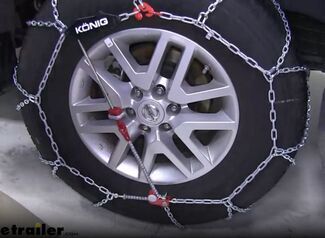
As you can see here, we don't have a whole lot of wheel space but it is SAE S class certified so you don't really have to worry about any rubbing. This is a relatively smaller D link shaped type snow chain and what that's going to do, it's going to basically not give you such a radical difference between the rubber and the tips of your chains and that's going to give you a smoother ride when you're going down the road. And these also are going to protect your rim as well when they are installed. As you can see, the closest parts of this tire chain are plastic and especially this rubber tensioner here and a plastic is designed for this part right here, and that's not going to really make any damage to any type of wheel that you may have.So these do come in and pair of two and for your all wheel drive applications. Just grab another pair of two on etrailer.com.
It does come in a nice sturdy case. A lot of them come in canvas bags, which eventually wear and tear over time. So having a nice, sturdy, plastic case is always nice to be able to store them when you're not using them. It is a honestly really, really simple install. It's going to protect your rim.
Like we said earlier, it does have a built in tensioner, so you don't have to bring any additional tools or equipment for them to be installed. It's relatively easy. And on top of that it's going to get the job done. So let's just go ahead and install them together. So the first thing you're going to want to do when you're planning on putting these on your tires is lay them all flat. Make sure everything is nice and straight, there's no kinks in your links. And once all that is done, then you can go ahead and feed the Konig tensioner first, back around your tire.And once you do that, grab all this, go behind your tire and you go ahead and connect them. And while you're back here, just take your chains, start draping them over. We want to get this part right in the middle of our tread. Once you get them nice in place, you go ahead and take your red hook, hook it to your red link, and then you can go to the bottom here. And you do have this self tensioner right here and you pull this back, put that in there, and then give it a nice tug. Once you think it's nice and snug, you grab this other plastic red lever and connect it to your loop down low. Make sure everything's nice and tight, and we do recommend that you roll over these a couple times. Go back out check and make sure everything's nice and tight, and once it is, then you're ready to hit the road again. Well, thanks for watching at our look at the Konig's CG9 tire chains.

Info for this part was:
At etrailer.com we provide the best information available about the products we sell. We take the quality of our information seriously so that you can get the right part the first time. Let us know if anything is missing or if you have any questions.


Thank you! Your comment has been submitted successfully. You should be able to view your question/comment here within a few days.
Error submitting comment. Please try again momentarily.