


To see if this custom-fit item will work for you please tell us what vehicle you'll use it with.


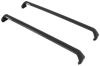
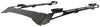
Custom-fit, 3" round nerf bars have extra-wide, 4" non-slip step pads that help you easily enter and exit your vehicle. Curved ends match your truck's contours. Carbon steel construction has a rust-resistant, textured black powder coat.
Features:
Specs:
The sturdy and stylish Aries Pro Series 3" round nerf bars have extra-wide, non-slip step pads that allow you to enter and exit your vehicle's cabin with confidence. The heavy-wall 3" diameter tube provides the strength and stability needed to support applied weight. The bars are constructed of carbon steel with a rust-resistant, textured black powder coat. The textured, black powder coat finish undergoes an extensive salt spray test during manufacturing to ensure resiliance to the elements, and easily hides minor scratches and grime.
The nerf bars install quickly and easily with custom-fit mounting brackets. The carbon steel brackets mount to pre-existing holes in your vehicle's frame - no drilling required. Each side bar fits the contours of your specific vehicle to ease installation and improve functionality. The raised step pads are also customized to match the layout of your truck cabin's doors.

Videos are provided as a guide only. Refer to manufacturer installation instructions and specs for complete information.
How's it going neighbors This is Ed here with etrailer.com and we're taking a look at the Aries Oval Black Running Boards for your 2024 Jeep Wrangler Unlimited. So when you add running boards to your Jeep, it's gonna do a few different things for you. It's gonna give you a step to get into the vehicle and it also adds to the appearance. The installation is really easy, it's just a lot of hardware. So let's go ahead and let me show you how to get your Jeep hooked up. So let's take a closer look at our Nerf bars to see what makes 'em special.
So let's start with the construction. You're gonna have a black powder coated steel with treated metal underneath. So once you eventually nick that powder coat, you don't have to worry about it all rusting and flaking away. You're gonna have four inch pads for you to step on for your tread and you have a nice textured surface that's gonna allow you to get a little bit of additional traction. It's nice and wide.
It's about 19 inches long. It's going to give you plenty of space for the largest foot to hop in there. And in general, it's just real sturdy and very well put together. In general, the thing that sticks out most to me is just the installation. It is a breeze, but it's just a little bit tedious.
So I'm gonna get you lined up and I'm gonna show you how to get this done. So we're gonna start by grabbing our wrenches. You're gonna need to get a M6, M8, M10, and M12 socket wrench or a box wrench, whichever works best for you. You can do either. You definitely are gonna also need a torque wrench to get to the specified torque requirement.
And from there, basically what I do, I just lay all my hardware and parts out. Your brackets are gonna be specific for their position. So you're gonna have driver front, driver center, driver rear stamped right onto your bracket. And then you'll also have the corresponding support brackets as well. So let's take a look underneath to see how we get started with our brackets. So right under here you're gonna find your first attachment point. There's a hole in your frame for you to drill this in. And there are gonna be two holes right at this pinch weld on the body. You're gonna take your 10 millimeter bolt with the corresponding lock washer and flat washer and we're just gonna hand tighten it into the the weld. And we're just gonna hand tighten because we're gonna need our brackets to kind of be loose in order to align it with our Nerf bar later on. So it saves this headache later. So just enough to hold it up. Not gonna put a wrench to it or anything just to support it with the threads. Now that I have this hand tightened, we're gonna move to the support bracket that's gonna fasten through these two holes in the bottom. Now we're gonna secure our support brace and it's also labeled driver front stamped onto it and you're gonna be able to flip that on. So we want to align with the holes in your frame and this hole right here on our bracket. Just gonna fasten our hardware through hand tight just to hold it in position again for that same reason. We just want it loose enough where we can make adjustments when we put our ball on. Now we're gonna take our eight millimeter bolt with this corresponding washer and nut and we're gonna feed it through the hole in the body. Here just gonna tighten it on just to fasten our hardware hand tight onto the vehicle. So you wanna make sure that your fastener does have the washer on both the exterior and interior. That's gonna sandwich between the pinch weld here on the body to give you more stability with your bracket. And now that we have our hardware hand tightened, we're gonna do the same thing on the rear and center. Alright, and now we're completing our installation with our last bracket on this side. So from here what we're gonna do is get our bar and get it set up to attach it. Now that we got our brackets on, we're gonna install our Nerf bar. We're gonna align the holes in the bracket with the holes on the bottom of our bar and they just bolt right on. So it's pretty, pretty straightforward. So I'm just gonna lay it across our brackets and then we're gonna go underneath and make those connections. So now we're gonna break open the bag for the hardware that's separate for mounting your step, and I'm just gonna feed it through the hole in the bracket and just start 'em into the holes. So now you just want to get those hardware started in hand tight. You just wanna make sure that you have your 13 millimeter handy for later. But the key is just getting it in fastened enough to keep it stable and sturdy while you make all your connections. So I'm gonna move to the center and then rear and then we can go back and fasten everything down. One thing I've found that this is a little bit tedious, but it's not difficult at all. If you take a little bit of preparation on the beginning, get all your tools together, lay your parts out where you're gonna install 'em, that little bit of prep will make it so much easier. So now we're gonna grab our wrench and go back and fasten everything down. (drill grinding) Now that we got all of our hardware fastened down, we're gonna go through and make sure that we're at the specified torque requirement for all of our bolts. Alright, now we're gonna make sure that we're at our torque spec for all of our fasteners and then we're good to go from there. So we're just gonna take your torque wrench and make sure you're locked in. So now that we have our hardware installed, we're gonna test out our step. I have Sam here. He is gonna be our model. Can I have you make use of our Nerf bar here And as you can see, it's solid and the all of his weight is shifted onto the vehicle itself. So it's installed correctly and we're good to go. So installation is super easy and as far as getting it put together, its' just tedious 'cause there's a lot of nuts and bolts and hardware to put together. But if you take your time, lay it out ahead of time, get everything ready, then it goes pretty smoothly. I would say that in general when you have a Jeep without running boards or Nerf boards on those guys, they look naked. So adding something like this makes it look more put together and it just gives you an additional step to hop in as well. This has been a look at the Black Oval Nerf bars from Aries on our 2024 Jeep Wrangler Unlimited. I'm Ed, this is etrailer.com and you have a great day.
Ratings & Reviews

The packaging wasn't great. I'm not sure if it was UPS whom re-taped the box, but it had various holes in it and I was shocked that all the parts were actually still in the box, since there were holes on both ends. 1 end of 1 of the bars was exposed and the finish scuffed off it, but I can probably take a sharpie and fix that. Other than that, it was pretty easy to assemble and install. They seem very sturdy and serve their purpose.
Info for this part was:
At etrailer we provide the best information available about the products we sell. We take the quality of our information seriously so that you can get the right part the first time. Let us know if anything is missing or if you have any questions.













Thank you! Your comment has been submitted successfully. You should be able to view your question/comment here within a few days.
Error submitting comment. Please try again momentarily.