
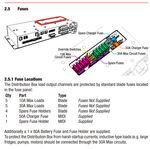
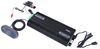
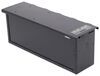
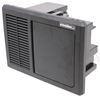
RedVision Manager30 management system controls multiple on-board devices in your RV so you can turn lights, inverter, water pumps and tanks, and electric steps on and off. It also acts as a 240-volt charger, solar regulator, isolator, and controller.
Features:
Specs:

California residents: click here
Ratings & Reviews


Product is fantastic but what made it even better was the customer support from Redarc. It's a great system, but quite complex, and they were phenomenal in walking me through the various stages of setup to get everything working how I wanted it to.
Great service
Do you have a question about this Smart RV?
Info for this part was:
At etrailer we provide the best information available about the products we sell. We take the quality of our information seriously so that you can get the right part the first time. Let us know if anything is missing or if you have any questions.


Thank you! Your comment has been submitted successfully. You should be able to view your question/comment here within a few days.
Error submitting comment. Please try again momentarily.