
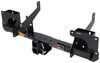
Hellwig Front Anti-Sway Bar - 1-1/2" Diameter


To see if this custom-fit item will work for you please tell us what vehicle you'll use it with.
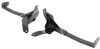
Minimize sway and driver fatigue by improving the stability and driveability of your truck. Solid, 1-1/2" chromoly sway bar provides improved handling, comfort, and safety. Uses existing end links.
Features:
Specs:

California residents: click here
Videos are provided as a guide only. Refer to manufacturer installation instructions and specs for complete information.
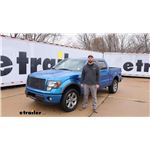
Hey guys, it's Jake here with etrailer. Today, we have a 2011 Ford F-150 and we're going to be taking a look at, I'm going to show you how to install, the Hellwig Front Anti-Sway Bar. This anti-sway bar is designed to replace your factory anti-sway bar. It's going to be a little bit thicker design, coming in at an inch and a half in diameter, whereas your factory one is more like an inch and a quarter, inch and an eighth, something like that. This is just simply designed to help reduce the body roll when driving on windy roads, or if you hit big gusts of wind, this is going to help to keep your truck more centered than your factory one did. Now from the factory trucks, more and more are becoming more comfortable to drive.
And with that, that means the suspension is getting softer and anything like the sway bar, like the factory sway bar, is going to be softer. Adding this sway bar is going to, or anti-sway bar, is going to allow you to get a little bit more stiffness in the front end so that you feel more confident when you're driving down the road, whether you're hauling a load or not. The sway bar is not only going to outperform the factory sway bar, but the finish is also going to outperform because it's going to be a hammer tone finish, whereas the factory one, they can tend to rust quite a bit sooner than this is going to because it just has your standard factory powder coat on it. So that'd be another reason if you wanted to upgrade, is that this one is going to last much longer in those harsher chemicals that are on the road. If you're just swapping out the factory sway bar for this Hellwig sway bar, you may not see a huge difference because this truck does not come with a rear anti-sway bar.
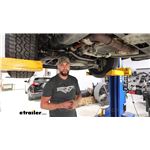
I highly recommend if you're going to do one, go ahead and do the other, that way you get the best performance because after all, if you've got sway still in the rear of the truck, then the front end's not getting any help. But if you pair two anti-sway bars together, that's how you're going to get the best outcome possible because they're going to work together in order to keep that truck level. But with that being said, let's go ahead and pull it in the shop and show you how we did it. To begin our installation, we're going to take an 18 millimeter socket and on the ends of our sway bars, we're going to need to take the nuts off of them. We're going to leave all that lower hardware in place and we're going to hold on to the hardware that we take off 'cause we will be reusing it.
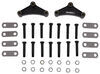
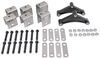
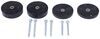
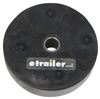
(power tool whirs) (power tool whirs) Now we'll take a 16 millimeter socket and remove the factory nuts off of our brackets here on both sides. (power tool whirs) (power tool whirs) Now we're going to take our bushings, put the grease that comes in your kit on the inside, and there's not a very large space here to be able to put them, so typically if it's a really long space, like the center of this bar is, you don't want to put them on before because you want them to be pretty close. But since this is, you know, there's only really two spots this can go, we're just going to stick them on here and put them right in the middle to start with and if we have to slide them either way, that's okay. Now we'll lift our new sway bar into place. We're going to put it over these end link bolts first.
Then we'll take one of our brackets. Slide it up and over. We'll grab our factory hardware along with our washers and get this in place. (screw clanking) I will take that 16 millimeter socket and snug these back up. (power tool whirs) I will come back and torque all of our hardware to the factory specifications. (tool clanking) Now when torquing down the end links, you're going to have to take a vice grip, grip the bottom of this bolt here. Otherwise, it's just going to keep spinning in the top of this ball joint. And then we can come back and torque it down. Now we need to take our stops, now these are designed to keep the sway bar from sliding side to side because our end links are flexible so they can move, but we don't want the sway bar moving. You'll just take the Allen head bolts out of it and then you want to make sure you've got them facing down so that you can still get to the heads, but then we'll just turn them back in. You want to butt it up right against it. Make sure your sway bar is side to side where you want it, and we can thread these back in. (power tool whirs) After we get everything tightened down to the specifications, that's going to do it for installation. Well, guys, hopefully this video helped you decide whether or not the Hellwig Front Anti-Sway Bar is right for you in your 2011 Ford F-150.

Condition: Like New
Notes: May have damaged packaging or minor cosmetic blemishes.
Info for this part was:
At etrailer we provide the best information available about the products we sell. We take the quality of our information seriously so that you can get the right part the first time. Let us know if anything is missing or if you have any questions.


Thank you! Your comment has been submitted successfully. You should be able to view your question/comment here within a few days.
Error submitting comment. Please try again momentarily.