To see if this custom-fit item will work for you please tell us what vehicle you'll use it with.
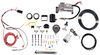
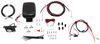
5,000-lb Capacity. Load up your gear or hitch a trailer! This complete air suspension kit with on demand compressor and in-cab controller keeps your truck level, the ride smooth, and handling steady - all from your driver's seat.
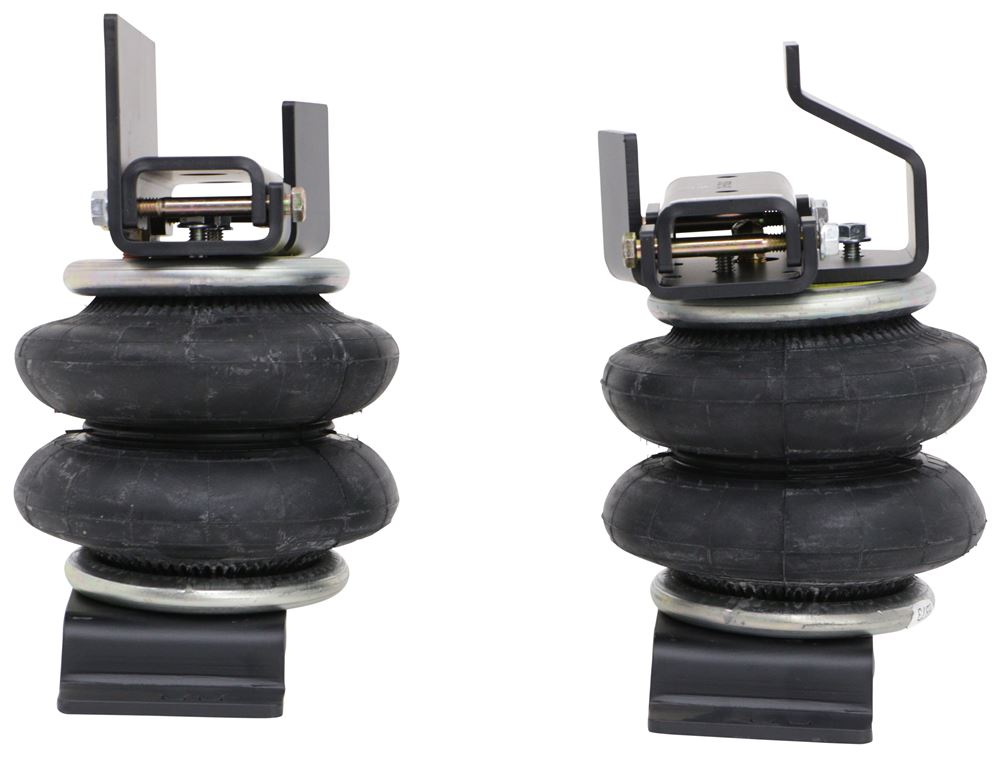
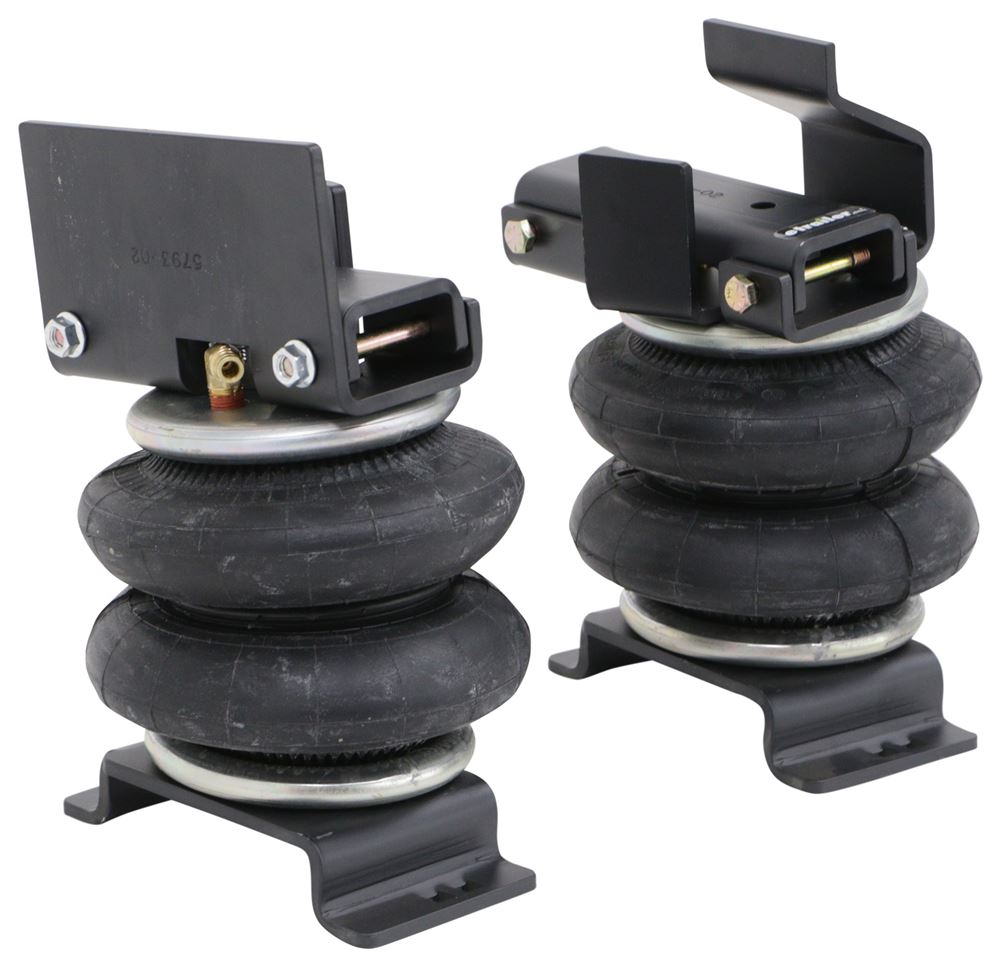
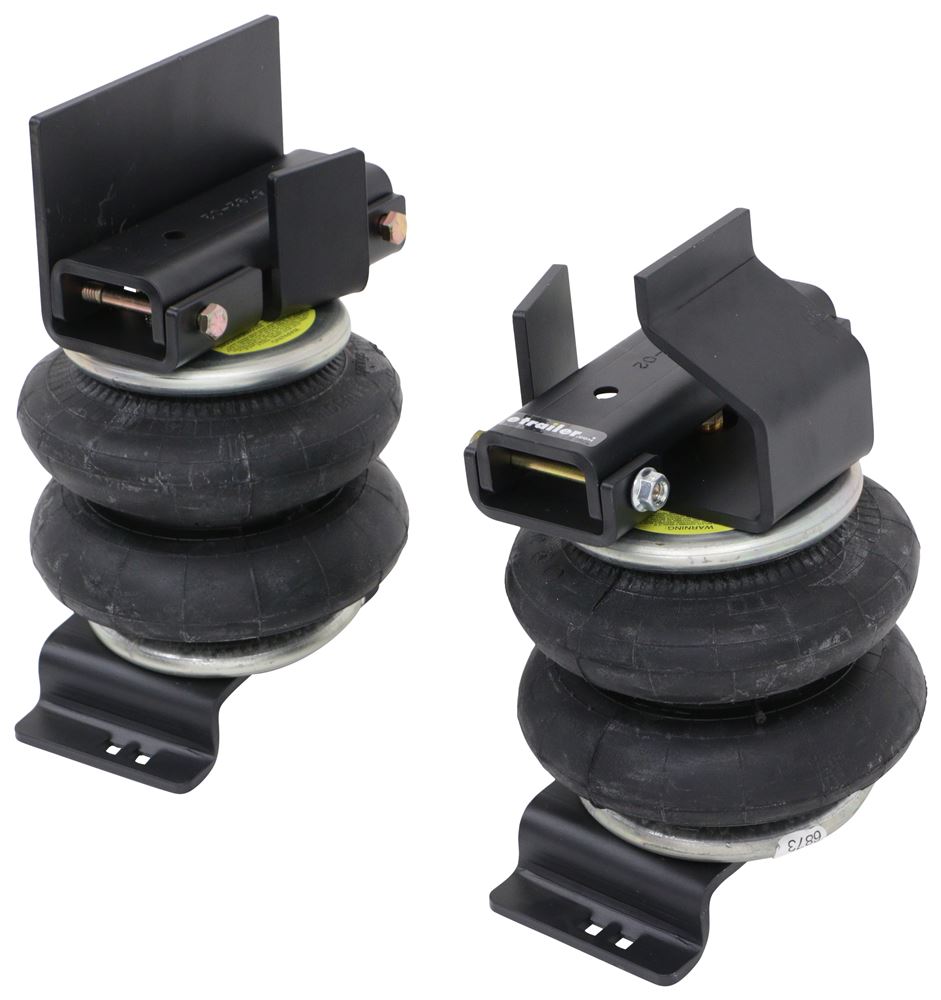
When your truck squats under a heavy trailer or bed load, it throws off balance, braking, and steering. This Ride-Rite kit fixes that by adding air bags that work with your factory suspension to level the truck and restore control. With the air bags, compressor, and in-cab controller all working together, your truck stays level, your headlights stay aimed where they should, and your braking stays consistent. The double-convoluted design delivers up to 5,000 lbs of load support, smoothing out rough roads and giving you a steadier, safer ride when your rig's working hard.
Forget dragging out an air hose or stopping at a gas station air pump. The included compressor and in-cab control switch let you fine-tune air bag pressure right from the driver's seat. Add a few pounds when you hitch up, let some out when you unload. It's quick, easy control that keeps your setup dialed in for every drive.
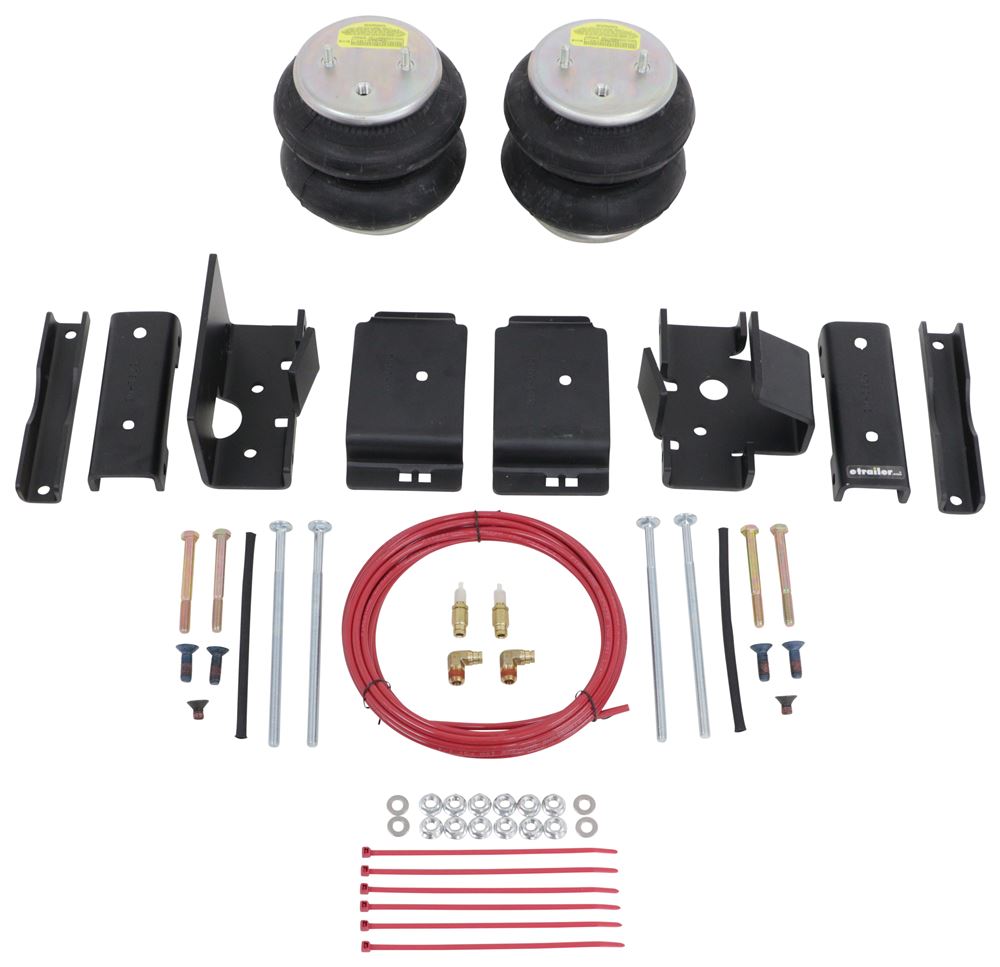
Firestone built this kit so you can get the job done without chasing parts. You get the air bags, custom-fit brackets, in-cab controller, fittings, lines, hardware, and a bolt-on mount for the compressor - no drilling required. The air bag brackets line up with factory attachment points, cutting down on guesswork and helping each piece fit where it should. Depending on your experience, the install can take a day or stretch into a weekend project. Either way, everything you need is in the box when you're ready to dive in.
If you drive in snow, salt, or coastal air, you know how tough corrosion can be on metal parts. Firestone uses plated, coated, or brass components to help protect them from rust and wear, so your suspension stays strong season after season.
Firestone's been building air suspension longer than most of us have been driving. Made in the USA and backed by a lifetime air bag warranty, each kit is built for years of dependable towing, hauling, and everyday use.
California residents: click here
Videos are provided as a guide only. Refer to manufacturer installation instructions and specs for complete information.
Hi, everyone. Jesse here with etrailer. Today we'll be taking a look at and I'll show you how to install the Firestone Ride-Rite airbags with easy mount compressor and in-cab control on our 2021 Ram 2500. This kit is really the complete solution if you are like our neighbor and you plan on towing different size trailers with different weights and also hauling stuff in the back of your truck. 'Cause with this kit you can really get your suspension dialed in. And what I'm talking about when we're talking about suspension and getting it dialed in depending on what you're towing is if you've ever towed or hauled on your factory suspension, you will notice that the rear end will sag a little bit and when that rear end sagging, that's taking weight off of the front of the vehicle.
And that's where a lot of your braking comes from. That's where all of your steering comes from. And also your headlights will be pointed straight into the sky. And when I say complete solution, with this kit you get not only the airbags but you also have a compressor and an in-cab gauge, which really gives you everything you need to get your suspension dialed in. And if you didn't have that compressor, you would have to find somewhere to fill up, say a gas station or in your garage and it really just improves the convenience of this kit.
That's enough of me just talking about it. Let's get this truck pulled into the shop. I'll lift it up and we'll take a closer look. And here's what our airbags look like installed on our truck today. As you can see we have two brackets, bottom and top.
These are custom fits so there's really no drilling or cutting of any holes to get these to get in place. Really, the installation's pretty straightforward. And then moving forward we have our compressor and this whole bracket system comes in your kit and it simply bolts around your frame using a couple U-bolts. And this is very sturdy, you don't have to worry about it coming off. And the feet on our compressor here actually have rubber bushings, so that's gonna cut down on any vibration.
You really won't be able to feel this thing running when you're inside the vehicle. And now with our gauge, we have a nice clean install here, but it's still visible. And that's the main reason that you would have a gauge like this. This is for if you want to be monitoring your pressure at all times. And also here you can adjust by pushing up, that's gonna fill up your bags or by pushing down, that's gonna let air out. It's also back lit so we have that set up so that whenever your headlights come on, that back light's gonna come on so you can read it even at the nighttime. Other than that, down here, all that we have left is our two airlines and some wiring that runs into the engine bay and then into the cab for your gauge. If you have any questions or concerns about what air helper springs are gonna be the right ones for your setup and lifestyle, feel free to reach out to us. We'd be happy to get you pointed in the right direction. And when it comes to the installation, with this entire kit it can be a handful with running all the lines and getting the airbags installed. So I'd understand if you are not looking to do this yourself. Check out our dealer locator. You can find someone local to you that would be happy to get you set up. If you are wanting to see how all this gets installed then follow along and I'll walk you through the process. We'll begin our installation by removing our factory bump stop, which is just right here and it's held in by two 16 millimeter bolts. This one on the back. (drill grinding) And one more on the front. (drill grinding) Now we can assemble our airbag. So we'll start with our fitting, we'll get that threaded in, just get it started by hand and then we'll tighten it down. The instructions are kind of loose on how tight to get it. It just says to make sure that that thread locking tape is fully engaged in the threads. So I'll just tighten it pretty tight, but I don't wanna go too far where I might strip those threads out. Now with our top bracket, you'll see this opening here. That's gonna be for our fitting. And then those two holes, we'll line up with those studs and we'll take a nut, tighten both of those down with a 9/16 socket. (drill grinding) With our top bracket we'll now torque those two nuts down to the specification on top of our airbag. So let's get that all the way torqued down and we'll flip this over and install our bottom bracket. This one we're gonna keep loose for now, so just get the smaller of our flathead screws and thread it in. You can tighten it down a little bit. We just wanna be able to rotate this once we get our airbag into position. We have another bracket that we're gonna install directly into where we just removed that bump stop. And you'll notice it's kind of off center. We want the bigger gap to be on the backside or on the rear. So we'll get that raised up into place and get two of our bolts. They're gonna be those blue tinted bolts in our kit started just right through those factory holes. And we will tighten those down with a six millimeter hex socket. (drill grinding) And we'll torque those two bolts down. Now we can lift our airbag assembly into position. Just find your most open route to get it back there. And then we can kind of compress the air bag so you can get everything to slot in. And you'll notice I have the longer side of our top bracket on the outside. That's how you want it. Then we'll take a bolt, slide it through these holes, which is kind of tricky to get all lined up. And once you have both the bolts slid through, top that off with a flange nut on each one. Now we can slide our large carriage bolt down through the inside hole. And when you're doing this, you kinda wanna eyeball how close your brake line is to that bolt. As you can see mine's gonna be even when everything's settled, it's gonna be pretty close. So I'll end up bending this out just to make clearance, but we're only temporarily getting this all installed because we're gonna end up taking our assembly back off after making some marks 'cause if you remember, we did not tighten down the bottom bolts on there. So I'll get the two nuts on these carriage bolts started, kinda get everything straightened out and then use a paint marker to mark both my bracket and the airbag and take everything back off. I've reinstalled our airbag after tightening down that bottom bolt and I also added two washers behind this bolt that's holding our brake line up. Looks like I'm still gonna be pretty close, but I'll just tighten everything down and see where I'm sitting. And then most likely just bend that. You just wanna be careful when you're bending brake line not to go too far, but we'll tighten the rest of our hardware down with a 9/16 inch socket. And you'll also need to use a wrench on the top. (drill grinding) And just like everything else, we'll go over everything with a torque wrench and get it torqued down to that specification. Once you have everything torqued down on the driver's side, then go to the passenger side and it's gonna be the same process. The upper bracket is slightly different, but the entire process will be the same. Then I'm gonna start running our manual fill port and lines. So I'll get that done and we'll come back and go over it and I'll show you what I did. So I have our airlines ran now and I just used that license plate hole there. Just had to drill it out to 5/16 and run our line through it with the nut and plugged in our one airline to the back of that. And we're gonna bring this to a union tee, which I did purchase this separately. And this is just 'cause I only wanted one fill port on the back. If you didn't have this union tee, then you would just have to do two holes in the back. But all of our connections will be made the same. We're just gonna simply push in the airline, you'll kind of feel it click into position, give it a tug, make sure it's nice and tight. So one end of our union tee will go to our driver's side bag. That's a pretty easy route. The other end goes up above our heat shield here because we want to stay away from any hot or moving components. And then it wraps around the side of the frame and plugs into our airbag here. To begin our compressor install, what I like to do is kind of map out where I'm mounting everything. And I like to start with the gauge just because it's usually the most difficult to find a spot. So you'll see I already kind of pulled apart the dash. There's really just a handful of seven millimeter screws and everything else is just held in by clips. You just kind of have to look at it and it's put together like a puzzle. So if you pull one piece out, then you can pull the other piece out. And we're gonna end up mounting it here. So this is gonna sit just like this when we're done and I think our gauge will look pretty good mounted up there and it's gonna be out of the way. So I pulled this out and I've already drilled two holes here for our bolts to mount up to, but you have to think that we also have to route these wires and two airlines through. So what I'll do on the backside here is drill two holes separately and I have some rubber grommets that I'll put in there. And with those grommets, we can feed those wires through and have a nice clean look. Before you get this actually mounted up in its location, you might want to just get your wiring figured out. So we have four wires coming off the back of here. Two of these wires or one on each. So black and white is gonna go to 12 volt power. The black one I'm gonna wire into either a headlight circuit or just a dashboard light circuit 'cause that's gonna be the power for our backlight on our gauge. And the other black wire and one white wire, we're gonna tie those together and ground those off. Next I like to figure out where I'm mounting my compressor. So we're on the driver's side of our truck and pretty far up. We're almost towards our front trailing arm here. So the reason we're so far up with this install is because we need to run airlines from here into the cab and then also an airline out the cab. So I kind of like to push it a little bit further up. And also we have a bit of wiring that we need to run. So just kinda map it out because I'm trying to avoid extending out these wires. So knowing that our battery is also on the driver's side, that's why I mounted this on the driver's side that's gonna help shorten that trip. Now we can start running our lines. So I did have to order some extra line. I didn't have quite enough because we're gonna have to run two airlines from outside the vehicle into the cab where our manual gauge is. So we'll start with this one. This is gonna be our longer one. And I'm gonna tie this in with our airbag lines here. And I'm just gonna put it right past our original union and make sure you let all the air out of the bags before you do this. Get that popped loose. Then we'll tie in our second union. Just pop that in both ends. And then that last port, we'll take our good amount of line, pop that in, and I'll start running this to the front of the vehicle and then inside the cab. So after I ran our red line up, I ended up not having enough because I've already ran our compressor line. So I found some scrap line. Just trying to avoid any confusion as to why our airline is now black. But I'll show you the routing that we took. We're just trying to stay away from any hot or moving components. So it's going above our frame over there. And once we get past that, we're just following our frame rail. And then you'll see our compressor is right here. So that's that line I was talking about that comes from the compressor. So those both will go up into our engine bay, which I just fed up kind of pushing it up and then I was able to pull it up from the inside. But with our compressor, we still have one wire coming off of it along with the one that we ran up into the engine bay earlier. That's our ground wire. So I'll just use a self tapper and we'll ground that out to our frame right here. Now inside of our engine bay, of course we have our red wire, which I'm actually gonna end up shortening just because we have about three feet extra. But this is going to eventually connect to our battery here. That's gonna be our last step of the install. And then tucked down in there is a rubber grommet. I essentially just poked a hole through that and fed both my airlines and the white wire through there. After coming through our firewall, our white wire and our airlines connect to our gauge. The airlines go to the fittings on the rear and our white wire connects with a butt connector. So as far as what wiring we're gonna tap into for our light, I found this plug, which essentially powers our charging port here, and those have a backlight on 'em. So I just used my test light, found out which wire comes on whenever those lights are on. It's gonna be this pinkish wire. So I just used one of the included connectors and spliced into that using that one black wire. On the back of our gauge here you'll have to kind of keep track of your hoses, which kind of helped that mine we inchesre different colors, but one will go into one port and the other one will go into the other port. And I did feed those through the holes in the back there. And we'll get this all buttoned up. I have our gauge bolted up into place. But before we reinstall this whole panel, we still have one more wire and that's our ground wire for this entire system here. So what I'll do is just kind of wrap it around this frame. You won't be able to see it, but there's some bolts that are in some pretty sturdy metal that'll be a perfectly fine ground for us. Now, before you button everything up and get it all back together, you'll probably want to just test everything, make sure it's working. So right now we have 30 pounds of pressure in our airbags, and then when I turn the headlights on, our back light comes on. So that's all working. And you can also go through the compressor functions. I've already done that and I'll get everything back together now. Before we run our compressor, you'll want to install your filter if you haven't already. This is just gonna be connected to our compressor here. And these are just push barb fittings. And with this you will want a loop in your line and we're just gonna end up tucking it up here and zip tying it down. Now with all of our connections made, we can fill our bags up to 70 PSI because we wanna leak test our system. So we'll fill it up and then we will go through all of our connections with some soapy water and check for leaks. So I'm just going through each of my connections, as I said, spraying it down with this soapy water. And what we're looking for is bubbles to accumulate. And we definitely wanna check the top of our airbags because not only do we have that airline, but we also have that threaded fitting that we tightened earlier. And that completes our look at the Firestone Airbag and Compressor Kit on our 2021 Ram 2500.
Ratings & Reviews
I like how the Firestone All-in-one comes with everything I needed without needing to piece together a bunch of parts. The best part is that the air bags and the compressor system come in one package, so everything is already matched and ready to install. I still had to mount the compressor myself, but there’s no guesswork on what works with what.
Installation takes a little time, but the bags make a noticeable difference. They level out the truck, cut down on squat, and help everything feel more stable when you’re towing. And with the onboard compressor, I can add or remove air whenever I need, without carrying around a bulky compressor or stopping at the gas station.
It’s a solid, well-built kit that simplifies the whole process. For anyone who tows often and wants a clean, all-in-one solution, it’s a great fit.
Had a friend install everything. Went smoothly.
Info for this part was:
At etrailer we provide the best information available about the products we sell. We take the quality of our information seriously so that you can get the right part the first time. Let us know if anything is missing or if you have any questions.





Thank you! Your comment has been submitted successfully. You should be able to view your question/comment here within a few days.
Error submitting comment. Please try again momentarily.