


To see if this custom-fit item will work for you please tell us what vehicle you'll use it with.


Thank you! Your comment has been submitted successfully. You should be able to view your question/comment here within a few days.
Error submitting comment. Please try again momentarily.


If you crave a roof rack that compliments the look of your car rather than disrupts it, the Rhino-Rack RS 2500 is for you. The flush-mount design means the crossbars terminate at the legs with no overhang, providing a sleek, factory-installed appearance. This feature not only enhances your vehicle's aesthetics but also boosts aerodynamics by reducing wind drag and noise, offering a quieter and more efficient ride.

Long drives should be enjoyed, not endured with the constant whoosh of wind. The innovative Vortex strips built into the crossbar channels of the Rhino-Rack RS 2500 strategically disrupt airflow, eliminating unwanted wind noise without the need for an additional fairing. Whether on a scenic highway or in the hustle of city streets, your ride remains blissfully quiet, letting you savor the journey.

Whether it's a weekend kayaking trip or a cycling race, transporting your gear has never been simpler. The RS 2500 is equipped to handle both channel-mount and clamp-on accessories, making it versatile enough for cargo boxes, cargo baskets, kayaks, and bikes. With this flexibility, you can easily customize your setup to suit any adventure, making outdoor exploration hassle-free.

Facing the elements head-on, the RS 2500’s crossbars are made from structural-grade anodized aluminum that’s rustproof and ready for year-round use. This ensures that even through the harshest weather conditions, your roof rack remains reliable and looks as good as new, without the worry of corrosion affecting your gear-carrying adventures.
No one likes the idea of losing their precious gear to theft. With the Rhino-Rack RS 2500, each leg comes with a sturdy nylon locking cover that not only adds a finishing touch to the design but also secures the rack to your roof. The convenience of keyed-alike locks means one key opens all, providing an effortless security solution and peace of mind when you leave your vehicle unattended.


 Alternate Instructions
Videos are provided as a guide only. Refer to manufacturer installation instructions and specs for complete information.
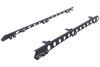
Today, were going to be taking a look at the Rhino Rack RS 2500 Series Roof Rack System. These are the custom fit design made for a wide variety of application. They use the vortex arrow crossbar. These crossbars have a subtle slope to them. Its going to help to contour it to the vehicles roofline. Theyre made of an extruded aluminum.
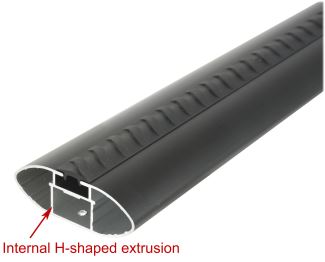
Theyve got nice heavy-duty bracing inside that makes them very strong. The elliptical design is going to help to reduce any kind of wind or road noise, and also help maintain that fuel efficiency with that aerodynamic design. Very similar to a factory style roof rack except we dont have the overhang that extends past there.The bars themselves when theyre extruded, they use an H-shape or an H-style. Its hard to see, but you could see its not just a hollow bar. Theyve got some nice rigid material that runs in there.
Its really going to keep these bars sturdy for a long time. They have strips that cover our T-slots that are located right here in the top. These are nice and lightweight. It allows you to slide your T accessories right in, and then you can follow that up with your strip protector that will go on top. These are designed not only to allow you to keep just a small opening here to come up through, but this is also going to keep out the dirt, and debris, and stuff like that that may try to get in to that slide.The strip can be cut to accommodate any different length, and they are going to come with a couple extra.
The legs themselves are made from a UV-treated, glass-reinforced nylon. This is going to be durable and weather-resistant for years to come. The custom fit as you can see, we have two different length of bars. For the application that were doing today, the fit, the roof tapers in. Weve already got this precut from the factory.
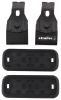
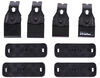
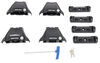
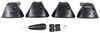
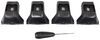
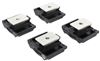
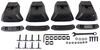
Theyre going to come with exactly what we need. Weve got four pads. In this particular application, all four pads are the same. These are going to fit right under the bottom of the foot pack. That nice smooth rubberized surface is whats going to be on your cars finish to protect it from any kind of scratches.The clips are designed here to bolt right on the end of the foot pack. These fit around the underside of the roof line of your vehicle. As you can see here, weve got two different lengths. Again, this is a custom fit. Youre going to get exactly what you need in this package to put it on your vehicle. These are also rubber-coated on that underside. Were not going to have to worry about scratches or any kind of scuffs on our paints finish. Also, rubberized texture is going to help hold that on to the vehicle.After we have our kit on our car, weve got four locking covers. These are designed to go right on the end of the foot pack, turn them with a key. Ill show you later just how they go on, so you wont have any questions there. This is going to keep the roof rack on our vehicle. Its also going to keep Remember that small black cover that slides on to the end of the bar where our T-slot goes Once our locking cover comes up, it covers that. Its going to hold that on. This is going to help keep any of the accessories that we might have attached into that T-slot on the vehicle. Lastly, its going to come with four security-style hex head bolts and a really nice extended tool here to help get the proper force applied as were tighten that down onto our vehicle.Now that weve gone over some of the basic features of the rack and what its going to come with, let me show you how to install this on your car. Our Rhino Rack kit is going to come with a full set of instructions, so well know step by step how to install our bars on our vehicle. I got a list of warnings here, some things youll want to keep in mind such as dont go through the carwash, dont strap your kids to the roof, things of that nature. Then, were going to have our full warranty terms and conditions card. Now, Rhino Rack does offer a lifetime warranty with their product, so they really stand behind it and believe theyve got something going on here.Weve already preassembled three of the foot packs, but I wanted to show you how to assemble the fourth. In your instructions, its going to indicate your plastic part of your foot clamp whether the arrow should be pointing in or out. In our case today, it should be pointing out, so weve got our arrow pointing out. Well then have our pad that needs to go on. Its also going to have an arrow. Itll tell you in the instructions whether that needs to be forward or rear. In our application today, that needs to be forward.Now, the bars look the same from both sides. Weve decided that were going to have our Rhino Rack label facing forward. Thats going to help us remember which way we should put this bar on the roofline of our car. If thats going to be forward, well have the arrow facing forward. Were going to put that right under the pack here. You can see, weve got two square tabs that stick up and one circular one. One square will go here, circle will go here, square will go here, so our arrow is facing towards the Rhino Rack emblem. It doesnt have to go that way on your vehicle, but thats a very easy way to be sure you get them on your vehicle properly.Were just going to clip that in until we feel those three points click in and get a secure hold. Were then going to take the clamp thats designed to go around the underside of our roofline and hold on as well as one of our bolts. Now if you look right the end of the bolt, this does have a security key style. It looks like a standard Allen head, but its got that small circle inside. Youre provided tool matches that perfectly. Somebody with a standard Allen key isnt going to be able to come up and remove this. Take our clamp, bring it around this side. Maybe I can turn this over, you get a little better look at it.Our clamp is going to fit up. The bolt will go through the hole in the middle, and its going to thread in to the small pivoting nut located inside of our foot pack. All right. Now that weve got that started, Im going to show you how to get this installed on your vehicle. Our first step needs to be opening up our front doors on our fit. With those front doors open, were going to take our front roof bar. Place it right up onto the roofline of our vehicle and allow our clamps to come around the underside. We need to do a measurement now. The measurement comes from the center of where the two doors meet forward to the center of our foot pack.Today in this particular application, it will vary vehicle to vehicle, so be sure to look in your instructions. We need to set this at 27 centimeters or 270 millimeters. Im going to do this measurement on both sides. This is going to help me ensure that I have my feet in line with one another. Now once I have both sides set to the proper measurement, and again, refer to your instructions because every application is a little bit different. Im going to take the provided tool, and I just want to take the slack out of my bolt here. I dont want to tighten it down too much because I may want to adjust it a little bit side to side. I just want to take a look. For right now, just getting it up to where we got slack out of it, and were not going to have to worry about it moving.Now, Im going to do the exact same thing over here on the other side. What I did here with my fingers, Im just verifying that Ive got my pads sitting at about the same spot on both sides. Meaning, I dont have my bar offset to this side too far or to that side too far. Again, just taking the slack out of the bolt for right now just to hold that in place. Then, Im going to come around, and Ill actually start torqueing them down. As you can see, these bars are great. We dont have any overhang that comes off on the end. Whatever weve got is going to be inside of the roofline of our vehicle. They look really sleek, really stylish, almost like a factory roof rack would look. All right. Just tighten them down a little bit at a time on that center bolt that we showed you earlier.Go over here, do the same thing. This tool is really handy. Its got a longer side on it. It helps you get plenty of torque as you can see at the T-handle setup. I really like this one. Its one of the better ones provided by any other manufacturers. Clean that out 10:01. Now once we have that torqued down where we wanted, were going to take one of those black covers that I told you about earlier. Were going to slide it in this side. Push down, simply turn the key. That paired with that security bolt that I showed you that had that little round thing that sticks up in the middle, its really going to help keep anybody from getting this rack off of our car no matter how bad they want it.I just finished tighten this one down. Im going to do the same thing with my black cap. Im just going to put it right over the end. Theyre all keyed alike. You will have four keys that are going to come with it which is great. You got two or three cars, you can put one on each key ring and then keep an extra on the spare set in case I hope you dont, but in case I guess you lose all four sets of keys that you have. With front bar installed, Im just going to open up the rear doors. Im going to grab my rear bar. Im going to place it on to the rear roofline of the vehicle.These things are really great to set up. As we said before, they customized to each vehicles application. I need to back this now just a couple turns. Maybe the same thing on the other side. Now once we have this positioned roughly on the roofline of our vehicle, were going to do another measurement. This is going to be from the center of our front foot pack to the center of the rear foot pack. In this particular application, its 70 millimeters, or Im sorry, 700 millimeters or 70 centimeters. Im going to say it one more time because I know you cant wait to hear it, but please refer to your individual instructions for the individual kits. Every measurement will be a little bit different.We do this measurement on both sides. Its going to ensure that we have our feet in line with each other just like the front, but this one is important because it also makes sure that we have both the front and the rear bar running parallel to one another. If we didnt have them running parallel, that could give us some headaches down the road when were trying to add some accessories on or something in that nature, so keep our bars running parallel. Just like I did on the front, Im going to do it over here because Im already here taking out some of that slack.Take a look at how the footpads are sitting on the roofline, theyre both sitting on there about evenly. As you can see, Ive got a little overhang on the front here. The same thing on the other side there, just a little bit of an overhang, so I know Ive got them in the right spot. Were then going to tighten down each side a little bit at a time now that weve got our slack out. You can see in our case here, as weve been tightening it down, its drawing our bar over a little bit, so that little bit of overhand we have is now gone.Our pad is sitting squarely onto the side roofline of our vehicle. They really are good at making these custom fit roof racks. They fit on there. Theyre the perfect size. Theyre going to fit every time. Close our doors, and Im going to cap this off just like we did on the front. Slide the two tabs in that side. Push it in, and give that key a turn. Just like that, were ready to throw a few accessories on there, and we can hit the road. Now that weve got our roof rack cross rails on our vehicle, were going to take it out and get some Go Pro footage, and also get a reading off of our sound meter to see exactly what kind of noise we get with the bars installed and also without.Without our crossbars installed on our vehicle, we we're getting adjustable readings somewhere between 73 and 75. Once we installed our bars, those readings went up slightly to 75 to about 77 decibels. Now, what does this mean for you, and how its going to work with your life As we we're going down the road sitting in the car, we experienced no real noticeable difference. That will complete todays look at the Rhino Rack RS 2500 Series Roof Rack for Naked Roofs using the Vortex Aero Crossbars in black. .
Ratings & Reviews


Cabin M.

9/19/2017
The product still is holding strong. The appearance still in perfect shape. No regrets. Money very well spent.

Peter
3/11/2018
This rack is great! On the first install, I used stickers to mark where the hooks go, so I never have to measure again. Just a couple minutes to get into place. I typically use it to haul my kayak, and it does great. Last week I was helping someone move, and with a couple of boards running the length of the car on top of the cross bars, I put stuff on top and it worked great. If I paint the hooks to match the color of my car which Im thinking of doing, this could easily pass as a factory install.
Michael C.
12/13/2017
I love the rack. Used it plenty of times and had compliments on its looks especially from Subaru employees. I would and have recommended this product to friends and others.
Mlee
1/30/2018
Wow, what a surprise follow-up email from you and your company. The racks are doing just fine as the day I installed them on my car roof. I use the racks once r twice a week for my surfboards and have had no problems what so ever. Great product and totally satisfied with the purchase. I remember the instructions made it simple for installation.
James M.
2/20/2018
The rack is still fantastic. It Has shown no signs of wear in structural integrity or cosmetics. All fasteners are still tight as can be. Absolutely love the rhino rack. I will definitely return to etrailer.com for future needs. Thanks for the follow up.
Jan K.
8/9/2019
Still awsome
Tim B.
4/25/2016
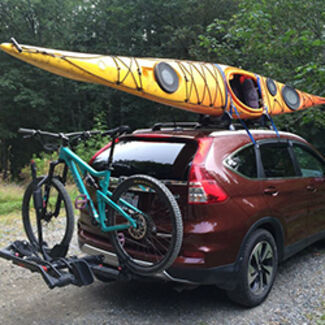
We still LOVE this rack! We have taken our kayaks across the state and it has held up. In lieu of removing the racks, we use the No Touch car wash places - it is just easier for us. We recommend this product and will check Etrailer first for any future purchases.
Chris P.
2/27/2018
I am using these on my 2013 Dodge Ram 1500 to carry a 16ft Old Town Canoe. All I use is 2 6 ft ratchet straps over the canoe and it as solid as can be. I love my Rhino Rack Bars!
Info for this part was:
At etrailer we provide the best information available about the products we sell. We take the quality of our information seriously so that you can get the right part the first time. Let us know if anything is missing or if you have any questions.
























Scott F.
9/12/2018
I love it! I still use it only for the cargo box. I occasionally mount it naked for a few days when I know the box is about to be mounted. I prefer to install the Rhino Rack on freshly-cleaned paint, then I remove it as soon as my immediate need is passed. The rack is so fast and easy to remove, thanks to the arrows, that its convenient to remove/install as needed. I have no regrets about this purchase.