
To see if this custom-fit item will work for you please tell us what vehicle you'll use it with.


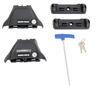
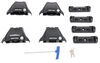
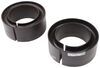
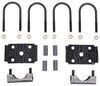
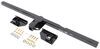
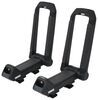
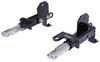
Struggling with roof racks that just don't fit right? The Custom DK Fit Kit for Rhino-Rack solves this by letting you mount four Rhino-Rack 2500 series legs seamlessly on your vehicle with a naked roof. The kit includes metal clamps that bolt securely onto your vehicle and molded-rubber pads tailored to fit the contours of your roof. This ensures a snug and secure fit, so the roof rack stays put, no matter your journey.
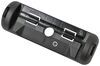
Worried about damaging your car while setting up the roof rack? These Rhino-Rack padded metal clamps are your best allies. They offer a secure grip on your door jambs while being equipped with molded-rubber pads to protect against scratches and abrasions. This thoughtful design not only keeps your vehicle's finish intact but also provides a stable and sturdy connection for all your rooftop adventures.
Concerned about the longevity of your roof rack in various weather conditions? The powder-coated finish on the clamps offers excellent durability and rust resistance. This means that whether you're traveling in downpours or under the harsh sun, your Rhino-Rack setup will stand the test of time, maintaining both its functionality and appearance.
Need a complete solution for your vehicle's roof rack setup? With the easy-to-install 4-pack, you're not just buying individual components; you're getting a comprehensive solution that simplifies transporting gear like luggage, kayaks, or bikes. It's the perfect pack and go for adventure enthusiasts who value convenience and reliability.
Want the best for your vehicle's sleek look without compromising on functionality? The molded-rubber pads in this kit not only ensure a secure fit but also help maintain the stylish lines of your car's roof. These pads are engineered to hug the roofline tightly, offering enhanced support while ensuring your car looks impeccable.
Looking for a long-term investment in your travel gear? The Rhino-Rack Custom DK Fit Kit comes with a limited lifetime warranty, providing peace of mind and assuring you of its quality over years of adventures. Whether you're a frequent road tripper or an occasional excursionist, this warranty ensures that you're covered, letting you focus on the journey ahead.

California residents: click here
Videos are provided as a guide only. Refer to manufacturer installation instructions and specs for complete information.
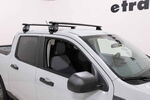
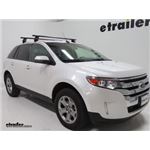
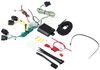
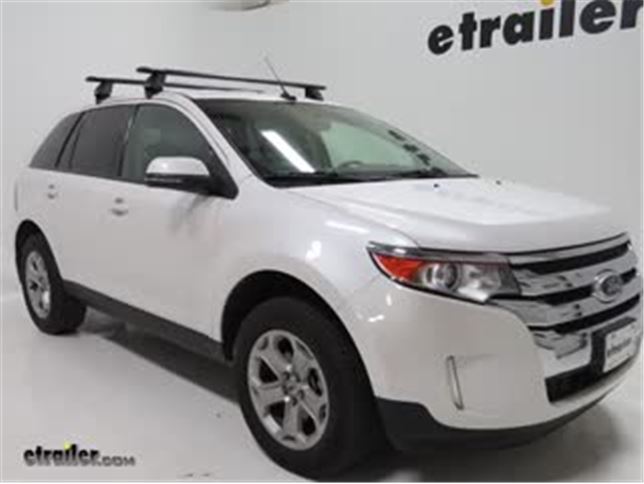
Speaker 1: Today on our 2014 Ford Edge, we're going to be doing a test fit of the Rhino-Rack Vortex Aero 2500 Series roof rack system. It's available in black with part numbers RRVA137B-2. They're also available in silver crossbars with part number RRVA137S-2. We'll also be using RRLKVA and part number DK228. The Rhino-Rack Rook Rack System is a premium roof rack for your Ford Edge. It features two 54" aluminum Vortex Aero crossbars.
Not only are they going to be stylish but they're aerodynamically designed to reduce wind noise and drag. The crossbars will also accommodate your T-slot accessories. The end caps feature plastic locking cores with a key included to prevent anyone from removing your T-slot accessories. If you'd like to upgrade those to all metal locking cores, you could four up with part number RRVA-LEC4.The crossbars are held in place by four Rhino-Rack 2500 Series foot pads, which are then hooked to our Ford Edge. Both the foot packs and the hooks feature padding so it won't arm or scratch our Edge's roof.
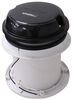
The foot packs also feature a locking cover with two keys included. This is going to prevent anyone from tampering with our hardware. When it's installed on your Ford Edge, it's going to add about 5-1/4" to the height. Now that we've gone over the features, I'll go ahead and show you how to get it installed. Now this roof rack system is designed for your Ford Edge's naked roof.
We've already got the front one installed. The rear one installs the same way. Let's go ahead and show you that now.Now for our rear crossbar, I've already got one side installed. Let's do the other side. We'll start by grabbing the foot pack.
We're going to turn it upside down, where we can access the foot. We'll grab the rubber pad. It's got a little arrow on it. We need to made sure that that's pointing away from our foot pack. What we want to do is push the pad onto our foot. Just line it up and we're just going to push it in place. We want to make sure that it gets on there all the way, just like that. Then, we can turn it back up and we're going to take out the bolt here. We'll then take our hook, we're going to place that right over the nut and then we'll just simply replace that bolt. Now we don't need to worry about tightening it down all the way, just get the threads started.We're now ready to put our foot pack on our rail. We'll need to make sure that the bolt up top here is in the loosened up position. Here's the underside of my crossbar. We'll need to slide it into the channel here. I'm going to take my foot pack, going to line up the square and then we'll just slide it in place, just like that. Then while I'm here, I'm going to go ahead and put on my end cap. Now before we position our rear crossbar onto our Ford Edge, we'll need to made sure that the foot pack is in the correct spot. Now in our kit, we have a measurement strip that actually gets installed on the underside or our crossbar to reduce wind noise and drag. And on the strip, it has some numbers. This is how we determine the correct spot for the foot pack. When it gets installed at the correct measurement, it gets trimmed and then that way that's in place.For demonstration purposes, we will not be using it. Per instructions, it needs to be 158 millimeters. We're going to line it up and we're going to go to the beginning portion of our foot pack. Once it's in the correct spot, we can then tighten it down with the included tool. Now let's put it into position on our Edge. It's a good idea to make sure that the rear doors are opened up and we're going to set it in the general area that it's going to be. Now per our instructions, our crossbars need to be 27-9/16" apart, center on center. We'll take our tape and measure center on center. And it looks like we are pretty close. And we want to do this for both sides. Now we can begin tightening down our foot packs. And what we need to do is we want to tighten it down on both sides until the hook actually makes contact with the inside of the door here.With both hooks making contact with the inside of our door, we can go ahead and start tightening it down completely to our Edge's roof. I'm going to give a couple turns here and then I'm going to alternate sides. That way it's tightened down evenly. Now there's no reason to over tighten, just get it nice and snug. And we're all set. The final step is to put on our covers. Put it in place and we'll lock it up. Now we're ready to load up our favorite Rhino-Rack accessory on our Ford Edge and hit the road. And that's going to complete our test fit on the Rhino-Rack Vortex Aero 2500 Series roof rack system on our 2014 Ford Edge.


Do you have a question about this Accessories and Part?
Info for this part was:
At etrailer we provide the best information available about the products we sell. We take the quality of our information seriously so that you can get the right part the first time. Let us know if anything is missing or if you have any questions.


Thank you! Your comment has been submitted successfully. You should be able to view your question/comment here within a few days.
Error submitting comment. Please try again momentarily.