


Manual RV awnings can be a pain to set up, especially after a long day behind the wheel. When you finally park, you don't want another job. This electric awning runs off a wall switch. Just stand and press while the awning does all the work.
With a manual awning, you are the motor. You have to step outside, pull it down, guide the arms, and try to keep it tracking straight so it doesn't bind. If it starts to go crooked, you have to straighten it out before it makes things worse. At the end of a long day, paying attention to every detail isn't the job you want. This powered awning takes you out of that role. The momentary wall switch sends power to the motor inside the roller tube, which rotates the tube and moves the awning. You just hold the switch and watch it do the work.
This isn't just your basic on and off switch. It works only while you're pressing it. That means you decide how far the canopy extends. Need just enough projection to block late afternoon glare through one window? Stop there. Want full coverage over the patio side? Hold it longer. You press, it moves. You let go, it stops. It only moves on your timing.
Both. This awning works just as well for a new install as it does as a replacement for an older unit. It runs on 12-volt DC power, so it connects to your RV's existing 12-volt system. Once it's connected make sure to properly ground it. You might ask, "Is there a single standard way to wire it?" Not really, because RVs are anything but standard. Battery locations, fuse panels, and wall cavities change from unit to unit. How you route and protect that wiring depends on your RV's layout.
It isn't surprising when an awning tears. It's not even surprising that it tears in the exact same places every time. Tears start near the arms and along the seams because that's where the fabric and hardware rub against ea8h other every time you extend and retract it. Repeat that enough and wear turns into a tear. This awning reinforces those high-stress tear zones near the arms with heat-welded seams rather than stitched ones. The fabric isn't punched full of needle holes. The panels are fused together instead, so you aren't giving water and wear an obvious weak point to work from.
Any time you bolt something to an RV wall, you create a hole. And holes are where water goes. If those holes aren't sealed correctly, water will eventually get inside. To prevent that, this awning includes butyl tape on the brackets and arms. As the bolts are tightened, the tape compresses and spreads into the small gaps between the bracket and the wall, forming a continuous seal instead of relying on surface contact alone.
Long awnings are awkward to move and even easier to damage in transit. Rather than shipping in one oversized carton on a freight truck, this awning ships in protective packaging built to move through standard carriers. That means fewer bent tubes, fewer crushed corners, and less chance you're dealing with shipping damage before you even get it installed. It also keeps shipping costs more reasonable.

Videos are provided as a guide only. Refer to manufacturer installation instructions and specs for complete information.
Hi, I am Daniel with etrailer and today we're gonna take a look at, and I'm gonna try to install the etrailer 12 Volt Powered Patio Awning on our June 21 Grand Design Transcend. Awnings are great to have on those hot summer days. You can extend this when you get to the campsite and be under a nice cool shade. You won't need a sunhat like this I needed for the whole install. I can just walk under here and now I'm completely in shade. This awning is going to be 16 feet wide and it's gonna be good for if maybe you've already had an awning that the motor blew out on or you're installing an awning from scratch.
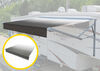
This awning is gonna be eight feet wide and it's made out of a nice durable vinyl. And as you can see, it does have a gradient so it's gonna fade from black to a white on the end. On the supporting arms there is a knob that you can tighten up and that'll strengthen this. So if you are in some heavy winds like we actually are right now, we'll tighten this up and that'll make it a lot more sturdy. But when you do retract it, you do have to loosen this up on both sides.
This is what it'll look like retracted against your trailer. Rolls up so you can only see the black. So it does match a lot of the accents on this trailer. This kit does come with a hand crank, so you can put this in that loop on that right side and crank this up. So this will retract and I would recommend only to do this when you don't have that 12 volt power power on your awning.
Something I will mention is you wanna measure from the top of your C channel if you already have that on your trailer or where you would mount that to the top of your door. So ours is right about six inches and I would say that is most likely the minimum you can get. So as you can see, our door is very close to our roll. If you have any further questions about replacing an existing awning or you're just getting a new one, please feel free to reach out. We'd be happy to point in the right direction.
We do offer a lot of replacement parts, so maybe just a small part is all you need to get yours working. Now as far as getting this one installed, it is fairly in depth. You're gonna need a level and maybe a couple of friends to help you get this in place. So if that's not something you have the time or tools to do, you can check out our installer locator. We can find an installer local to you to get this installed. But if you wanna do it yourself, follow along. And in this video, we'll show you how. First off, on our neighbor's camper, we're gonna have to take off their old awning. So I extended their awning just a little bit, a couple inches. And I'm gonna use some zip ties to secure this. So when we take this off, this doesn't fall down, you can use a piece of rope or I just put two zip ties together. I'm gonna put it above this support so this doesn't fall off and get that secured. And to take this off, I'm going to take the fastener that's going into our roll out. (tool buzzing) It is gonna be another fastener going into the extrusion rail and into the fabric itself. So I'll take this out so we can slide this out. I got that zip tie and I'm gonna take our hardware of our old awning, (tool buzzing) we can take our fabric tube and I gotta take out the Phillips. There's one fastener in there to take out our center section and there's gonna be a line marking halfway. Push that back in to that line and your threaded insert should line up and we'll get that screw back in place. We'll take our other counter sink screws. I did loosen them all up so I can move this around so they can all fall into where they need to be into that counter sink. I'll just loosely tighten 'em all back around. We can get our center section and get this slid in. There is only one way this can go in, just find it, slide it all the way down and we'll do the same thing. Take those screws, put 'em all in loosely and then we'll tighten 'em all down together. We will take our other end piece, we'll do the same thing, take this intersection, take it out halfway and get all of our screws tightened down. Now we'll slide this end piece into that center section. Now we can get our bracket screwed in to the side of our camper. And I did measure everything out 'cause we had existing rails and they're not gonna be exactly where they were. So I want them to be as centered as possible to cover up those existing holes. I'm gonna start over here where our wiring was 'cause that's gonna give us a set location where we're gonna put this. So I measured down from our C channel up here from the top of it, I measured down six inches and that is where the two holes in our bracket are gonna line up. So I drew a line. Now I can get this attached, (tool buzzing) get both of those started, take all this off and then I can get that put back in place. There is butyl tape on the back of that bracket and I'll also take that wax paper off. Okay. And I am gonna leave this loose until I get our rail in place. With our bracket loosely in place, I put a mark right in the center so we can measure from this 16 feet so we can put our other bracket. You can also put your tape measure and put it on the end of this one and then measure it to the inside of the other one. I like to do both just so our bases are covered. We got Scott over there giving me assistance and I'm just gonna put a mark right at 16 feet. (tool buzzing) Do you want to cover up and waterproof the holes So before you get the new one on, you wanna check all your holes and get those covered. And for ours, they're way up here. I'm just gonna do this now. I covered our existing hardware that we took out in butyl tape. (tool buzzing) I'm gonna run that down, clean that up, and then caulk over all of these fasteners. Now I got a level and I slid this underneath our bracket, level this out, and now I'm gonna self cap this in. (tool buzzing) When putting your arms on, you wanna take off the coverings of the butyl tape, I'll get this up into place. You wanna go behind that upper bracket, behind it all the way up. And now we need to level this out. So you do wanna make sure your trailer's completely level. I got my level headed friend over here, Scott giving me a hand with the level and I'm gonna move it until it's perfectly level. And that's looking good, so now I can shoot myself tappers in the bottom, (tool buzzing) I laid out our fabric and we need to take our poly cord. And on the white section, there is a fold and that's where we're going to feed our poly cord through. We got our awning fabric slid into our tube. There's gonna be a sticker on there. It's gonna say number one fabric slot. So that's where you feed this in. And this is our left side and then down there is our right side. So we want the access to be flapping down and I just had two people, we slid it in, one person fed and then I just dragged it all the way down and we got it in that slot. Now from the end of our awning, I'll take a measurement so we can get this even on both sides. I got about 7/8" on both sides so we're all good. Now I can rotate it back a little more and there's another slot and I'm gonna use this tool that that comes in the kit, push down our fabric into that opening. I'll take our other poly cord and I did cut this into a point, so this would be a little bit easier to feed in there. And you can use soapy water. I'm gonna use some silicone spray to help us get this in as well. So I'll feed this in to our fabric and I'll work this down. So you want to get this nice and tight and work it in that slot as well as feeding your cord in. We can take our remaining poly cord and get this put in our other opening on the other end. Same thing, we'll put that in and feed it all the way down. I will cut the excess of our poly cords off. Now we can roll this up, making sure it's even on both sides. Now we can take this over the trailer and get this put on. See we had three people doing this with a multiple ladders, so it's a good idea to grab a couple buddies to get this slid in and you are able to throw it onto the roof if you need to take a break to move ladders around. So then we did that a couple times and once we got it slid all the way in, we used the nut and bolt that we inchesre already on our arms. We took that off and we put that back in place so this could hold its weight. Something to mention is depending on how your trailer is, you may have to take the gutter completely off in order to get this in. That's what we had to do, 'cause you don't want to go too fast and rip it on the edge of your C channel here. Something to mention when you're putting the roll tube on is you need, this handle has a loop in it to be facing down. This is what you're gonna use to manually retract it if maybe your power goes dead. And so just make sure that's down. I undid our strap and this is letting our arm come out and my ladder's here so it's not gonna go all the way out. And now I can wire it up. So the wire that's coming from our roller tube, that can go right into our arm. There's a cap you have to unscrew and then you can feed your wires inside. There's another wire inside our arm and I just splice those so I can crimp some butt connectors on. And I am using heat shrink butt connectors. So we can add a heat source to these and I'll shrink right around the wire since they're gonna be outside so water won't get in there and corrode your wires. Now I'll connect blue to blue and brown to brown. (tool buzzing) Old awning wires, they're sticking out. So we'll get our other wire connected to these and they do give you a cover so I can slide this over first. You unscrew the cap, slide the cover over and now we can get our other wires connected up. If you are doing the wiring from scratch, you're not replacing an existing awning, then you will have to hook this up to temporary 12 volt just to make sure everything's working properly. And once you've done that, you can run your wires inside and there's a diagram in your instructions on how to wire that switch. If you do have existing wiring like we did, each wire's gonna be specific, so one's going to control the retracting and one's going to extend. So what I would recommend is getting a wire nut to temporarily put your blue wire on one and your brown on one, push the button and see what it does and then switch 'em if you need to. Now with everything connected up, we can test this out. So I'll go inside, hit that button and extend this. And it looks like our motor stopped right there. So we need to adjust it and I'll show you how to do that over by the motor. Over here on our right arm, this is where our motor is and I do give you a tool that comes in the kit to set how far it needs to be extended and how far you can retract it. So the hole that is furthest away from your handle, that's for extending. So I'll put this tool in here and I'm going to turn it clockwise, but there's a diagram that will have a plus and minus to show you. I'm gonna give it a couple turns and then extend it a little more. So what you're looking for is to extend it all the way to the open position with the motor shutting off. So if the motor's still going, you're gonna want to do some minus turns. So now it's stopping there. So I'll do a couple more turns, come back and do this until we're fully extended. All right, and that's all good. So now we can retract it all the way and we'll do the same thing. We'll adjust that as needed. And same thing, you're gonna want this to close completely with the motor shutting off at the right time. Again, if it's still going, you want to turn that until you get the right setting. With everything working properly, we can get the rest of our fasteners in. So in the upper bracket, get a screw in that lower hole. (tool buzzing) And now I'm gonna just tighten everything down evenly. So we did leave these top a little bit loose. Our last screw is gonna go in the middle. So I extended our awning all the way out so I can get to it. I'll get this fastened. (tool buzzing) And we can take our very small self tapper that comes in the kit and we're going to put that through our C channel into our fabric. And it does say the instructions to do about four inches from the fabric. We already have a hole here from our previous fabric installed, so I'm just gonna use that one. You wanna make sure you go through the poly cord and the fabric. You can take our longer self tapper. And this is gonna go through the poly cord that's in the C channel and it wants you to use this longer one, but ours was already here and it's incorporated with our gutter. So this would just go straight through into the gutter. So we're gonna find a smaller one so we can put it in there. (tool buzzing) It is gonna be a couple more self tappers we're going to have to use and it's gonna be in our roll tube where that poly cord is. So I got that self tapper, I put it close to the end as possible and got it into that poly cord so that doesn't move around. And then there's gonna be one more in that other poly cord that's in the bottom here. Once you've got everything caulked up and all the self-tappers in, the last thing to do is tidy up your wiring and we're gonna be using a grommet and some caulk to fill that in. Now it just about does it for a look at our Etrailer Patio Awning on 2021 Grand Design Transcend.
Customer Satisfaction Score:
83% were satisfied with this product
17% of customers were not satisfied
Ratings & Reviews

Do you have a question about this RV Awning?
Condition: Surface Scratches
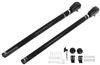
Notes: Item has minor cosmetic scrapes on the end of one of the tubes. Otherwise new and unsued.
Info for this part was:
At etrailer we provide the best information available about the products we sell. We take the quality of our information seriously so that you can get the right part the first time. Let us know if anything is missing or if you have any questions.





















Thank you! Your comment has been submitted successfully. You should be able to view your question/comment here within a few days.
Error submitting comment. Please try again momentarily.