
 Product Experts Available Now!
Call 1-800-940-8924


Thank you! Your comment has been submitted successfully. You should be able to view your question/comment here within a few days.
Error submitting comment. Please try again momentarily.


Sleek, hybrid RV kitchen faucet has 1/4-turn stems that prevent leaks so you won't have to worry about wasted water. Washerless stems reduce daily wear and tear to help extend the life of your faucet. Includes deck plate and mounting hardware.
Features:
Specs:
To install, assemble the 2 pieces of the faucet together, and use the inlet shanks to drop the new faucet and deck plate in place of your existing faucet. Then tighten the included mounting nuts against the underside of the counter, and connect the hot and cold water lines. You'll need to keep some tub and tile caulk (not included) on hand to help prevent any leaking.
Videos are provided as a guide only. Refer to manufacturer installation instructions and specs for complete information.
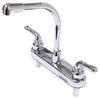
Today we're going to be taking a look at the Phoenix Faucet's RV Kitchen Faucet. This unit's going to add or replace a kitchen faucet in your RV. It's a dual handle design. It's going to feature the dual acrylic lever handles, gives the unit a really nice look, cice quarter turn design and then the handles are going to have a H and a C to indicate hot and cold. The base of the unit's made from a plastic construction and has a brush nickel finish. The spout is a high arc metal spout that also has a brush nickel finish. It's completely lead-free design.
Here where the water comes out of the spout it does feature a low flow air rater. It's going to have a flow rate of 2.2 gallons per minute. The spout does fully rotate which is a really nice design of the unit. The mounting area is going to require 2 holes for installation. These are going to be the connection points for the hot and cold water lines. They're going to be separate on center by 8 inches.
They're going to give us a length measurement of right around 2 inches long. The outer diameter on those is going to be 13, 16, 7 inch with an inner diameter of a half inch. Taking a measurement of the base going this direction, we're looking about 2 and 1/4 inches. If we go this direction edge to edge, we're looking at pretty close to 10 and 1/4 of an inch. There's a few other measurements that I did. I took an overall height measurement from the counter-top or from the bottom of the base to the tallest point of the unit at a straight line measurement.
That gave me a measurement of around 9 and a half inches. Doing that same measurement so from the counter-top or bottom of the base to the closest point where water comes out measured around 7 7/8 of a inch. The overall depth from very back to very front was about 8 and 3/4 of a inch. I also took a measurement from the center of the unit to the center of where the water comes out and that was about 7 and 1/4 of an inch. It's a really simple installation. It's going to require 2 mounting holes.
Each hole needs to have a diameter of around 1 inch. They need to be separated on center by 8 inches. It does come with your back end plate and it's going to come with the threaded mounting nuts to get everything tight and secured. The unit also includes detailed installation instructions. It's going to walk you through the entire process step by step so it's going to show you how to get it installed in the holes, how the make the water line connections. On this side, you're going to have some operating instructions, cleaning tips, helpful hints. On the back side, you're going to have a detailed diagram of the parts list. That's going to do it for today's look at the Phoenix Faucet's Dual Handle RV Kitchen Faucet.
Ratings & Reviews


Info for this part was:
At etrailer we provide the best information available about the products we sell. We take the quality of our information seriously so that you can get the right part the first time. Let us know if anything is missing or if you have any questions.


























Kelly H.
8/1/2019
Still working fine!