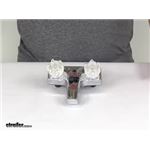
Phoenix Faucets RV Bathroom Faucet - Dual Knob Handle - Chrome
- All Info
- Reviews (31)
- Q & A (0)
- Videos (3)
- Photos
Phoenix Faucets RV Faucets - PF212307
- Bathroom Faucet
- Chrome
- Dual Handles
- Standard Sink Faucet
- Conventional Spout
- Plastic
- 0 - 5 Inch Tall
- Phoenix Faucets
Sleek RV bathroom faucet has plastic compression valve stems that prevent leaks so you won't have to worry about wasted water. Built-in hole between the knobs let you add a pop-up drain and lift rod assembly (sold separately).
Features:
- Faucet lets you replace or upgrade the bathroom faucet in your RV or camper
- Dual, acrylic handles have plastic compression valve stems that prevent leaks
- Durable ABS plastic construction with chrome finish
- DuraPro polymer plastic underbody is reinforced with glass fiber
- 2-Hole installation with included mounting hardware
- Requires tile and tub caulk (not included)
- Add matching pop-up drain and lift rod assembly (sold separately)
- CSA approved
Specs:
- Flow rate: 2.2 gallons per minute
- Overall dimensions: 6" wide x 3" tall x 5-1/4" deep
- Base dimensions: 6" wide x 2-1/8" deep
- Spout length: 4"
- Distance from mounting points to aerator: 3-1/2"
- Distance from countertop to aerator: 1"
- Inlet shanks:
- Inner diameter: 1/2"
- Outer diameter: 13/16"
- Distance between: 4"
- Length: 2"
- 1-Year warranty
How to Replace Bathroom Faucet
To install, use the inlet shanks to drop the new faucet in place of your existing faucet. Then tighten the included mounting nuts against the underside of the counter, and connect the hot and cold water lines. You'll need to keep some tub and tile caulk (not included) on hand to help prevent any leaking.
PF212307 Phoenix Faucets RV Bathroom Sink Faucet - Dual Knob Handle - Chrome
Alternate part number: P4032A-i
California residents: click here


Videos are provided as a guide only. Refer to manufacturer installation instructions and specs for complete information.
Video Transcript for Phoenix Faucets RV Bathroom Dual Knob Handle Faucet Review
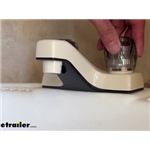
Hey guys, Kevin here with etrailer and today we'll be showing you how to install the line of Phoenix Faucets RV bathroom faucets. If your faucet's just not properly working anymore or is starting to corrode away and just doesn't really look nice anymore, the Phoenix Faucets line of RV bathroom faucets might be the right solution for you. This faucet is a dual knob zone with your hot on your left and your cold on your right and it comes in four different colors. This faucet has a 2.2 gallon per minute water flow which is a little bit higher than most of the other Phoenix faucet lines. If you look at some of the other ones, they do come with a 1.5 gallon per minute water flow and that's typically just because they don't want you to kind of blow through all of your water real quickly running the faucet since you're in a camper and most of the time you're not really hooked up to city water, you're just using your holding tank. Installation of these faucets is super simple.
The hardest part really is kind of just getting up in your cabinet to hook up your water lines 'cause it's just really tight. RV manufacturers really don't give you a lot of space because they're trying to cram everything into one little piece. So other than that, you should be able to do get this done in maybe just five minutes. So here's our neighbor's current faucet. As you can see, it's kind of getting worn out the finish on it's kinda getting ruined and it just nothing that you can really clean off.
it just kinda happens over time. Build up kinda gets on there and eats through it. So we're gonna go ahead and replace it. To replace that, there are two fittings down below that are just a screw on fitting. So we will have to get under the sink which pretty tight space, especially in campers just like this, where you really just have this really, really tiny cabinet but should be super simple.
We're just gonna unscrew those off and we'll be able to pop our old faucet off. So here's the fittings I'm talking about. These just simply screw on. This is typically gonna be what you're gonna find on any kind of faucet like that. With beads, they are plastic.
You shouldn't have to really use any tools to get 'em on and off, but they may be a little bit tighter than your hand can handle it first. But you do wanna be real careful if you use like channel locks or anything like that, it can kind of start to mar up that connection point and then you're not gonna be able to really get it on there properly and you can end up having a leak. So here's a little bit of a view of what I was talking about. Here's that little connection point really just screws on and like I said, this is plastic. So using anything metal like the channel locks, you're gonna end up just cutting into this too much. You can end up kind of crushing it or breaking it and like I said, I've seen a lot of these crack and then you end up not having a waterproof seal on it anymore and then it's just gonna sit there and leak. And typically you don't find that leak until it's a major issue. So we can go ahead and get our cold water inlet out and then we can start unscrewing our faucet. So now all we have to do is unscrew our faucet. If you look at those two inlets, there's these black rings that are around it that are also gonna have that same kind of little tabs on it that you can kind of grip onto and unscrew it. So you're just gonna have to take those off. With both rings removed, we can lift up our faucet and then you can see both those water inlets. Now the next step is going to be measuring your sink's water inlet holes. Ours today is spaced 4" apart, center to center. So we know we need to get a faucet that is 4" center to center or if we have a single inlet faucet where it's got the two hoses coming out we just need to make sure that we can cover both of these holes with the little dash plate that kind of goes over that and lets the single stack faucet sit in place. Installing our new faucet's gonna be super simple. We'll simply drop it down into the inlets on our sink and then we will use our little plastic, not right here and we're just gonna thread that on. Once we have that fully threaded on, it's going to clamp it to the sink itself so it won't be able to kind of move around or kind of slide or anything. And then you can easily screw on your water inlets. Now there is one other thing along with this. If you look at the top, there's this little black cover here. If you pull that out, you can also go ahead and stick in a stopper. So if your sink already had a green plug, you can easily run that rod right through there and be able to plug up your sink. If not, you can go ahead and leave that cover in place. So I'm gonna go ahead and drop this into place and then I'm gonna screw these on so it's almost tight about 99% of the way. And then I can kind of readjust this because as you can see, this can kind of shift around a little bit, especially when you're trying to screw it on. It's gonna wanna kinda lean up and kind of move around. So I wanna make sure that when I have it all the way clamped down that I have it exactly centered on here and make it look nice. So I'll begin screwing these on. Alright, now I can go ahead and kinda center it how I want and finish tightening it. Alright, with that fully tightened down, we can go ahead and start hooking up our water. Alright, make my final twist on here. Get it nice and tight so we don't have any leakage. One thing I like to do is stick a piece of newspaper or a paper towel under there that you can kind of tell if it gets wet. So kind of crinkle up and you just leave that down there for a day or two and just make sure that everything's nice and tight, 'cause you won't always see it if it's dripping real, real slow. But I think we're pretty good right now. We can go ahead and turn on our water and test it out. Well, I think about does it for today's look at the line of Phoenix Faucets RV bathroom faucets. My name's Kevin. Thanks for watching..
Customer Satisfaction Score:
89% were satisfied with this product
11% of customers were not satisfied
Ratings & Reviews
4.8
31 reviews
Great Company - Great Webpage - Tied the First Product to the Order.
Worked as advertised, quality was good.

products work perfectly
Great product. Exactly what I was looking for. I had no problem installing it. Thanks!
Ordered this faucet to replace one that was leaking. Ordering was simple and they new faucet went right in place effortlessly.
Excellant faucet works great . Thank you .
Easy to install in our pop-up camper. Works great.
The products were sent in a timely matter at a much lower cost than the local RV supplies stores. Their inventories are sizable which makes it easy to choose new or replacement items. I’m overall very satisfied and will definitely order again from that source.
E trailer (Eric) was especially courteous and helpful to help us through our order. Shipping was very quick.

Great products fab and vent cover still working great and look great after a year of use. Will buy from etrailer again.
Exactly what I was looking for our Park Model RV that uses well water. Anything that is metal plated only grows green “tarnish”.
Maybe not as asthetically appealing as a metal faucet. But any metal at all quickly changes those asthetics.
Almost porcelain in appearance. Love it so far.

George thank you so much. My first time owning a trailer and my faucet breaks on the day we’re going home. Your website made this whole process extremely smooth. Easy swap out with no problems at all. My new go to gut. Thanks again
This was exactly what I needed at a very good price and shipping was fast--what else could be wanted?
etrailer service is great. They had the product I needed at a good price and shipping was quick. They will definitely be my source for RV products.
Everything was as expected with a 5 minute replacement of my RV bathroom sinks faucet.No leaks,I am a happy camper.easy to install,thank you again etrailer for quality products.

I like what I ordered and the way the order was delivered and e-trailers help.

Everything fit perfectly. Just like oem. Products and service was excellent.

excellent faucet for the price. easy to install and works correctly.
See what our Experts say about this Phoenix Faucets RV Faucets
- Availability of RV Bathroom Faucet with Screw Off Spout We have the Phoenix Faucets RV Bathroom Faucet # PF212307 which has the aerator nozzle that can be removed like I believe you are looking for.
view full answer...
Info for this part was:


At etrailer we provide the best information available about the products we sell. We take the quality of our information seriously so that you can get the right part the first time. Let us know if anything is missing or if you have any questions.


Thank you! Your comment has been submitted successfully. You should be able to view your question/comment here within a few days.
Error submitting comment. Please try again momentarily.