
Yakima SkyLine FX Roof Rack for Fixed Mount Points - JetStream Crossbars - Aluminum - Black - Qty 2


To see if this custom-fit item will work for you please tell us what vehicle you'll use it with.



Thank you! Your comment has been submitted successfully. You should be able to view your question/comment here within a few days.
Error submitting comment. Please try again momentarily.


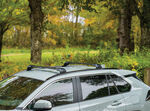
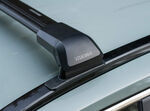
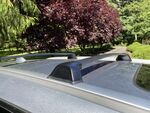
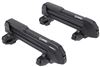
The flush design of the Yakima SkyLine FX keeps the crossbars tight to the roofline, giving everything a clean, factory look. Nothing sticks out past the sides, so it looks streamlined and balanced. It’s a simple way to carry gear without adding bulky overhang or breaking up the roofline.
When you’re driving with a load on top, wind noise can be a real drag. These aero-style aluminum crossbars are built to fight that. The push-down rubber strips in the top channels help reduce wind noise and vibration while you’re on the road. The smooth design lets air flow cleanly over the bars for a quieter ride.
These bars are ready for just about any adventure setup. They work with accessories that mount in the top channels or clamp around the bars, so you can use your favorite bike racks, kayak carriers, ski mounts, or cargo boxes all on the same system. That flexibility means fewer limits on what you can bring.
The SkyLine FX uses an integrated crossbar and tower system that installs to fixed mounting points on the roof. The setup feels solid under load—rated for up to 165 lbs, though it’s always smart to follow your vehicle’s maximum roof load capacity. The aluminum construction adds strength without unnecessary weight, so you can count on it mile after mile.
You can add Yakima Same Key System (SKS) lock cores (sold separately) to secure both the rack and your channel-mount accessories. It’s an easy way to keep your setup safe whether you’re parked at a trailhead or overnight at a campsite.
 Alternate Instructions
Videos are provided as a guide only. Refer to manufacturer installation instructions and specs for complete information.
Hey, everyone, I'm Evangeline right here at etrailer. If you're looking for a roof rack for your 2025 Chevrolet Trax and you want something that's super sleek but also easily removable, we're taking a look at the Yakima SkyLine FX, we'll take a look at some features, and later on I'll also show you how this installs. This is going to be a flush roof rack, and what that means is it ends at this tower here. Some other roof racks you may see on the road have an overhang if you want a little bit more crossbar space. So while Yakima does offer that option, this is definitely gonna be ideal if you're only carrying maybe one thing at a time and you want something that looks a bit more sleek. This is designed specifically for the flush rails on your Chevy Trax.
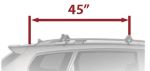
If you do not have these rails on top of your roof, you probably have what we call a naked roof or a bare roof, and there are other options for that type of vehicle too. Now, when you get this specific kit for your flush rails, this secures into the mounting points of your rails so you don't really get much adjustment when it comes to where they go. So for crossbar spread, what I like to do is measure center to center of the bars, and we have around 27 1/2 inches, and that's gonna be really good for versatility. That number will fit for most things like your roof boxes, roof basket, ski and snowboard carriers. You can always check recommended crossbar spread on any of the accessories on our site.
Now, for those longer items, since you do have a smaller car, you wanna be mindful of, will you still be able to open up your hatch So if I take a measurement real quick from the rear bar to the top of our hatch, I have it at another 27 1/2 inches. So that's just so be mindful of if you're carrying around a longer kayak or a longer roof box. If all else fails, maybe you just really wanna carry around that canoe, just be mindful before you open up your hatch all the way. (hatch thuds) Just because it's sleek doesn't mean it's too low profile. So you'll see there's a significant height to our bar here, and that means we'll be able to clamp more things around your bars.
So let's go for the distance from the top of the roof to the bottom of our crossbar. I have it around 3 1/4 inches, maybe 3 1/8 depending where on your roof you measure. That's plenty of space, will fit most things. Your cargo on top of the roof, that's going to be about 4 1/4 inches above your roof. Something to think about is skis with tall bindings, you'll make sure that those bindings clear and aren't scratching up your roof.
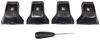
If you need extra clearance, you can always check out different accessories that offer that special extra height. But with these numbers, most things will be good. Now, I did say that you could maybe carry one thing at a time on this roof, and that's because if you do clamp around, you are kind of limited to in between these towers for where you can clamp. So that number will be a little different. For front and the back, I have 27 1/4 inches here, and then in the back I have about 26 inches for usable bar spread. That's gonna be the maximum distance apart that your clamp can be and still attach to this bar. Or you can choose not to use clamps and use T-track mounted accessories. The SkyLine FX has this very convenient hole in the center where you can slide at your T-bolt or channel bolt through and just slide to wherever on the bar you need to secure too. Then you don't have to worry about any clearing clearances at all. With that landing pad design, you could just lift your crossbars off if you don't want them on your roof for whatever reason. I leave mine on my roof all the time. So you take that end cap off, you get a flathead screwdriver, turn this lock core over to the open position or unlock position. You lift, or I guess pull, this door down and then you can now lift the roof rack up and out of that landing pad. Now, do that on both sides for it to fully clear. But that's just a quick and easy way to remove this crossbar. Some people like to do that if they're going through a car wash where they're worried that the car wash won't allow roof racks or other accessories, things like that. So just an extra feature for you there. As much as I love how the Yakima SkyLine FX looks on this car, especially with this all-black trim and those shiny black crossbars, for me personally, I've always carried longer bars on my roof, simply 'cause I carry a lot of cargo and I like having that extra space. They don't look as sleek though as the SkyLine FX. So it's all about what are you carrying and what type of look are you going for. Hopefully this video with all of those different measurements and dimensions help you figure out if this is the right fit for you. And if it is, I'd love to hear all about it. I always talk about how my roof rack helps out with my journeys, and if your roof rack helps out with yours, send in a picture and maybe you can inspire some other people along the way who are trying to figure out what's the best fit for them. If you're curious about how I got this installed, stick around. Now, when getting your roof rack installed, the good news is that most of your roof rack is already put together. You just need to install the landing pads onto your vehicle, and that's gonna be the items in the fit kit portion. Now, almost everything you need is included. The one thing that I brought to the table is a piece to pry open the plugs on your roof. We can also use a flathead screwdriver for that. Along the flush rails of your roof, you're gonna see these plugs. And to pry them open, they're usually pretty stuck in there, so that's where that flathead screwdriver or your pry tool will come in handy. You'll use your tool to pull on the plug, and it'll come out of the flush rail. You're then gonna do the same thing three other times each side. The next step is to get your landing pads, and you're gonna have this rubber cap. This rubber piece will just fit into the landing pad. You'll just follow the curve of the pad. No need to make it super perfect, as long as it just stays in there. And we'll put this on the roof using our hardware. Bringing this up to your flush rail, this will fit over the rail. Now, try to have it where this long slot faces the back of the vehicle, and that's going to be the same for all four of your landing pads. Now, this will then be secured with your bolts and your washer. And I like to do this by hand first just so that I can get that threaded in. Same thing on the other side. There's gonna be eight bolts and eight washers you need to secure total. You'll then have this special security torque tool, which you'll use to tighten down those bolts. You are gonna have to be patient since you don't have as much wiggle room on the roof. So from here you need to put the crossbar on top of the landing pads, or if you're just gonna leave the landing pads on their own, you can just put a cap on them and drive around with just this part installed. Back to our crossbar, so we have these towers here that we're gonna open up, and this involves pinching on the top sides and then lifting out the cap. So now you will then reveal the locking core for the mounting point. You'll use a flathead screwdriver to turn that to the unlock position. And now when you open up that door, you'll see that the tabs underneath go in and go out. And that's how you secure this to your landing pads. Notice here there's a little diagram of the vehicle and this shows which direction is front of the bar. With both sides open, now what I'm gonna do is I'm just gonna loosen that both on the inside using our Yakima tool. That way, once we get onto our roof, we can make adjustments to the bar length. So this is gonna be how you install this onto the landing pad. You're just gonna lift the towers up and into the pads. It's very important that that door is open so that you can fit them in there. So then drops into place, and then just go ahead and close that door. Those tabs will push right out, securing it into the landing pad, and tighten it down on both sides. The Yakima tool included with your box, that's actually a torque tool, so it has a special setting to it that when it reaches the proper tension, it will click and prevent overtightening. So whenever you tighten down all four of these towers, keep turning until they all click. And then you're gonna turn that lock core up to the locked position with your flathead screwdriver and then finish it off with popping that end cap into place. And that's how you install your roof rack. From this point onwards, if ever you wanna take that roof rack off, you just take those end caps off and then open up that door like I showed you earlier in this video. And then you have a more streamlined look. But when you need to load things up on here, whether it's accessories or cargo boxes, you can put the crossbars right back into place. Hopefully this video was helpful for seeing how this looks, how this works, and how to install your Yakima SkyLine FX roof rack on top of your 2025 Chevrolet Trax.
Ratings & Reviews

The system fit perfectly. Thank you!
Works great!
Yakima Landing pads are vehicle specific. Good quality mounts are supplied with good stainless steel fasteners. Required as a base for the towers.
Excellent service
Great company. Fair price. Product as advertised. Fast and free delivety.
Great customer service
Stacey was very helpful to ensure I ordered the right part for my vehichle. Excellent customer service!
Excellent customer service! I felt like I had a personal shopper in the care Sherry S. offered!
Great product. Easy to install. Arrived quickly.
Yakima Towers and Pads arrived on time and all in order. Service was extremely fast and the price was better than every other site I looked through.
I like the strength of the Yakima brand and it looks great. It does seem a bit more complicated than might be necessary. I know they have to fit to many different cars but the matching of components is confusing and the installation less than intuitive. The end result is great and etrailers is awesome in every way!
In the confusing world of roof racks, the etrailor site had a locator tool that made it easy to identify the correct landing pads and towers for my vehicle.
Yakima racks are always a good choice. Etrailer made it easy for me to know all the parts I needed and it was so easy to install!
I have a Buick Envision and it seemed as if it would be difficult to get the correct rack, but it turned out to be easy. I entered my vehicle info and was directed to the Yakima Skyline with flush rails. It was easy to install and they look great. I will be able to take my canoe out with no problem! Joe
I love the ease of removing my crossbars at the end of the season with these landing pads. Highly recommend these.
Exactly what we needed to use our old Yakima bars and kayak sharks with our new Ford Explorer. Our old car, a Ford Expedition, used the same round Yakima bars and kayak sharks but had a different roof rack. Instead of paying $800+ to get a whole new kayak rack system... the adapters we got from etrailer helped us used all the old equipment :)
I had cross bars and landing pads on my Jeep Grand Cherokee. I bought these to put on my wife’s new Grand Cherokee L. They were extremely easy to install and now I can easily move the roof rails between the two vehicles. They are a great product as is most of Yakima’s products. I highly recommend them.
I HAVE DONE BUSINESS WITH E-TRAILER BOTH PERSONALLY AND AT MY JOB. THE SERVICE, COST, AND CUSTOMER SERVICE ARE LEGENDARY IN PERFECTION. KEEP UP THE FANTASTIC WORK.
Came quickly, and I appreciate the free shipping – which is why I went with etrailer instead of ordering directly from Yakima.
All worked as described. Installation was easy and quick.
Dont waste your on cheaper products, it will bite you eventually
Makes for easy and secure crossbar on/off. Covers stay on during car washes.
Easy website, fast shipping, quality pr oducts
My 2014 Jeep Grand Cherokee used landing pads 18 to mount to the roof my newer 2023 JGC uses landing pad 19. I was able to change the pads thanks to etrailer and install my older roof rack on my newer Jeep. I love that the majority of my roof rack is upgrade-able.
These landing pads allow for the quickest and easiest install and removal of cross bars. This will be the only ones I use going forward.
I have these installed on a 2022 Honda Pilot. I could not get them to fit on my raised roof rails with the included rubber gaskets. I have mounted them without the gasket but this leaves a gap between the rail and the landing pad. This seems secure but does not have a finished look. I will be trying to see how to get the gaskets to fit.


Andrew N.
10/15/2022
You definitely want to use the gaskets and I dont recommend using the crossbars without them. Here is an install video that might help you out with this part. Let us know if you still some assistance after watching.
Do you have a question about this Roof Rack?
Info for this part was:
At etrailer we provide the best information available about the products we sell. We take the quality of our information seriously so that you can get the right part the first time. Let us know if anything is missing or if you have any questions.

















James
8/24/2025
The rack base has worked perfectly. I took my Yakima rack off my Tacoma and transferred it to a Honda Pilot and eTrailer had the correct bracket.