
 Product Experts Available Now!
Call 1-800-940-8924


Thank you! Your comment has been submitted successfully. You should be able to view your question/comment here within a few days.
Error submitting comment. Please try again momentarily.


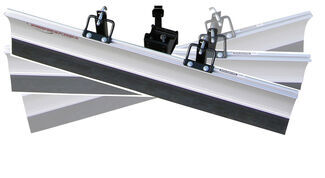
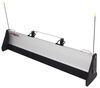
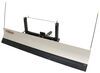
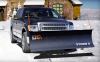
96 x 18 Heavy-duty plow with thick rubber cutting edge self-adjusts up and down to smoothly clear a path over concrete, gravel, and grass. Side scoops catch more snow with each push. Aluminum blade can be manually angled to either side.
Features:
Specs:
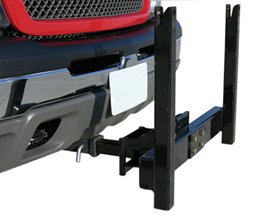
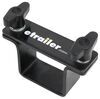
Installation is quick and simple - just slide included shank assembly into your 2" receiver and secure with pin.
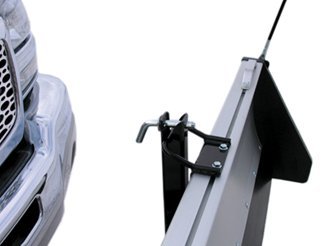
Then lift the blade, one end at a time, onto the frame's holders and fasten with snap pins.
The SnowSport HD blade is mounted on an angled, 3-position shank assembly, allowing you to plow to the left, to the right or straight ahead.
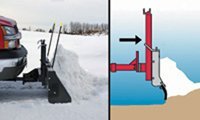
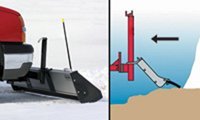
To plow, lower the blade and begin driving; no wiring or hydraulics are needed. The unique push frame on the shank assembly allows the blade to move along the grade of the terrain for easier, more efficient plowing. The heavy-duty rubber cutting edge is effective yet turf friendly, collecting snow and squeegeeing slush without digging into the ground.
When you reverse direction, the blade lies back, skimming over the surface of the ground so that you can easily take another pass.
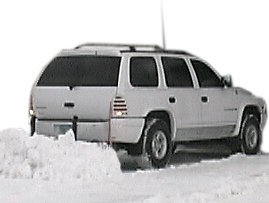
Once you're finished plowing, just lift the blade and refasten into the travel position. The blade is secure enough to travel at highway speeds, and the low-profile design keeps it from blocking your vehicle's headlights. Removal for storage is quick and easy. The plow can be used on the rear of your vehicle, making it a cinch to back out of your snow-packed driveway.
Videos are provided as a guide only. Refer to manufacturer installation instructions and specs for complete information.
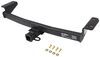
(upbeat rock music) (upbeat rock music continues) Narrator This video is to be used in conjunction with your owner's manual to help you with the assembly and mounting of your new SnowSport HD Plow. You will need a receiver plow mount hitch installed on your vehicle before starting the plow assembly. Follow the written instructions for the mount kit for your particular model of truck. Next, you will want to gather the tools shown on the list: torque wrench, impact or ratchet with 9/16-inch and 3/4-inch socket, drill with 3/16-inch and 5/16-inch drill bits, number 3 Philips driver bit, 3/4-inch box wrench, 5/16-inch open end wrench, 3/16-inch Allen wrench, bubble level, and protective eyewear. Make sure your vehicle is parked on a level grade and you're ready to get started. Step 1.
Insert interceptor into receiver and secure with the hitch pin. The interceptor can be installed with the big leg turned either up or down as needed for proper push frame clearance, shown turned up in this video. Bolt the push frame to the proper hole pattern on the interceptor using 4 half-inch by four-inch bolts with flat washers and lock nuts. Leave bolts snug tight for now. Step 2.
With the bolts snug tight, level the push frame horizontally, then check push frame for vertical plum. If plum, tighten all four bolts and proceed. If not plum, refer to the shimming procedure in step number 2 of your owner's manual. Step 3. Align the end of the rubber edge with the matching channel of the bottom section of the aluminum blade.
Slide the rubber edge into the channel until it's centered on the aluminum blade. Take the top half of the blade and connect the tongue-n-groove joint with the bottom half. Slide the top section until it's centered on the bottom section. Step 4. At each end of the blade, insert two square nuts into each channel, flat side facing out.
These nuts will be aligned with the holes at the top and bottom of the slide hinges. Place each slide hinge on the blade and align the edge of the hinge with a factory mark on the blade. When both hinges are properly aligned, they should measure 22 1/2 inches apart. Turn the 3/8-inch by 3/4-inch hex bolts with flat washers into the nuts that we're previously slid into the channels on both the top section of the blade and the bottom section of the blade. Double check to make sure each slide hinge is lined up with the factory mark. Then, tighten the hex bolts on the top section first, then tighten the hex bolts on the bottom section. Using a 5/16-inch bit, drill a hole through the blade in each factory punched hole on the slide hinge. Turn a 3/8-inch by 1-inch self-threading bolt into each drilled down hole and tighten. Step 5. At the tongue-n-groove joint, drill a 5/16-inch pilot hole at the factory mark in the v-groove at each end of the blade. For a 96-inch wide blade, there will be an extra hole drilled, and bolt installed per side. See step number 6 in your owner's manual. Turn a 3/8-inch by 1-inch self-threading bolt into each pilot hole and tighten. Using a torque wrench, tighten all six bolts in each slide hinge to 31 foot pounds. Step 6. At the bottom of the blade, double check that the rubber edge is centered. Then using a 3/16-inch bit, drill a pilot hole at each of the four factory marks in the v-groove. Be sure to only drill through the first layer of aluminum and into the rubber. Using a number 3 Philips bit, run a self-drilling screw into each of the four pilot holes. This prevents the rubber-cutting edge from moving. Step 7. Now, hang the blade on the push frame in the transport position and insert the keyhole pins. Insert two square nuts into the top channel. With a hex nut turned onto the stud of the blade marker, align the blade marker with the hole on the lift handle and bolt the marker and handle to the blade using one of the square nuts in the channel. Turn a 3/8-inch by 3/4-inch bolt into the other hole on the handle and thread it into the second nut that was slid into the channel. With the handle flushed with the blade edge, tighten both bolts connecting the lift handle to the blade. Repeat at the other end. Step 8. Attach the rubber box end to the blade using the metal cap plate and four 3/8-inch by 2 1/2-inch self-threading bolts. Tighten these bolts until the rubber end begins to compress to the blade. Insert a fifth bolt to tighten the bottom of the rubber end to the bottom of the metal cap plate. Secure this bolt with a flat washer and lock nut, tighten all bolts equally, and repeat at the other end. The installation of the plow is now complete, and your plow is ready for the winter season. (upbeat rock music).
Ratings & Reviews


Info for this part was:
At etrailer we provide the best information available about the products we sell. We take the quality of our information seriously so that you can get the right part the first time. Let us know if anything is missing or if you have any questions.





















Kacey
11/16/2017
GREAT! For me, this plow is perfect. My drive way is gravel but mostly dirt and I can pile the snow in my yard and not tear it up! Its fast and warm in the cab of my truck! Thanks for your help