


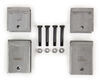
LED light bar with durable aluminum housing produces a bright white light. The combination spot beam and flood beam lets you see at a distance, as well as off to both sides. Hardware, brackets, and wiring harness included. 12 Diodes.
Features:
Specs:
Lumens are used to measure the amount of usable light that is put out by a light source. Raw lumens represent the number of lumens that the manufacturer claims the LEDs are capable of producing. It does not include the light's drive method or the amount of light lost from the lens or reflector. Effective lumens take these factors into account and represent the number of lumens that are actually produced by the complete light assembly, not just the amount of light that the diodes are capable of producing. This light has a 2,520 raw lumen capacity and produces 1,550 effective lumens.
California residents: click here
Videos are provided as a guide only. Refer to manufacturer installation instructions and specs for complete information.
Speaker 1: Today we're going to be taking a look at showing you how to install the Optronics LED Off-Road Light Bar. This is a 9-inch bar with mixed beam double row lights. Part number is UCL23CB.Here you can see what a difference it can make in lighting up your trailer and making sure you can see what you're doing.Now these LED light bars are designed typically for use on vehicles when you're off road. But more and more common we're seeing them used in a lot of other situations.With the shorter 7 1/4 that we've got here it makes a perfect situation inside of an enclosed trailer like what we've got.Now the LED lights give us a nice, clean, pure, bright light. If you've seen LED as compared to a regular incandescent-style bulb there's certainly a big difference there and that's something a lot of people are after.Also, with the LED-type lights, they have a much longer lifespan. We don't have to change out the bulbs all the time.
And they draw less power. These lights are all gonna be ran off of a 12 volt from the vehicle. So we don't wanna overload that system and draw a bunch of unnecessary power through there.Also, being in this enclosed space, these generate less heat than what you get out of an incandescent bulb. So when you're in here working on something or if you've got something you need to do you don't have to worry about the heat build up quite as bad.Now before we turn the light on we can take a look at our reflectors. It gives us a really good mix of light.
So whether you're putting this on a vehicle or gonna use it in a space like this the four that we have on the outside you can see that reflector has multi different angles to it. That helps to spread that light out over a very nice, large area.So that's gonna be our flood style beam. It's gonna flood the area with light. And then the four that we have there in the center, those have a really high polish reflector. That allows that light to be concentrated and projected forward, giving us that spot beam that we're also looking for.Now, of course you're not always gonna be mounting a light like this inside of an enclosed area.
A lot of times we're gonna see these on the front of Jeeps, trucks, cars, you name it. So they've gone and taken a few measures to help protect it. We've got the polycarbonate lens so if you do get rocks or stuff that hit it and bounce off you're not really gonna have to worry about the chipping and the cracking that you might get on the glass.The entire housing is aluminum. That's gonna help to not only dissipate any of the heat that's generated through the fins but also resist corrosion and things like that. Then of course it's touched off with a nice black powder coat finish.
And it does have the IP65 rating for dust and moisture resistance.Here you can see the fins on the back that help to get rid of any heat that is generated by allowing it just like a radiator to cool much more efficiently.The light's also been designed to work with 12- or 24-volt battery systems, so regardless of which one you're operating on, the light's gonna work fine for you.Now the LED lights draw, like we said, a lot less power than the old incandescents used to. But if you are gonna be running it to an on-board 12-volt battery source, pick up a relay kit to put in line and make sure your switch lasts a very long time. You won't have to constantly replace it.Now, overall, with comparing this with other LED light bars that are out there, I definitely this is gonna be one of the better of the bunch. It's not quite to the level of what you see at the Vision X, which is the very highest level possible of LEDs available. But it does effectively transfer the lumens and light up an area very, very well. It's a cost-effective solution to get a lot of light out in front of your vehicle or get a lot of light in your work area. It puts out about 1550 effective lumens, which is very, very bright as compared to a lot of other lighting systems that we've been used to in the past.The overall dimensions with brackets included will be about 10 1/2 inches wide, about 4 3/4 of an inch tall and about 3 1/2 inches deep. Now, our installation's gonna be inside of an enclosed trailer. The basic principle behind it is gonna be exactly the same regardless of where you want to mount the light. You've got a ground and a power and you're gonna have two attachment points. It's really pretty straightforward.We're mounting it right up here. This is gonna be. We're actually gonna mount a pair: one on this side and one on the other side. So this is gonna allow us to see what's going on inside of the trailer. The customer wants to upgrade it. I think it's a really good idea.We need to find our halfway point for mounted, you know. Figure out where you want it to mount. I'm just gonna split the two sides here and kinda center it up. Kind of get this good look quality. And then on our brackets we want to get those holes marked.Now we're gonna grab a center punch. It'll allow us to mark the center of each noose. And we'll get the two holes drilled out. Now, be careful considering we've got a little wiring back behind ours. So you gotta be really careful that you don't damage that or drill through that.If you're using the mounting hardware provided you'll wanna use a quarter-inch drill bit.See, on the end of the light here where our bracket goes on we've got one of the shorter bolts. The flat washer. Once we get those secure we're gonna use the longer bolts. Put the flat washer on those. Now, they're a little bit longer than this when you get them to work with many different thicknesses of material. But keep in mind you can trim those off to a length that'll be appropriate for you.So now we're gonna place that bolt through the bracket and then the bottom of it. So we've got our rubber isolator. That just helps to kind of protect it from being bounced around too much. I'm gonna give it something to kind of dampen it as we head down the road.You get one side started at a time. And then they do provide the Allen key for you to allow you to tighten that down.I'm gonna do the same thing on our other side. Once we get started we'll snug down our bolts, make sure our isolators are pretty even and tucked in behind properly. I'm gonna get started to tighten them down.Now, of course, at some point we're gonna have to hold that nut on the back to keep it from spinning. And when you do you'll wanna use a 3/8 wrench for it.Great. Now, like we said before, black is gonna go to your source of ground, red needs to go to your 12-volt. Our ground source is both, well, both power and ground are ran right up here in the top. So we're gonna make our connections.Start with my ground. We're gonna use a couple of heat-shrink butt connectors to get this connection made. Part number is DW05745. I'm gonna twist those together and slide our butt connector over. I'm doing it this way rather than using, like, a quick-connector. It's gonna give me a lot better connection. You won't have to worry about coming loose or anything like that down the road.Once that's in place we'll crimp it down. Strip back the other side. It's of course gonna go to the other side of the butt connector.Red needs to go to your 12-volt.But we'll just use a heat source to shrink those down. Yeah, you can use a heat gun for this, you can use a mini torch, you can use a lighter. The trick is is that you just don't wanna overheat them. Just give it a little bit of heat. It starts to turn clear and you can see how it starts to shrink down. Once it gets fully shrank it looks like the wire gets bigger. Then you'll notice a little clear gel on the end of it. That's gonna indicate you've got a good connection made there and we won't have to worry about any corrosion issues. Just like that.All right, now we'll get our wires tucked back in. Tidy up the wires from our light there. Now we'll be ready to test it out.And that's gonna complete our look at the Optronics LED 9-inch Off-Road Light Bar, part number UCL23CB.
Customer Satisfaction Score:
97% were satisfied with this product
3% of customers were not satisfied
Ratings & Reviews


nice and bright!!!
Shines bright, looks well built.
Easy wiring bright easy fitment
I just received this product yesterday afternoon. I opened it up and product is as advertised. Quality of product appears good.
Info for this part was:
At etrailer we provide the best information available about the products we sell. We take the quality of our information seriously so that you can get the right part the first time.


Thank you! Your comment has been submitted successfully. You should be able to view your question/comment here within a few days.
Error submitting comment. Please try again momentarily.