
To see if this custom-fit item will work for you please tell us what vehicle you'll use it with.
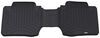
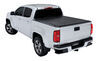
These premium mud flaps are easy to install and digitally designed to fit your car or truck. Protect your vehicle and your trailer from road debris. Flaps are constructed of durable thermoplastic resin with stainless steel fasteners.
Features:
Precision fit, durable components and ease of installation make WeatherTech NoDrills your first choice in mud flaps. Installing mud flaps has never been this painless. Patent-pending QuickTurn stainless steel fasteners makes installation quick and easy - no drilling required.
Videos are provided as a guide only. Refer to manufacturer installation instructions and specs for complete information.
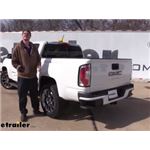
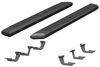
Hi there, GMC owners. Today, on our 2021 GMC Canyon, we're gonna to be taking a look at and showing you how to install WeatherTech's rear mud flaps. And this is what the mud flaps look like installed at the rear of the vehicle. You can see here, it's gonna protect the back of your vehicle as well as anything you're hauling behind you, whether it be a trailer or an expensive camper or a boat. We don't wanna fling any of that dirt and debris and mud on there. So, it protects all those items, and it also minimizes just how much cleanup you're ever gonna have to do 'cause it's gonna collect all in here and you can just kind of give it a kick and spray that out and clean it up real fast.
The mud flaps are constructed of a flexible, yet durable, composite that's gonna have plenty of give. So, if you we're to catch any debris on the road, it can flex out of the way without causing any damage, but it has plenty of rigidness to it to catch dirt and debris and keep it from flying through and hitting your vehicle. It's also gonna be resistant against UV rays, dirt, debris, road grimes and oils, so you're gonna have long-lasting mud flaps here at the back that are gonna look great. These mud flaps are gonna be custom made for your Canyon, so they're gonna fit and look great, and there's no drilling required. As far as the installation goes, this is an extremely quick and easy upgrade that you could do at home probably in less than 10 minutes.
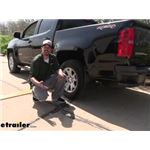
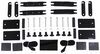
We'll begin our installation at the rear of our vehicle. We're gonna start on the driver's side. We first wanna make sure that we've cleaned up the area 'cause we don't wanna trap any dirt or debris behind our mud flaps. To install this mud flap, it's pretty easy. There are three attachment points there, we're gonna remove those with the included bit.
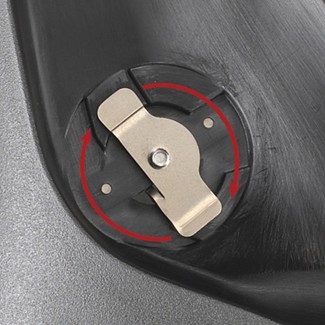
You wanna make sure you save this hardware because we are gonna reuse it upon installation of the mud flap. We can now take the mud flap that is labeled left hand and you can see that written right here, LH, since we're on the driver's side. It's just going to slide into position. Your old holes should line up with the holes in your mud flap where we'd removed those hardware. And then we'll take the included Allen key, while we're holding it in this position, we're going to push in on the screw here 'cause this mechanism on the back here, this little blade, is going to lock it in to the fender right there.
So, we're just pushing in and we're turning. And so, we feel it grab on the fender there. Once you've got it hooked, we can then just snug it down a little bit. That's just going to help keep this in place for us while we install the rest of our hardware. We can then reinstall our hardware that we had removed by passing through the holes in our mud flap, going right back into the factory holes. I like to start each one first before tightening 'em down to make sure that everything lines up. Now that we've got 'em all started, we can go back and tighten down our hardware, using the included tools. Once we've tightened these down, we'll perform the exact same procedures over on the other side to get that mud flap installed. And that completes our installation of WeatherTech's rear mud flaps on our 2021 GMC Canyon..
Ratings & Reviews

Excellent fit and finish, great customer service and follow up.
Great
Info for this part was:
At etrailer we provide the best information available about the products we sell. We take the quality of our information seriously so that you can get the right part the first time.


Thank you! Your comment has been submitted successfully. You should be able to view your question/comment here within a few days.
Error submitting comment. Please try again momentarily.