
To see if this custom-fit item will work for you please tell us what vehicle you'll use it with.
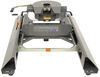
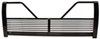
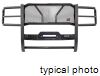
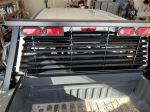
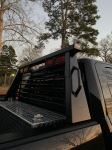
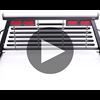
Prevent shifting cargo from crashing through your Chevrolet Silverado's rear window with this sturdy steel rack. The louvered screen won't obstruct your view. LED lights with chrome trim hardwire into your truck to give you brake, turn, and tail lights.
Features:
Specs:
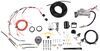
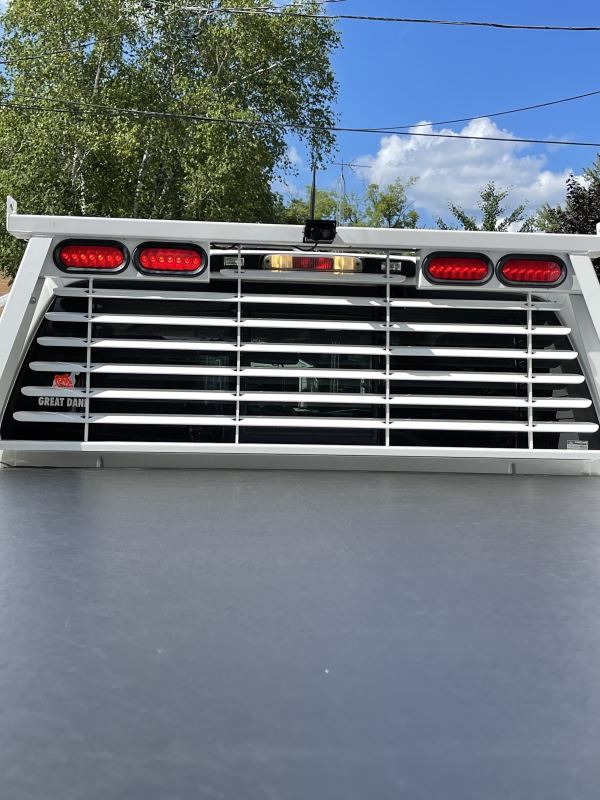
LED lights are built into this headache rack. There are 4 lights. The 2 innermost lights tie into your vehicle's tail lights and the 2 outermost lights illuminate in tandem with your turn signals and brake lights. The entire lighting setup comes pre-wired so that you only have to connect a single harness to your truck's wiring to power all 4 of the lights.
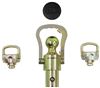
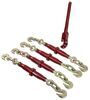
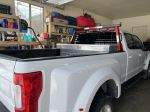
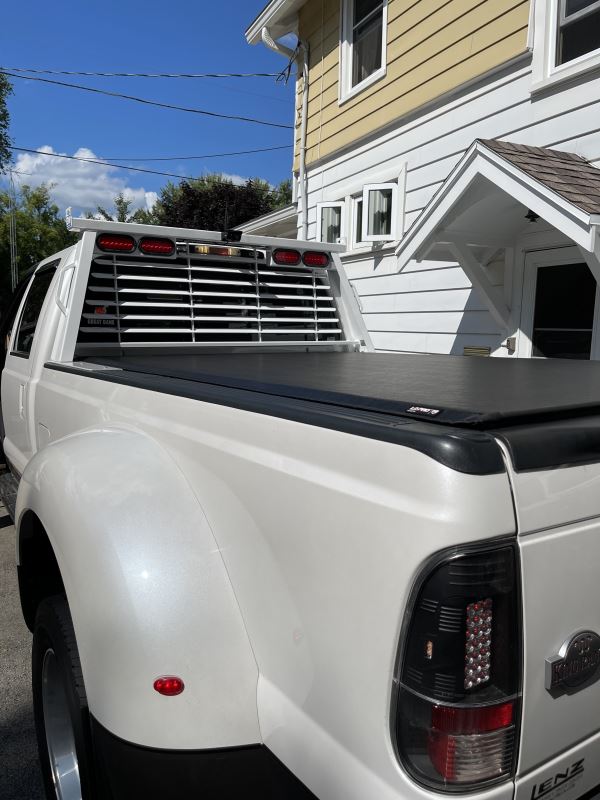
This headache rack is also built with oversize tie-down points on both sides of the rack that double as handles. Not only can you lash down your equipment by running even wide strap through the anchor point, but you can also easily pull yourself up to access your truck bed.
California residents: click here
Videos are provided as a guide only. Refer to manufacturer installation instructions and specs for complete information.
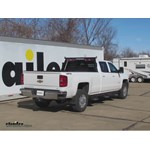
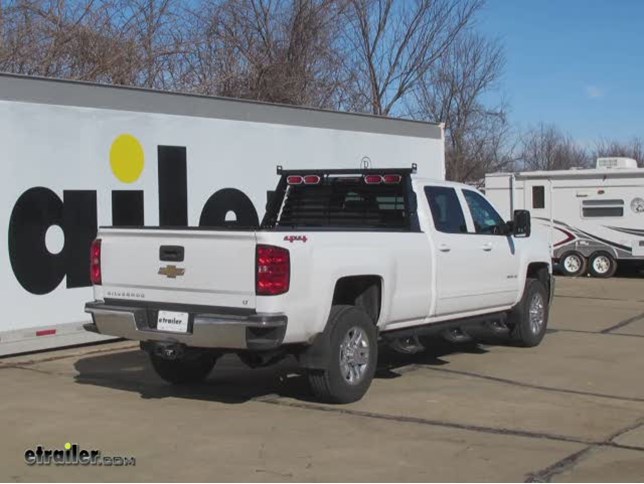
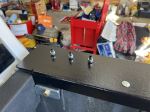
Today on our 2015 Chevy Silverado 3500 Crewcab, we're going to install part number BWPUCP7541BA. This is the B&W Custom Headache Rack with LED lights. This headache rack is designed to keep the cargo from damaging your rear view window, keep anything from going through your glass. This has a louvered screen on it so you can still see out the back of your vehicle. These horizontal louvers actually help shield the sun from the truck and may help in decreasing the temperature inside the truck a little bit. Let's go ahead and take a look at the features rack on the side here. Looking on the passenger side, we've got a hand hold right here.
If you need to get access to the back of your truck you can. This also acts as a nice tie down point as well. It's got a nice wide base at the bottom, and it gets narrow as it goes up towards the top. Take a look at the top here, it acts as a load stop to keep anything from sliding off to the side, also, you've got a generous hole here that could be used for a tie down point as well. Our handles and tie down points are going to be identical on each side of the truck. We'll go ahead and take a look at the louvers here.
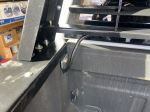
They are angled pointed down, but you can still see straight out through them. This is actually made of pretty heavy material. Whatever accidentally happens to hit on this, it's going to withstand the damage and protect your glass behind it. You also have about 1" or so of room between your glass and the louvers as well. On each side of the rack, we've got 2 LED lights, both with a chrome finish trim around them.
This will be a running light, turn signal, and brake. The lights on the inside will only act as a running light signal. This headache rack is actually really easy to install and kind of fun actually. It only has 3 parts. First off, you have the headache rack itself right her, which comes already fully assembled. That's part #1.
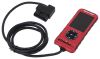
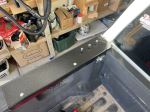
Part #2 is the rail protectors right her, one on each side. They do require to drill a 5/16" in 2 places on both sides of the truck. Then, you have the wire harness for the lights that typically get ran below the truck. These will splice into your factory wire harness in the truck. With that, we'll go ahead and show you how the headache rack installs onto the truck. We'll go ahead and start off by putting our bed protectors in place. This is the one for the driver side. We'll set it on the rail and then push it as far forward as possible. We'll do that on both sides. With the bed protectors all the way forward and pushed up against the bed, we'll go ahead and get a quick measurement from the center of one stud to the center of a stud across the other side. We're doing this to measure up against the holes or the slots in the headache rail to make sure the measurement comes out the same. We want to be within 1/2". Once we're verified that that fits okay, we can go ahead and start marking and drilling our holes for our bed protectors. I'm going to hold the bed protector in place and with a 5/16" drill bit, we'll go through a square hole and use the bed protector as a template to mark my hole, only 2 places to do it in. Then, we'll go ahead and take our bed protector out of the way and finish up drilling our holes. One hole we drilled out almost lined up with an existing hole in the bed. This one, we're going to use a pilot bit and then go back at it with our larger bit. Next, I'm going to go ahead and cover up our holes with some tape, and I'm going to spray something to protect the metal from underneath. Then using your favorite paint, primer, or even undercoat to protect the metal, we'll spray from the bottom. ON the hole going towards the tab, there's actually a plastic tab for the bed rail cover, and our hole right next to it. Let's just go ahead and break it loose. This will create enough room for our hardware where it should be okay. Let's go ahead and install our hardware, which will be a 5/16" carriage bolt with a 5/16" flat washer and lock washer and nut on the other side. There's 2 sizes of flat washers that come with the kit. Make sure you use the smaller of the 2 sizes here. We're just going to take up they slack, but we wont' tighten them down yet. One is done, let's do the other attachment point. We're done with our passenger side. Let's do the same thing over on our driver side. At this point, we can go ahead and put the headache rail into place. We'll go ahead and get an extra set of hands, we'll put it into place, line up the studs, and then we'll loosely install the hardware, one on each side to stabilize it. This is the large flat washer, lock washer, and nut. With it stabilized with this hardware, we'll go ahead and install the same hardware on the the remaining 2 studs on each side. With all our hardware loosely installed, we'll take a few moments to go ahead and put the headache rack where we want it left to right to center up with the cab. Using a 1/2" socket, we'll go ahead and tighten down our hardware to our bed protectors first. One side is done, let's go ahead and go to the other side and do the same thing. Maybe make 1 double check to make sure your rack is even on both sides. Then, we'll go ahead and tighten down this hardware here. We'll be using a 9/16" socket. There's just barely enough room for a socket, a short socket and ratchet to fit. Now, we'll go ahead and tighten down our passenger side. With all the hardware hand tightened, we'll go ahead and torque them down as specified in the instructions. We'll torque down our bed protectors first and then the headache rack. With the headache rack fully installed, let's go ahead and work with the electrical. First off, we're going to add some loom material to hide the wires that you can see that will go up behind the headache rail. The wire loom we're using is part number 459075-1. Go ahead and tape off the end of it so it won't slide down on us. Then, we'll take the rest of our wire and drop it down behind the cab. Pull it right off to the side and work with it from there. Now, we're going to take our 4-pole wire harness and route it back towards the bumper and towards the 7-pole connector on our tow package, but we will get our light signal from there. Running the wire towards the back is a largely going to be personal preference, but this is how we did it. We actually threaded our wire through the hat channel that goes underneath the bed and through the corrugations. The corrugation will be holding the wire up for us the whole time. We just came around the corner at the end of the bed right here and then worked our way towards our 7-pole connector at the bumper. It probably wouldn't be a bad idea to put some loom material where it goes around the corner as well. Everywhere else, it seems to be sitting pretty well flat. We look for our 7-pole connector behind the bumper here. This is it, and we'll go ahead and splice it to our wires right here behind the connection point. To make things a little bit easier, we're going to disconnect our wire harness from the 7-pole. To disconnect it, we need to remove this gray lock right here. We'll need a small screwdriver to pop it loose. We'll work the lock out of the way, and then, we push down this button right here and go ahead and pull it apart. Next, we'll go ahead and peel back the covering for our wires so we have better access to it. To test our wires, our tester is going to need a ground, and also, our wire harness is going to need grounded to the frame as well. Let's go ahead and install our ground first. We're going to use a self-tapping screw. Put the ground to our tester onto that, and then, we can go ahead and test our wires. Instead of piercing the wires, we're actually going to probe right here and then see which wire it is on the other side, but there is a cap that we have to remove so we can see what's going on. With a flat screwdriver, we can go ahead and pry it off and out of the way, and then, we can see our wires. Let's go ahead and test for our running light circuit first. We found our running light circuit. We'll flip it over, and it looks like the gray wire with the brown stripe will be our running light circuit. Let's go ahead and cut our wire, and then, we'll go ahead and strip our wires back, maybe 1/4" or so. Then, we're going to add our brown wire from our headache rack, which will be for our running light circuit. We'll go ahead and add them together like this. Now, we'll install our butt connector. The butt connectors we're using is part number DW05744-5. We'll go ahead and crimp it down on both sides. Now, we can go ahead and double check our connection. Let's go ahead and check for our left turn signal. There it is. It looks like our yellow wire with a silver stripe is going to be our left turn signal. We'll go ahead and do the same thing once again. We'll split the wire, add our butt connector, and connect up our yellow wire from our headache rack to that wire. Now, we'll go ahead and look for our right turn signal. It looks like our right turn signal is going to be our green wire with a purple stripe. For our ground, we'll go ahead and use a ring terminal. In this case, we're using part number DW05739-1. Now, we'll go ahead and hook up our ground. We'll put the ring terminal on our white wire and hook it up to the screw we installed earlier. That will be the same screw we're using for our testing. Let's go ahead and leave it alone for now because all of our circuits are connected. Let's go ahead and check out our lights on our headache rack. We'll go ahead and try our lights now. We'll dim our lights in our shop. We've got our running lights on. We'll do our left turn signal. We'll do our right turn signal. Check out our brake signal. With everything working, we'll go ahead and seal up our connections for good. We'll use a heat gun to go ahead and shrink our butt connectors and seal them up. Let's also take a few moments to go ahead and put our cap back over our wires here. It just threads in through the wires and snaps back into place. Since I've got 2 wires going into one end, it might be a good idea to go ahead and still put some electrical tape on there just to give it a little extra protection. Plug our socket back into our 7-pole connector, push it back into place until it clicks, and then, put the little gray lock in. That's it. We'll go ahead and zip tie our wires up, and that will finish it for our install. With that, that will finish it for part number BWPUCP7541BA, the B&W Custom Headache Rack with LED lights on our 2015 Chevrolet Silverado 3500 Crewcab. .
Average Customer Rating: 4.7 out of 5 stars (23 Customer Reviews)
Prevent shifting cargo from crashing through your vehicle's rear window with this sturdy steel rack. The louvered screen won't obstruct your view. LED lights with chrome trim hardwire into your truck to give you brake, turn, and tail lights.Shipment was excellent and the product was better than expected
Was the right fit and all the parts were there ! I added the dot tape and I didn’t like the idea of splicing into the harness so I routed through the stake pocket and back to the bed plug ! It’s built pretty heavy duty ! I would of like the wires to be of better quality with a heavy rubber insulator but I put it in flex conduit. Just would’ve eliminated one more process! Took 18 min to install and another 30 for the lights ! etrailer made sure I had the right fit and product before it was shipped. They delivered faster than scheduled! I would definitely buy from them again!!!
After doing research I decided on the B&W rack and I’m glad I did. Install was easy but I’d like to see them change a couple things. The rack is powder coated and I had to wire brush the bolts in order to thread the nuts on. Also I would like to see them have a pigtail for you wiring harness instead of having to splice into it. Other than that I would recommend this rack to anybody who wants a strong durable rack.
I have bought a number of items from Etrailer and this was me was no exception excellent customer service, fast shipping, great communication, fair pricing. This headache rack is built very well it is the nicest one that I own. Easy to install, strong as nails, looks great, top notch. Very happy with B&W and Etrailer (Brittney W.)
I like it. One of the side brackets were bent a little bit but I straighten it out when I installed it it looks great now
Great Headache rack, bad service, poor communication, bad shipper communication.Received it 5 days late, etrailer never returned phone calls once!!!!!
Stump, Texas
Very sturdy and high quality, easy to i nstall.
Overall quality product that was easy to install. Took me about 30 minutes on my own to install it. Would reccoment this headache rack. One thing, since the rack is designed for the alumaduty Fords they could add some anti galvanic corrosion to the packaging.
the shipping company had gouged and scrached the paint and finnish off in a couple of places, other than that it is a very nice and fit to a tee.
Really made a difference. The truck looks great.
This worked well
Excellent product. Sturdy and heavily m ade.
Great Product Fast Shipping!

Do you have a question about this Headache Rack?
Info for this part was:
At etrailer.com we provide the best information available about the products we sell. We take the quality of our information seriously so that you can get the right part the first time. Let us know if anything is missing or if you have any questions.


Thank you! Your comment has been submitted successfully. You should be able to view your question/comment here within a few days.
Error submitting comment. Please try again momentarily.