


To see if this custom-fit item will work for you please tell us what vehicle you'll use it with.



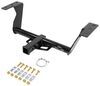
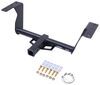
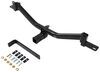
This Class III hitch receiver brings dependable strength for small trailers, campers, and light cargo hauls. It’s built for towing up to 2,000 lbs of gross trailer weight and supports 200 lbs of tongue weight. Whether you’re pulling a teardrop camper or hauling a utility trailer, the solid square-tube design gives you the stability and confidence needed for weekend adventures or daily hauling.
The 2" x 2" receiver opening means you can hook up a wide range of hitch-mounted gear without adapters. Bike racks, cargo carriers, or small trailers all fit right in. This size is the most common across hitch accessories, so it’s easy to swap attachments depending on what your trip calls for.
A matte black finish with a fourth layer of powder coating keeps this hitch looking sharp while fighting off corrosion and scratches. The extra-tough coating stands up well against road grime and weather exposure, giving it a rugged look that blends cleanly with most vehicles. You get a hitch that stays strong and looks good season after season.
Installing this hitch doesn’t require special tools or a shop setup. It bolts directly to existing frame points using the included hardware—no drilling, no welding. That straightforward design makes it an easy weekend project for folks who like to handle upgrades themselves and get back on the road fast.
Videos are provided as a guide only. Refer to manufacturer installation instructions and specs for complete information.
Hello, neighbor, it's Brad here from etrailer, and today we are taking a look and installing the etrailer trailer hitch receiver on a 2022 Volkswagen Taos. And adding a trailer hitch receiver to really any vehicle is a great start to be able to take a lot more on adventures with you. Whether you're pulling a trailer for work or putting toys on there, or maybe a bike rack or cargo carrier, a trailer hitch is gonna be the first step to making that all happen. Now, if you're planning on towing, there are gonna be a few other things that you'll need. And if you're wondering what all you need, feel free to reach out to us. You can call our customer service line and we'd be happy to get you all set up so that you're ready to tow.
But let's focus on the hitch. This will be the first starting point on all of that, and the etrailer is gonna be a great option. So let's take a closer look. Now, this is what the hitch is gonna look like when it's installed on your Taos, and the great part about this one is it's gonna be completely hidden as far as the cross beams. The only thing that you're gonna see when installed is gonna be the receiver tube opening and the safety chain loops.
And this hitch is a two inch by two inch receiver tube opening, which I always recommend to people if that option is available. It's gonna be the most common receiver size out there. So that means that there's tons of accessories available. And any of those accessories are gonna stay in place with a 5/8 pin and clip. Now this does not come with the hitch.
A lot of times when you get accessories, they'll have their own pin and clip included. And something that I'll recommend is if you plan on leaving your accessories on your vehicle long term, maybe a bike rack for the season or a cargo carrier on a long vacation, you might wanna look at a walking pin and clip. It's a really good deterrent from anyone walking by that just won't be able to take out that pin and clip and those accessories with them. Now, if you do plan on pulling a trailer, you do have just kind of standard safety chain loops where you're gonna hook up your safety chain. So standard S-hook, no problem there.
If you have a small clevis hook, also not an issue. And even a larger clevis-style will work just fine. Now when towing a trailer or loading up accessories, you do wanna make sure that you're gonna stay safe the entire time doing it. So as far as capacities, the first things I recommend doing is taking a look at the vehicle's owner's manual, see what the vehicle's rated at, and then compare it with what the hitch is rated and take the lower numbers. That way you're not overloading anything. So as far as our hitch today, capacities are fairly decent, I suppose. These are gonna be really not a hitch that's gonna be heavy duty. So gross trailer weight rating is coming in at 2,000 pounds. That's gonna be the weight of the trailer, plus the accessories loaded onto it. So a small jet ski trailer or kayak trailer or even a small utility trailer would work just fine. Just make sure that you're not gonna be going over that weight capacity. As far as tongue weight rating, that's the downward pressure on the inside of the receiver tube opening, and this one comes in at 200 pounds. So more than likely, a two-bike bike rack shouldn't be an issue loaded up. But if you start getting a four-bike bike rack, you really need to pay attention to the weights of your bikes. It's pretty easy to go over that 200-pound capacity. So all things to keep in mind. Now seeing the side profile, I like that this sits a little bit recessed. You're not gonna be hitting your shins on it. But when choosing accessories, you're gonna wanna make sure that it's gonna work well with this vehicle. So measuring from the center of our hitch pin hole to the furthest point of our fascia, we're coming in right at about six inches. So things to keep in mind, some folding accessories, they can be pretty tight against the fascia. So take a look at some of our test fit videos, which will have accessories in place on a Taos. You can see how it's gonna interact. But this is gonna be also an important, you know, for choosing a ball mount because you're gonna want that ball to stick out a little bit further so you can attach to the coupler. So maybe looking at one with a longer shank might be worthwhile. And then as far as rise or drop, best way to determine that is using this measurement, which from the top of the receiver tube opening to the ground is about 11 inches. So to get your trailer as level as possible is the best way to tow. And what you can do to figure out your rise or drop that you'll need for your ball mount is get your trailer, if you have it available on level ground, measure from the ground to the top of the coupler and then compare it with our measurement. And with this measurement, more than likely you are gonna need a decent rise. So get something with a longer shank and a good rise there, so you can account for your trailer. And you could always get an adjustable ball mount. That's a good option too. It allows you to swap out different heights, as well as potentially different balls, so you can account for a lot of different trailers. Now, if you're watching this video to see how the hitch installs, I'm here to tell you, this one isn't really that bad. You are gonna be loosening up a little bit of hardware to lower down the fascia. You do have to scrape some undercoating off of the frame. You'll then feed in hardware, trim a little bit, just to make room for the hitch, a small amount, and then you'll raise it up, put the bolts in, tighten and torque, and that's really it. So overall, it's not that hard in reference to a lot of different hitches out there. So if you're slightly mechanically inclined, you should be able to knock this out, and I'll be walking you through the steps to make sure you can get it installed. But throughout the process of the video, if you decide, "You know what I don't have the time, the place, the tools, or even the want to do that," I kind of, I mean, I understand. I do this for a living, and sometimes it's just hard to get this all knocked out. So if that's the case, you can find someone to get this installed as well as really anything else that you may want for your adventure, maybe some trailer wiring. You can use our dealer locator. You'll put in your information. You'll find a list of shops close to you that can get that installed for you as well as those other accessories, so you can be out on the road enjoying your adventure and not have to worry about the install. For your DIYers that are gonna be tackling this at home, let's take a look at the installation. Let's get this hitch installed. To get our installation started, we're gonna be removing some hardware from the lower portion of our fascia, and that's gonna allow us to kind of peel this back and eventually get our hitch bolted up. So to get this started, we'll be removing hardware, and I do recommend having an organized spot to keep that hardware. It'll make reinstallation a lot easier. First thing we're gonna need is a T15 Torx bit, and we're gonna find that we have two screws that are located on this lower section. So we'll get that center part removed. And these are actually a plastic push pin, which is kind of interesting. So once you get the screw taken out, a lot of times you can pull this down, and that lower section will pop out. So just make sure that you hold onto both sections and then we'll get this one removed as well. Now as we go out a little bit wider, we have two screws that are gonna be a T25. There's one on each side. So we'll get this removed. And this is gonna allow us to get the fascia to pull back a little bit easier. So when we slide the hitch up, we'll have the clearance. (ratchet cranking) So with this loosened up, again, that's just gonna make space for our hitch when it goes up eventually. We are gonna be doing some trimming. But before we do that, we want to get our frame rail ready where we're gonna be bolting up the hardware. And Volkswagen puts a lot of undercoating on the frame rail, and you can see it kind of gooped-up here. And we want this to be nice and clean. That way when we bolt up our hitch, it'll be flush. So all of this undercoating on the frame rail on the bottom here, we're gonna want to scrape away at that and make sure that it's gonna be a clean surface. So using a putty knife or even a utility knife, just take your time and scrape away at this until you get both sides of the frame rail nice and clean, and just more or less just a metal surface. Again, so it'll be flush with the hitch. And with the undercoating taken off, we do wanna make sure that we're protecting the metal and we're gonna put a little spray paint on there just to coat it up. But something that you may wanna do is grab a carriage bolt and we'll eventually be feeding it up into the frame rail here. And you'll see, it's pretty tight. It will fit up there, but you do kind of have to finagle it in there. So what I'm gonna do is just take a grinding bit and just enlarge this slightly. You don't have to, but it will make it a little bit easier. So I'll grind this down and then I'm just gonna coat this up with spray paint. Now these access holes, make sure that you have all that undercoating taken off of there because we will be dropping a bolt through there. But for our access hole, I'm just gonna enlarge slightly. (drill whirring) Now we're gonna get our hardware in the frame rail, and we're gonna be using this fish wire, our carriage bolt, and a spacer block. And what we'll do first is there's gonna be that smaller hole, we're gonna take our coiled end, feed that through, and then pass this down to that access hole. And if you need to make a small bend, that can help kind of guide it. And with that pulled through, leave the tail here, we'll take our spacer block, and just feed that into the frame rail. And then our carriage bolt, we will thread that on the coiled section. And as I mentioned, it's kind of tight to get this through. So if you have to put the carriage bolt at a slight angle with the head first, that's totally fine. Because once we push that in, we should be able to drop this down into place. And we're gonna leave our pull wire on. This will help as we guide our hitch up. Now for this section, we'll be doing a reverse fish wire technique. And this one's pretty simple. We'll just feed over our spacer block over the coiled section, just kind of hold that in place. We'll thread this on and then we'll feed these in (metal clacking) and then drop that down. At this point, we're just gonna repeat on the other side. Now we do need to do some trimming, and that's to gonna allow that receiver opening to reside here on the fascia and have clearance. To do that, we do need to trim this out, so the measurements are found in the instruction manual. I used painter's tape to kind of just guide it along, make sure it's nice and clean, but it's actually pretty simple. I measured back, use my tape line. And on this one, I found that if you go from where the gray meets the black here and just the straight line back, it's pretty close to the measurement that they're looking for. So again, you don't have to use the tape, but it does help make it nice and clean. And as far as cutting goes, I like to use an oscillating blade or a multi-tool, whatever you wanna call it. This will get you some nice, clean lines. But if you have a dremel, an angle grinder, or really just something manual, whatever works best for you that you have available is gonna work just fine. So we'll get this all trimmed out. (multi-tool whirring) (multi-tool whirring) At this point, we're ready to get our hitch raised up, and what we're gonna do is grab our pull wires and feed them through the corresponding holes. And we're gonna want to keep those in place as we raise this up. That way if we do push hardware up into the frame, we can just pull it back down. Now the fascia, we are gonna peel back because the hitch is gonna reside there. So as we kind of raise this up, we'll just pull this back, slide the hitch up, and kind of tuck it back there. The exhaust is kind of in the way here, but with a little manipulation of it by just moving it, we should be able to get this to drop in. Again, pretty tight here. And we may need to rotate this kind of down a little bit just because there are tabs where the fascia kind of meets up. There we go. And once that slides up there, it really does make it quite a bit easier. So we'll just, from here, raise the hitch up and we'll get our bolts to pass in. And once in place, you can pull the pull wire off and then grab your serrated flange nut and just get it started with a few threads on one of the bolts on each side. And that'll support our hitch, making it easier to get the rest of the nuts in place. Now once you get all of the nuts started, we're gonna snug it all down. You don't have to get too crazy here because we'll come back with a torque wrench, but we'll be using 3/4 inch socket to snug it down. (drill whirring) (drill whirring) (drill whirring) Once they're snugged down, grab a torque wrench in that same socket and we'll torque it down to the instruction manual torque settings. Now, if you don't have a torque wrench, see if you can borrow one from a neighbor 'cause really you're just gonna need it for these four bolts. If you don't, if you can't find someone that has one, you can generally go to an auto parts store and rent one for free. But this is gonna make sure long term it's gonna be strong enough to, you know, use our hitch to tow, but also not too tight putting stress on the frame rail. So we'll go through, get these all torqued down properly. Once you torque down all the hardware, all that's left to do is put back our hardware from the fascia. And then load up your accessory, put in your pin and clip, and you're ready to hit the road. So overall, not too bad of an installation. And that's gonna do it for a look and installation of the etrailer trailer hitch receiver on a 2022 Volkswagen Taos.
Customer Satisfaction Score:
93% were satisfied with this product
7% of customers were not satisfied
Ratings & Reviews

Great service as always.
Great product and GREAT service. Thanks!
Good quality and great fit and easy installment, my only complaint was the very poor pictures in the instructions, but still very simple installment
Do you have a question about this Trailer Hitch?
Info for this part was:
At etrailer we provide the best information available about the products we sell. We take the quality of our information seriously so that you can get the right part the first time. Let us know if anything is missing or if you have any questions.





















Thank you! Your comment has been submitted successfully. You should be able to view your question/comment here within a few days.
Error submitting comment. Please try again momentarily.