
Stealth Hitches Hidden Rack Receiver - Custom Fit - 2"


To see if this custom-fit item will work for you please tell us what vehicle you'll use it with.



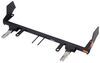
You don’t have to give up a clean look to carry your gear. This completely hidden hitch keeps the cross tube tucked behind the bumper and lets you remove the 2" x 2" receiver when it’s not in use. When detached, there’s no trace of a hitch at all. You keep that stock appearance while still being ready for bike racks or cargo carriers when you need them.

The rack receiver connects and removes in seconds—no tools required. Just pop it into the sturdy center block until it latches, press the built-in lock, and you’re set. When finished, unlock it, turn the handle, and stow the receiver away. The included hitch plug keeps out dirt and debris when the receiver is off. It’s a simple setup that works perfectly for everyday use or weekend trips to the trail.


Built from durable stainless steel with a black powder coat finish, this hitch resists corrosion and keeps its strength over time. It’s rated for up to 350 lbs tongue weight, giving you plenty of capacity for bike racks or cargo platforms. It also meets SAE J684 safety regulations, so you can count on a secure fit every time you mount your gear.
Installing this hitch doesn’t require special tools or cutting into your vehicle. It bolts onto existing connection points using a simple, bolt-on process that protects the vehicle’s crumple zones. With no drilling or welding needed, it’s straightforward for anyone comfortable with a basic garage setup.
 Alternate Instructions
Videos are provided as a guide only. Refer to manufacturer installation instructions and specs for complete information.
Hello, 2 Series owners. Are you looking to add a trailer hitch receiver to your BMW 2 Series without taking away from the look Well, I have something for you. Today on our 2025 M240i, we're gonna be installing the Stealth Hitch rack receiver. Now, this is gonna work with our '25 M240i, but also the 230i. So if you have a 2 Series in that configuration and you're looking to bring along a bike rack or maybe a cargo carrier, this is gonna be the solution for you. While it may look a little bit busy and loud sticking out right here, not to worry, this is a very cool system that allows you to remove your receiver when not in use, and it goes back to a clean-looking 2 Series.
The thought of adding a receiver permanently to a vehicle like this, especially in this beautiful Zandvoort blue, is it might make some people cringe, but also I get it, if you are a biker and you wanna bring that bike along, this is your only vehicle, you're gonna be left with very few options for this. But let me tell you, this Stealth Hitch is one of the best you can get for it. And the reason being, completely hidden, looks completely stocked right now, but whenever you are ready to put your bike rack or cargo carrier in place, you just grab your rack receiver, pop that in place, you're able to lock this in place and then ready to load up with a 350-pound capacity. Now, that's something that's gonna be important to keep note of. On our receiver that we have here, they'll tell you pretty quickly, this is not for towing, and they're correct.
You're not gonna put a ball mount in here, it's not designed for that. This is strictly for bike racks and cargo carriers or other accessories, but not towing a trailer. If you are looking to tow a trailer, maybe some jet skis or something along those lines, you can get the towing kit, and all of the hitch will essentially install the same. But that towing kit will give you a ball mount that's specific to the Stealth Hitch and allow you to tow and also the wiring to be able to plug into the wiring for your trailer. Now, with this in place, obviously it sticks out pretty far and I think that's by design because at the end of the day, you wanna be able to put any bike rack on here and not have any worries about it hitting the back of your vehicle.
So our pin hole sticks out pretty far, so there's really no issue as far as any bike rack fitting on here, but your ground clearance is something that we're gonna wanna take in consideration. So from the top of the receiver tube opening to the ground, it's coming in about 10 1/2 inches. So what does that mean for you Well, you might wanna look at some bike racks or cargo carriers that have an upswing on the shank to give you a little bit more clearance. Going down the road shouldn't be an issue, but as you start to go up inclines or over large bumps, it's very possible they'll bottom out just because this car has some low ground clearance. You know, it's just something to keep in mind when going down the road.
Now, the rack receiver will come with this two-inch-by-two-inch receiver, so you'll be ready to load up your accessories. You are gonna have to source your own pin and clip, but a lot of times bike racks will come with those. And what's also neat too, as I mentioned, you can lock this in place, you get two keys and that way it can lock the tumbler. No one's gonna be able to just walk by and pop this out, so it's gonna be locked in place. What's also neat too is when this receiver's not in place, there's a rubber cap that you can put in the bottom of our receptacle, and that's gonna keep any grime out of there. There's also a rubber cap that goes on the tumbler, so it's gonna stay nice and clean for the next time you need to use it. Now, I'll be walking you through the installation of the Stealth Hitch on the 2 Series, and throughout the process, if you have any questions involving towing or maybe some accessories that you may want to pick up, feel free to reach out to us here at etrailer. We'd be happy to guide you through the process, and that way you don't have to do any of the guesswork. We can guide you through it, make it nice and easy for you. And as far as the installation, that's probably why you're here to figure out what all does it take to get this installed. And for just the rack receiver kit, I'm gonna be honest with you, it's really not too bad. A lot of times when we do Stealth Hitches on BMWs, they're very well put together and it makes it really difficult to pull it all apart. And this is kind of an easier version of the ones that I've done before. But with that being said, you are gonna be removing the fascia of your 2 Series. So I get that that can be a little bit sketchy, maybe a little scary for you. In fact, most people have never really removed a rear fascia on a vehicle, and you really don't have a reason to until you're putting a trailer hitch on. So if that's the case, watch the video, see if this is something that you're willing to tackle. You really don't need that many tools. It's pretty easy overall if you follow it step by step. And I do recommend following the instructions along with the video. The instructions are really, really good. Stealth Hitch does a fantastic job of making it nice and easy for you. But also I will say throughout the process, if you start to go, "I'm not doing that, that's not something I want to do, I don't have the time, the place, the tools, or even the want to do it," I understand completely. So if that's the case, you can get someone to get this installed for you by using our installer locator. It's a great way to find shops close to you that will reach out to you and let you know that they can get this installed on your Beamer. That way you don't have to worry about it. You can pick up your vehicle and be able to load up your accessories and enjoy the adventure. For you DIYers that are gonna be tackling this installation at home, follow along, I'm gonna guide you through the process. So let's get your hitch installed. To begin our installation, the first thing that we need to do is start gaining access to some of the hardware that's holding our fascia on. So believe it or not, this plastic piece by our taillight will be the first thing that we pop off. So there's a plastic push pin here. The best way to get that popped out is a plastic trim tool. I would highly recommend using some of these along the entire installation. This is gonna make sure that we don't scratch anything in the process, be able to separate everything though. So as I pop this, that plastic push pin may pop out completely, so I'll just make sure to hold onto that. And I do recommend having a nice organized spot to keep all of your hardware. It'll make reinstallation so much easier. That way you don't have to search for any of the hardware in the process. So with this one popped out, this is flexible here, we're gonna go down and pry here to kinda get this popped out. And I'm gonna probably work on the weather stripping area here so we can really get behind it without putting any pressure on the paint. And just kind of work in it until we can get this to pop. And it looks as if there's an alignment tab that goes straight down. So pry up, get that popped out, and then we can start working our way up on this. So you can see there's the two alignments. So once you kinda get those pried out, you'll work your way up, and that comes out pretty easy. So with that cover taken off, that's gonna give us access to this 10-millimeter bolt. So we'll get this removed. (tool whirring) And then we'll just repeat on the other side. Now, we're gonna head to each of our wheel wells, and there's gonna be two 10-millimeter screws that we're gonna need to remove. So they're pretty tucked in here. So I have an electric ratchet, but if you have just a standard ratchet and a short 10, you should be able to get these taken out. (tool whirring) The next thing that we're gonna attack is gonna be where the fascia meets the rear quarter panel. And in order to get to that screw, we're gonna just take the inner fender liner and just peel it back, work your way up. And that's gonna expose the hardware up here. So it's a T20 screw, and if you kind of feel around, it's facing vertical, so it's going straight up here. It's located right here. So I'm gonna be using a T20 torque bit and a driver. That way I can get up into that and we'll get that taken off. For your next step, you're gonna need to be under the rear fascia, so you don't necessarily need a lift, but to get access to this hardware, you're gonna want a 10-millimeter socket. And what you're gonna do is get the first three on the outside. So you'll see there's one on the heat shield and there's a few more. We're not gonna be removing those, just the ones on the fascia. So we'll get these taken off. (tool whirring) There's gonna be three on the other side as well. And then we'll be going across the bottom section here, removing these 10-millimeter screws. (tool whirring) And removing those center 10 mils is gonna get our gravel guard taken off. We're gonna set this aside for now. And with the hardware removed, there's still gonna be some plastic clips that we're going to loosen up. So as we go to the side, we'll see that we have this one here. So with the plastic trim tool, what I'll do is kind of work on this outside edge and just kind of pry this down and push out the painted part of our fascia. So that's separated. And then as we work our way towards the middle, we're gonna have these clips that look like this. And same thing, I'm just gonna pry these out and push forward and just work my way the entire edge until we can kind of get that loosened up. And then there's gonna be one on the outside as well, just like we did over here. Now, these clips are not super easy to pop out, so being delicate with them, using two plastic trim tools, what I'm gonna do is push down on the clip, and then with my other one, try to create a small gap in between the plastic and this lower diffuser fascia part. And as we put pressure on that, that's gonna help kind of wedge it out as we push that tab in and allow it to separate. So just take your time here. I will say once you get one of them popped out on the edge, it does make it quite a bit easier to get the rest of 'em. So this one's popped out. So what I'll do is just, using my trim tool, go to the next one and again, just kind of wedge this in here to keep that pressure, and that way it doesn't pop back in. And then you can work on each clip, and we should be able to get this all loosened up. So I would work on those outside ones, get those loose, and as you work in, it should be a lot easier. So at this point we're gonna take our fascia off. So you're gonna want to have a nice place to store this, and that way, when we have this off, it's not gonna get scratched in the process. And something that I've done is run painter's tape along each of the seams, and that's gonna help with any friction that's gonna happen, you know, hopefully this will prevent any clear coat or paint chips, anything along those lines when we take the fascia off, but also when we put it back on. Now, to get this popped off, grab an extra set of hands, it's gonna get a little bit cumbersome, and we wanna make sure we don't drop this. So not that it's heavy, it's just kind of big and awkward. But to remove it's actually fairly simple. You're gonna start by pulling this seam down. There's two prongs that kind of latch into it. So what I'll do with my plastic trim tool is push down and kind of pull it out. And you can see those are the clips there that just kind of snap into there. Once you get that popped off though, you just work your hand or a plastic trim tool along the edges, and it should just pop off fairly easily. So it's actually pretty simple here. And as we hold this up, there is gonna be an electrical connection that we're gonna separate. So that's why having that extra set of hands is super helpful. The clips on the passenger side here, we'll pinch these tabs and get this plug to separate. And I got the clip to separate. You do have to pinch pretty good on the top and bottom. There's gonna be pinch tabs here that you'll just press, get that to separate. And then from here, we'll put our fascia somewhere safe. So with the fascia removed, the next thing that we're gonna take off is gonna be this plastic section that's on our bumper beam. And the reason being is, well, eventually our hitch is going to bolt up where the bumper beam is, so we wanna get this out of the way. And to get these plastic push pins removed, you can use a flathead screwdriver. I really like a trim panel tool for these. You can just pop in on the slot there, get that center section to pop out. You should be able to pull out the whole plastic push pin if it separates. Just make sure you have both of the pieces. And we'll just go through and get this all separated. (tool rattling) And with those removed, we'll set this aside. Also attached to our bumper beam is going to be our exhaust isolator bracket. So this bolts up to the bumper beam, and it's got a 13-millimeter nut that we're gonna want to remove. Now, this has a Dinan exhaust on it, so it might be a slightly larger diameter to where I can't really get a straight shot up there. It's kind of tight. So using a 1/4-inch ratchet and a 13-millimeter socket, I should be able to get in there and get that nut taken off. (tool rattling) It is a tight squeeze here with this exhaust, but I was able to get that socket on. So we'll get this removed, and we're gonna repeat on both sides. Now, you're gonna want to grab a deep well 18-millimeter socket, an extension, and ideally a half-inch ratchet because we're gonna go to each of the studs that hold the bumper beam up and remove the nuts. So there's one up top. The other one, if you go through this access hole, you'll be able to gain access to that to be able to loosen it up. And then we'll just repeat on the other side. (tool clicking) And I'll just go through, loosen these up, then I'll grab my power tools, make this a little bit quicker. (tool clicking and whirring) (metal rattling) Now, hold onto these. We're gonna be using these to bolt up our hitch, but the bumper beam, as we remove this, we're not gonna be reinstalling it. So you can do whatever you want with it, you can discard it, you can keep it, whatever you want to do with it, but it will not be going back on the vehicle. So on this plastic kick sensor panel, we have this tab right here in the center that's just kind of hanging out on its own in this section. We're gonna be cutting that off. So whatever method you have, I like using an oscillating tool, it's just a nice clean cut, you could probably cut this with just about anything, so whatever you have handy, we'll get this notched off. (tool whirring) Now, it's time to grab your hitch and two of the nuts that we just removed, and we're gonna slide this over the studs. And for now, I'm just gonna put these loosely on the top one, you can kind of snug it down a little bit, but we want movement still, but this will hold that in place for us. Now, we'll grab our exhaust brackets, and these are gonna slide over that bottom stud, and you'll see it's marked out as far as which side you need. So on our passenger side being the right, this will slide in here where this mounting point will kind of go out wide, and these two holes where the exhaust will bolt up to should be right there. So I'm going to loosely put this in place. And then we can repeat on the other side with our left bracket. Now, the holes on our hitch are gonna be slotted, and that allows for a little bit of adjustment and accounts for different tolerances. But we wanna make sure that this is centered up because this is gonna make sure that our hitch is exactly where we need it in the middle and not slightly off. Not that there's a ton of adjustment, but now would be the time to get this centered. So this ridge on the heat shield as well as this center bolt is not a bad reference point. And then you can use the center hole on our bracket on the hitch. So just kind of line this up center. If you need to, you can just use a dead blower, and I just used my hand there and I was able to get this lined up. So once you're happy with that, we can snug down the top bolts. We're gonna come back with a torque wrench, so no Need to get too crazy here. (tool whirring) And then for our exhaust brackets, they said to level it out and I was a little concerned as far as, you know, is it gonna pitch the exhaust tips a little bit higher or lower Because you do have a decent amount of adjustability here. Main thing, obviously make sure it's level, but I think what I'll do is probably put this kind of in the middle here, and that way it's not resting on the heat shield. I think that's probably a good rule of thumb here. So I'll snug this down. (tool clicking) So with everything snug down, I'm gonna come back with our torque wrench and using the torque settings found in the instruction manual, we'll go through and torque these bolts down properly. This is gonna be an important step, especially when you're using factory studs like this. You can overtighten things and cause damage long term, but we also wanna make sure it's tight enough obviously to be able to use our hitch. So a torque wrench really becomes a great tool here to make sure it's dialed in perfectly. So if you don't have a torque wrench, we do have 'em here at etrailer. You can generally go to an auto parts store and rent one for free. But we'll go through, get these torqued down. (device beeps) Now, on each side, we're gonna bolt the exhaust bracket back up to our new brackets, and included is gonna be new hardware. So we have our bolt, a flat washer, that's gonna go up, and then we have a serrated flange nut that we're gonna tighten it down with. So you may need an extra set of hands to be able to raise this up, just kind of guide it through. But that alignment pin will go through that first hole, and then as we pass it up, we'll just get that bolt started. (pin rattling) I'm just gonna get this started for now. I can raise this up, make it a little easier, and then just snug this by hand. Now, this is gonna be a half-inch nut and bolt combo, so that's what we're gonna be using to tighten this down. So grab a ratchet and a socket, we'll snug this side, and then we'll get the other side put in place and do the same thing. (tool rattling) Now, if you're following along with the instructions, you probably notice that they have you put that plastic panel back on. I think that gets in the way of everything, and we can do that after the fact. So with that being said, grab your receiver block, and also in your instructions, you probably noticed this key code sheet. And this is gonna be really helpful because if you lose the keys, you could reach out to Stealth Hitch and have that code ready. So as we grab our receiver block, you'll peel off this rubber plug and inside will be your keys. There's gonna be a five-digit code. Write that down and keep it for your records so you'll have it ready. And when we put our receiver block in, we want the handle towards the passenger side, so we'll just raise this up into place, run our bolts through, (bolts rattling) and then we'll grab our nylon lock nuts and get those started on here. And you're probably gonna want an impact for this. These nylon lock nuts, I mean, they're pretty large diameter, so it's gonna take a little bit of a muscle to get these going. But to get this all snug down, we're gonna use a 15/16 socket and a 15/16 wrench. (tool whirring) All right, now that we've snugged that down, we're gonna use the same combo but with a torque wrench. Use the torque settings in the instruction manual. Now, this one's a pretty high torque setting, obviously it's pretty large hardware, so I would recommend a half-inch torque wrench to be able to reach that torque setting. (device beeps) Now, we're gonna continue putting stuff back, but before we get to that point, I wanna show you how this mechanism works, because once everything's back, you're not gonna be able to see this, and that's kind of the point of it. But that way you have an idea of what you're doing when you're operating it. So grab your key. This rubber plug, this is going to make sure that your tumbler is always protected, keep junk out of there, so your key's gonna work, and we'll unlock that. And so when it's unlocked, this will pop out so that way you know that you can unlock it with this handle. So the handle, twist back, it's gonna click. That means that it's ready for your receiver. And you'll notice this one, not for towing, this is only for bike racks or cargo carriers, so from here you would raise this up, give it a push, and when that snaps over, it's ready and locked in place. So you can choose to lock this in. You just simply push that in, twist your key. Or another option too is if this is out, you can just push the tumbler in and that locks it. You'll just cover that back up and it would be ready to use for the next time. When you need to remove it, pretty simple, you just put the key in, unlock it, twist this back, this will drop out. Now, we'll grab our kick one sensor plastic piece here, and we're gonna hold this up. And this is gonna allow us to put our plastic push pins back here. (pins rattling) Now, for our brackets that we added on, we're gonna be bolting up with new hardware. It's the same combo that we had for our exhaust brackets. And so we'll have our bolt, a flat washer, this will pass through, and then we'll grab our serrated flange nut, put that on here, and then we can snug that down. Now, this point, our hitch is officially installed. So the only real other thing that we need to do is trim out this gravel guard, and it's actually really nice, it's got a perforation laying out exactly where we need to trim it. But cutting this out is gonna give us access for our receiver blocks so that way we can actually use it. So I'll trim this all out. Again, just following these little perforations. (tool whirring) With that removed, I'm just gonna file down any of the burrs, but we can start putting our fascia back in the reverse order that we took it out. So you can follow the instructions, but pretty straightforward, just make sure that you're plugging your sensor back in before you get everything back together. Otherwise you're gonna be pulling that fascia off again to just plug that in. So we'll get ours all put back together, we'll get this mounted up, and then we'll be good to go. So with everything back in place, all that's left to do is grab our rack receiver, pop this into place, lock it down, and then from there, you're ready to load up your accessories and hit the road. Now, everything went back together really well on this. I will say, I was struggling a little bit. I wanted the exhaust tips exactly lined up. One was dropped down lower than the other. So it's a little subjective. I did actually be able to go through here and still gain access to that bolt. I raised up the bracket, and then I was able to tighten and torque it back down. So I'm just a little particular, especially with something like this, as far as the aftermarket exhaust. So I was able to dial that in. You might wanna take a look at that on yours if that bothers you. But beyond that, this is a pretty easy installation overall, and it's really gonna add a lot of usability to your 2 Series. So thank you for joining us for a look and installation of the Stealth Hitch rack receiver on a 2025 BMW 2 Series.
Ratings & Reviews

These are great hitches. I installed one on my last BMW. It worked perfectly. Won't be able to get this installation for a couple of weeks.
Great product! Very high quality materials. Installation wasn’t too difficult and I love that it’s invisible when not being used.
Info for this part was:
At etrailer we provide the best information available about the products we sell. We take the quality of our information seriously so that you can get the right part the first time. Let us know if anything is missing or if you have any questions.



















Thank you! Your comment has been submitted successfully. You should be able to view your question/comment here within a few days.
Error submitting comment. Please try again momentarily.