
Curt Trailer Hitch Receiver - Custom Fit - Class I - 1-1/4"


To see if this custom-fit item will work for you please tell us what vehicle you'll use it with.



When you just need to move a lightweight trailer or small load, this Curt Class I hitch gets the job done without overbuilding it. With a 1-1/4" x 1-1/4" receiver opening, a 2,000 lbs maximum gross trailer weight rating, and a 200 lbs maximum tongue weight, it’s perfect for small campers, boats, or utility trailers. The fully welded, square-tube steel construction provides strength and stability so you can tow confidently on short trips or weekend hauls.
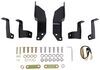
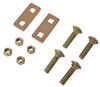
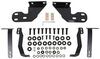
You don’t need welding equipment or a shop lift to get this hitch installed. It uses a bolt-on design that lines up with your vehicle for a precise fit and includes the full hardware kit and installation instructions. The robotic welding process keeps every joint tight and square so the hitch seats correctly during install. Whether you’re doing it alone or getting a hand, the setup is simple and repeatable with basic tools.
Once it’s mounted, the hitch blends in neatly under the bumper thanks to its concealed cross tube design. The gloss black powder coat finish sits over a protective base layer to resist rust and chips from road debris. That means the hitch keeps its clean look even after years of towing or carrying accessories in all kinds of weather.
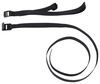
This hitch is ready for more than just towing trailers. You can mount bike racks or cargo carriers in the 1-1/4" receiver to add extra utility when traveling or working around town. Curt requires the use of a stabilization strap #18050 for non-trailer loads like these to keep everything steady and reduce stress on the hitch during use. It’s a simple addition that helps keep your gear secure on every trip.

Videos are provided as a guide only. Refer to manufacturer installation instructions and specs for complete information.
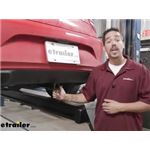
Hey everybody, it's Rob here at etrailer.com. And today we'll be taking a look at the CURT class one custom fit trailer hitch receiver on our 2019 Buick Cascada. Now I know everybody wants to see what it looks like, so we are going to go over some of the features and check it out. If you stick around at the end of the video, we are going to show you how to get it installed so you can have the confidence to do it at home. But here's what our hitch is going to look like once we do have installed. I think it has a really clean look, mainly because that cross tube is going to be hidden behind the bumper, and the only thing we're going to see is the receiver tube sticking out right here at the bottom.
Now, the other nice thing is, is you can tell that it sits a little bit underneath the bumper, not so much where it's going to be a hassle to use it, but it does give us clearance. When we're walking behind, we're not going to have to worry about hitting our leg on it.Now this is a class one hitch, so it's going to give us an inch and a quarter by inch and a quarter receiver tube opening. And this will be great for bike racks, cargo carriers, or if you got to pull a small utility trailer or do some light duty towing, but regardless of what exactly you're going to be using your hitch for, all the accessories are going to mount through the hitch pin hole here on the side. Now the hitch is going to accept a standard half inch pin and clip. That's going to secure all of your hitch-mounted accessories.
Just keep in mind that the pin and clip do not come with it, but you can find it here at etrailer.com. Along with the locking devices so you keep those accessories secure and anti-rattle devices so you don't have to listen to that rattling noise coming from the receiver tube.Now, if you do plan on doing some towing, maybe you get a small utility trailer, maybe just taking that jet ski down to the lake. A few things to keep in mind is one, that our hitch does have a specific drawbar or ball mount that is made for the hitch. Now, again, those are going to be sold separately, but you can find them here at etrailer.com. The other thing you need to keep in mind is you've got to hook up your safety chains.
Anytime you're pulling the trailer, it is going to be a requirement that you have safety chains or cables. And our connection point is going to be this loop style welded to the bottom. Now, it's pretty open, we're just going to have this rolled steel stock, big opening on there, so even if you have what I consider most normal sized hook, plenty of room to get them hooked on, take them off. Don't have to worry about interference from the pin and clip or even any kind of damage to the bottom because it's not anywhere near the bottom of our car.Now, if you happen to have those really large oversized hooks, we're still easily going to be able to get them hooked on, and again, not have to worry about any kind of interference or getting too close to the bottom of our Buick. Now, obviously, if you're looking for a hitch, you have something in mind you want to do.
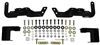
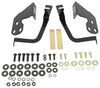
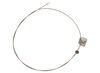
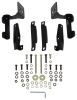
Now, whether that's you want to take some bikes with you down to the park, ride a few bikes, or if you're going on a road trip, you just need more room inside your Buick, you could put a cargo carrier back here, but that's where weight capacity is going to be a really important thing. You want to make sure that the hitch is up to the task that you put it to.So as far as the tongue weight goes, our hitch is going to have a 200 pound rating. That's how much force is going at the end of the receiver tube. So to put that in perspective, we'll be able to carry a couple of bikes with us, no problem. Or if we have a smaller cargo carrier, we can put a decent amount of gear on there, but you do want to realize you want to go with the lowest rating out of all the accessories, the hitch and your vehicle. Now, as far as the gross trailer weight rating goes, it's going to have a 2000 pound rating. That's how much the hitch can pull, but that does include the trailer and everything we have loaded on it. So with those numbers in mind, I do always urge everyone to double-check your Buick's owner's manual, because those are the ratings for the hitch, and we don't want to exceed the manufacturer's rating for our car.Now I'd like to give you a few measurements and these are going to help you whenever you're looking for accessories for your new hitch. From the center of the hitch pin hole to the outermost edge of our bumper is going to be right about six and a half inches. And that measurement is going to help you when you're looking at folding accessories to make sure you have enough room to fold them up and put them in the upright storage position and not make contact with the rear bumper. Now, another important measurement is going to be from the ground to the inside top edge of the receiver tube opening, and our hitch is coming in right about 12 inches. Now our Buick does sit rather low to the ground, so I always recommend a bike rack or a cargo carrier that has a raised shank, that way we can get a little bit more ground clearance out of it.But now that we have seen with the hitch looks like, gone over some of the features, let's go in and go through the process of getting it installed together. To begin our installation, we want to come to the back of our Cascada, and we're going to move to the frame rail. Now it's probably going to be easier to look at the passenger side here, because the exhaust isn't in the way, but we're going to have the same mounting locations on both sides, so I'm going to go ahead and point those out while we're here. We're going to have a hole at the very back of the frame rail, really close to the bumper. That'll be one mounting location. And if we move forward towards the front, we're going to skip one, and then this will be our secondary mounting location.And again, they're going to be exactly the same on both sides. And we're going to have a larger hole in front of that, and that's going to be our access hole to get all of our hardware in place. So we get the hardware in the frame rail, we want to grab one of our pull wires, a little coiled end on it, and I'm going to take the coiled end, then I'm going to feed it into the hole that's the furthest back towards the bumper. And we're going to start feeding it towards that large access hole. Now you may need to bend it a little bit possibly to reach into the frame rail, but the goal is to get the tail end to stick out and the coiled end. I always put a little bend on the tail, just so it doesn't get sucked into the frame, kind of help it stay outside.We'll grab a square hole spacer block, slide it over the coiled end of the wire, grab a carriage bolt. We're going to thread that onto the end of the wire. Push the block in, we'll push the bolts in, pull on the wire so it drops all the way down. Now I like leaving the pull wires attached, just kind of helps prevent the bolt from getting pushed back in, and even if it does, we can just pull it back down to the frame. Now we're going to go and repeat that process for our other mounting hole over here and the two on the other side of the frame.Now the next thing, as we're going to lift our hitch up, I suggest getting the driver's side kind of started first. Make sure you put your pull wires down through, lift up over the exhaust, then we can bring our passenger side and drop those pull wires down through the hips, lift it up where the bolts come down through lined up in the frame. We're going to want to remove at least one of the pull wires. Where going to grab one of the flange nuts out of our kit, you want to get at least one started on each side, that way the hitch will hold itself up and we can work on getting the rest of the hardware in place. Each one of the bolts coming down through is going to get a flange nut. We just need to go back through and put all those in place.When you have all the nuts loosely in place, you want to grab a 11/16 socket, we're going to come back and snug them up. You do want to make sure you come back with a torque wrench and torque all the hardware down to the specified amount in the instructions. We're going to go back and repeat that for all of our remaining hardware. Once you have that last bolt torqued down, that'll finish up your install and your look at the CURT class one custom fit trailer hitch receiver on our 2019 Buick Cascada..
Ratings & Reviews

Great service , great customer relations , great product
Arrived on time with great resources to assist with the installation.
Instructions could have been better but the product fit as advertised.
Shipping was a little slow
Quite easy to install. Used a floor jack to lift the hitch in place.
Works excellent. Used the hitch to the Everglades and Tampa Florida 2x trips and hauled two electro bikes.
Thanks for checking... the trailer hitch arrived promptly, is of good quality, and was easy to install....I’m a happy customer!
The hitch installed in minutes. A perfect fit for my Buick Cascade. My only regret was that they should have offered me options for the tongue and ball assembly. I now have to wait another week for that. Other than that, an easy installation.
Shipped Quickly and was an exact fit. Easy no drill installation and hardly shows below the bumper
I used the hitch to move from Calif. to Oregon. Worked well. Next I will use it when I buy a bike and bike rack. It's a financial decision.
This trailer hitch was delivered quickly and it was relatively easy to install on my Buick Cascada. It is plenty sturdy enough for the Thule bike rack.
Ordering and shipping was excellent.
This is the fifth hitch I've installed in my life and this was the easiest. It fit well, there were no missing parts and I was done in 30 minutes.
It all came together very well. I installed it myself, but I would recommend having a helper as I could have used another pair of hands! It works fine. I primarily use it with a bicycle rack that will support 2 bicycles.
I am extremely pleased with my trailer hitch, the customer service was excellent! It was exactly what they said, very easy to put on yourself, I suggest that you have a buddy for some extra hands. My son helped me and we did it in about 30 minutes! Can’t wait to get my new bike and teardrop trailer now! Thanks eTrailer, I will be referring to your company for sure!
Do you have a question about this Trailer Hitch?
Info for this part was:
At etrailer we provide the best information available about the products we sell. We take the quality of our information seriously so that you can get the right part the first time. Let us know if anything is missing or if you have any questions.

















Thank you! Your comment has been submitted successfully. You should be able to view your question/comment here within a few days.
Error submitting comment. Please try again momentarily.