
 Product Experts Available Now!
Call 1-800-940-8924


To see if this custom-fit item will work for you please tell us what vehicle you'll use it with.


Thank you! Your comment has been submitted successfully. You should be able to view your question/comment here within a few days.
Error submitting comment. Please try again momentarily.


Perfect for light-duty towing, this custom, vehicle trailer hitch receiver features fully welded, gloss powder coated steel construction. Drawbar sold separately.
Features:
Specs:
At etrailer.com we're committed to the products we sell, and to our customers. Our experienced and knowledgeable staff are available via both phone and email to address your questions and concerns for the lifetime of your hitch. The technicians at etrailer perform hitch installations on a daily basis, making them a valuable resource for do-it-yourselfers. The one-on-one, personal service you'll receive comes straight from an expert in the towing and automotive field. We've installed it, we've wired it and we've towed with it, so whatever your question, we can answer it.

Videos are provided as a guide only. Refer to manufacturer installation instructions and specs for complete information.
Today on our 2007 Subaru Impreza, we'll be installing the Curt Hitch, part number C11318. This is what our hitch will look like once it's installed. Next, we'll go ahead and give you a couple measurements to assist you in selecting accessories for your new hitch. From the center of the hitch pin hole to the outermost edge of the bumper is 5". From the top of the receiver tube opening to the ground is 10". This will assist you in selecting accessories such as a bike rack or cargo carrier.
Now we'll go ahead with installation. Before we can install the hitch, we'll first need to go ahead and remove the tow hooks on either side. Here on the driver's side, we'll need to remove the exhaust bracket also. To remove the exhaust bracket, we'll first take the bolt that goes through the rubber hanger. Now to give us a little more working room, because of the size of the after-market exhaust, we're going to go ahead and put a safety strap underneath the exhaust, and then remove the forward and inner muffler hangers.
First we'll spray them with some spray lubricant, and then use our pry bar or pliers to remove the rubber isolators. Then we'll remove the two frame fasteners. Note the frame fasteners will be reused so we'll hang onto them. We can go ahead and remove the tow hook here on the driver's side. There are a total of two frame fasteners, which we'll go ahead and remove now, then the two side support fasteners.
The support fasteners and tow hook will be set aside, as they will not be reinstalled. Next, we'll move over to the passenger side, where we'll need to remove the tow hook. There's a support fastener to be removed, and then two frame fasteners. Once again, the frame fasteners will get reused, so we'll hang onto that hardware; however, the tow hook will not. Now we can go ahead and point out the attachment points.
We'll go ahead and repeat this same process for the opposite side. Now with the tow hooks removed on both sides, we're ready to go ahead and install the hitch. We'll raise the hitch up over the exhaust, and then bring the passenger side up into position, reinstalling the manufacturer's hardware. Note the side plate and cross tube can come into contact with the rear fascia, so we'll go ahead and use a paint marker, mark out the area, and then use a rotary tool to lightly trim the fascia as necessary for the hitch to fit flat against the frame and line up with the weld nuts in the frame. Now with that section cut out, we'll go ahead and line the hitch up with the weld nuts and install the hardware. Now with all the hitch hardware installed, we'll go ahead and tighten it down and torque to specifications. Next, we'll go ahead and install the new hardware to secure the outside exhaust hanger. This will be a bolt, three flat washers, and a flange nut. The bolt and flat washer will then go through the hitch. We'll install a second flat washer, putting the hanger through the bolt, installing a third washer, and then our flange nut to secure it. Now with our hanger in place, we'll go ahead and tighten it down. Note, on this application, the after-market exhaust is larger than the manufacturer's, and we'll need to purchase two longer after-market hangers so that the inside and forward exhaust hangers will reach the muffler. And that will complete the install of our Curt Hitch, part number C11318, on our 2007 Subaru Impreza.
Ratings & Reviews


Kevin B.

7/4/2016
I have owned the product for a year now and still works great. Best alternative if you dont own a truck and need to tow small medium sized trailers. I highly recommend the hitch to anyone who own a Subaru wagon.


Heather A.
6/1/2018
You may be able to bend the exhaust hanger using a pair of vice grips or pliers to move the exhaust up or down a bit so its not touching the hitch. If the hanger is bolted to the frame you can unbolt it and reposition it as well. I have attached a link that will help with this.
Helpful Links
Heather A.
2/10/2018
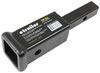
Jami,Thank you for your review.I recommend to use the roadmaster quiet hitch part #RM-061-125 to tighten up the space between your 1 1/4 shank in the hitch receiver. With adapters there will always be a little bit of wobble so I do not have another adapter to recommend but the quiet hitch should help wedge the adapter tight against the hitch. Please keep in mind hitch adapters will cut your tongue weight capacity by 50.
Helpful Links
John L.
10/29/2017
This with has been working perfectly. The fit 02 Subaru WRX wagon was great, instructions were clear and build quality fantastic. It required a tiny trimming of the underside of the bumper cover but it is not visible when the hitch is installed. The trimming keeps the hitch from pushing on the bumper.

Mike L.
4/11/2018
The Curt Class I hitch you refer to, part C11318 is actually manufactured in the USA. Because the hitch mounting brackets are made from mild steel, the mounting brackets may flex during shipping and handling. This causes the on-center bolt hole spacing to change, meaning it may appear that the bolt holes will not line up with the weld nuts on your vehicle frame. If the entire hitch was rigid steel, there would be a greater chance of the hitch being damaged and experiencing stress cracks. Such cracks could cause the hitch to malfunction. The mounting brackets need to be able to flex with the vehicle frame as the vehicle travels over the road and hits bumps or potholes. The hitch also needs to be able to withstand changes in temperature without being damaged.
Info for this part was:
At etrailer we provide the best information available about the products we sell. We take the quality of our information seriously so that you can get the right part the first time. Let us know if anything is missing or if you have any questions.





























Kelly
7/30/2018
Product is holding up well, still looks like new. I pull a utility trailer occasionally, works great.