

 Arrives before Christmas
 To see if this custom-fit item will work for you please tell us what vehicle you'll use it with.
Thank you! Your comment has been submitted successfully. You should be able to view your question/comment here within a few days.
Error submitting comment. Please try again momentarily.
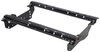
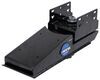
Say goodbye to lengthy installations! The Curt Custom Fifth Wheel Installation Kit for Ram Truck is designed for fast and efficient setup, cutting installation time in half compared to universal systems. Its custom-fit brackets align with existing holes in your Ram's frame, eliminating the need for time-consuming drilling. This feature promises a quicker path to hitting the road with less hassle.
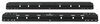
Achieving stability while towing your fifth-wheel trailer is critical, and these heavy-duty above-bed rails ensure a reliable mount for your hitch. Compatible with a range of trusted brands such as Curt, Draw-Tite, Hidden Hitch, Husky, Reese, and Valley, these rails provide the strength and support needed for peace-of-mind towing wherever your journey takes you.
Every truck is unique, but this kit is designed specifically to fit Ram truck models seamlessly. The brackets and rails are precisely crafted to match the contours of your vehicle, ensuring a perfect fit. This means a neat, professional-looking installation that gets you towing without worries about improper alignment or loose components.
Whether it's exposure to the elements or constant use, your installation kit needs to withstand the rigors of towing. Featuring a carbide finish, this kit not only offers a sleek appearance but also provides robust resistance against corrosion and wear, ensuring your setup remains as sturdy and reliable as the day it was installed.
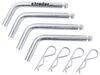
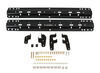
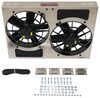
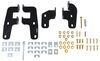
Why deal with multiple purchases and complex setups? This comprehensive kit includes everything you need—custom brackets, above-bed rails, and all necessary hardware—ensuring you have all components required for a complete installation. Enjoy the ease of having a one-stop solution that prepares your Ram for fifth-wheel towing all in one go.

California residents: click here
Videos are provided as a guide only. Refer to manufacturer installation instructions and specs for complete information.
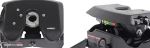
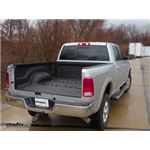
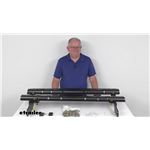
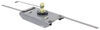
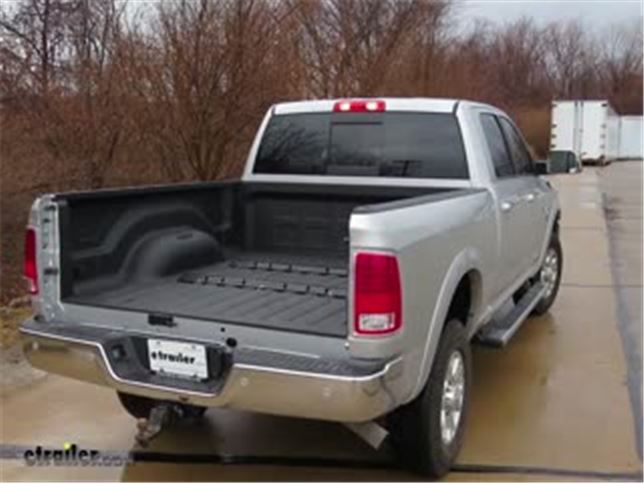
Speaker 1: Today on our 2018 Ram 2500 we're gonna be taking a look at and showing you how to install the Curt custom fifth wheel installation kit for Ram trucks in a carbide finish, part number is C16427-204. Now it's also available in a black gloss finish, part number C16427-104.Here's what our fifth wheel installation kit looks like once we have it installed and this is gonna allow us to tow a fifth wheel trailer safely down the road. The rails in the bed have several mounting points because they're gonna accept most industry standard fifth wheel bases or sliders. Whenever we're not towing with our fifth wheel and we pull the head and the base out our rails are only gonna take up about an inch above the floor of our bed that way we still have plenty of room to load it up with whatever we may need.This is a custom installation kit which is gonna cut down a lot on the install time. We're not gonna have to drill into the frame at all, it's gonna use existing weld nuts, but we are gonna have to drill several holes in the bed so we can attach the rails. Now the rails themselves have a nice powered coated finish to protect them and keep them looking nice and the carbide finish on these in particular is gonna match the Curt fifth wheel's exactly.Now that we've seen what our installation kit looks like and the rails in the bed let's show you how to get it installed.
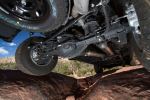
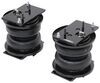
To begin our installation I went ahead and lowered our spare tire and now we're gonna need to remove the exhaust shield here. We're gonna three bolts towards the back that are holding it in place as well as two more that are going on the cross support, we'll be using a 10 millimeter socket to pull those out. Once you have all the bolts removed you can go ahead and set it aside for right now.On the passengers side just forward of the axle we're gonna have two weld nuts in the side of our frame. We're gonna wanna grab our forward bracket, it's gonna be the larger of the two in the kit, and the two tabs are gonna be going towards the top with two oblong holes going towards the front of the truck. You're gonna line up the holes in the bracket and we're gonna take one of our shorter M12 bolts and we're gonna slide a conical tooth washer on, making sure that the teeth are gonna face the bracket, and we're gonna loosely thread the bolt into the frame.Then on the backside you'll notice that there's a small gap here in between the frame and our bracket so we're gonna take one of our square spacers blocks and we're gonna slide it behind the bracket in between the frame and then we're gonna have a longer M12 bolt and another conical tooth washer and we'll get that in place.
Now for right now you just want to get them in there hand tight and make sure the bracket doesn't fall down. Once you get it nice and snug we're gonna push the bracket all the way back until it bottoms out and we're gonna push it up against the top of the bed as much as we can, making sure it's nice and square and then we're gonna repeat the same process on the drivers side.With our brackets in place, making sure that we have both of them shifted towards the rear all the way and nice and snug, we're gonna take a rather small drill bit and I'm gonna go to the very center of the hole and I'm gonna drill straight through going up into the bed, we're gonna repeat that for the other remaining holes on both brackets.Now we can move into the inside of the bed and we're gonna take our rail and we're gonna line it up with the holes that we drilled on each side. For our forward rail we're gonna line it up with the second hole from the outside, then we can mark our center attachment point. We're gonna be using the one towards the cab so we're gonna go ahead and take a paint marker and we're gonna mark that center attachment point right behind the rail. We can move our rail, drill out that hole, and enlarge the holes to the final size.
I'm gonna take a step bit and I'm gonna enlarge the hole to just a little bit over a half inch so our half inch bolts can fit through. It doesn't hurt to grab one of the bolts and test fit it before you go too big, maybe just a little bit more so I don't have to fight it going in. Now we'll repeat that for all the remaining holes.It's never a good idea to leave exposed metal on your vehicle, we're gonna take a little bit of spray paint and I'm gonna go over the holes that I just drilled to help prevent any kind of rust or corrosion from building up. We can take our rail, line it back over your enlarged holes and we can take our carriage bolts and we're gonna start dropping them through, they go down through the bed.Now any spot that the rail is sitting over a low spot on the bed, there's that corrugation where you've got a high spot and it dips down, you're gonna want take one of these U shaped spacer blocks and lift up the rail and slide it in so that the bolt has a little bit of support and it won't crush the corrugation. You want to go around and check each one and see if it's on a low spot or not and if it is go ahead and slide in one of those spacer block.
Now all our carriage bolts came through our brackets, you're gonna take a square spacer block, slide it over the bolts, then we're gonna take a flange nut and secure it. Now you want to be careful not to push the bolts back up into the bed, you want to make sure it's fully seated so you have enough room for that nut to grab. Just push the bracket up and we can attach the nut.If you're having a little bit of trouble getting everything on it could be because the carriage bolt isn't fully seated so a trick to get it seated all the way is if you just take a nut and you drive the nut on it'll suck that carriage bolt in, giving you a little bit more room. Let's thread on the nut, grab a three quarter inch socket, drive it in, you can see that it draws the bolt down and we can loosen it up and insert the block. Now we have a little bit more room with the bolt sticking out so we can get the nut started and we'll repeat that for all the remaining fasteners.Now that we have our forward rail in place we can go ahead and grab our base or our slider and we're gonna use that to make the measurement for our rear brake. Now if you're using more than one base or more than one fifth wheel it's a good idea to go ahead and test fit those that way you know that everything's gonna fit in there nicely. We're just gonna lift up our rail and our base and slide it over so we can get it in the mounting tabs. Once you have it in you're gonna want to grab the rail itself and pull back towards the tailgate so we have a nice, secure fit and then we're gonna mark out all our holes.In the rear rail we're gonna be using the very inside for our holes and then one in the center we're gonna be using the one towards the tailgate. Now again just gonna take a small drill bit and I'm gonna drill right in the center of the hole all the way through the bed and we'll repeat that for all of our remaining holes. Now for our forward holes on our rear rail we're gonna have to get an extra long drill bit because we're gonna have to go through the bed and then through the hat channel to make it all the way through.I drilled my one-eighth hole and I'm gonna come back with a larger, longer drill bit so I can go all the way through the hat channel and we're gonna do that for both forward holes. Then we're gonna grab our long 9-16ths drill bit and we're gonna enlarge all the holes to a 9-16ths and that long drill bit's gonna help out that way we can go all the way through the hat channel, making it a lot easier. We'll repeat that for all of our remaining holes. With all the holes drilled I'm gonna go ahead and slide my rail back into position.Here's the hole that we drilled on the drivers side through the hat channel, now the reason why we drilled the hole all the way through is that bolt's gonna come all the way to the bottom but we're gonna need to have this spacer block inside our hat channel so we don't crush it when we tighten everything down. To make things easier on ourselves we're gonna grab a step bit and we're gonna drill that out to a seven-eighths inch that way we can slide the support bracket inside the hat channel. You may want to periodically stop and check and only drill out once you can get this in place. Once we can get our spacer in place we're gonna come back and put a little bit more spray paint to cover up the bare metal.Now we can see that our spacer block is gonna be bigger than the hat channel itself. I'm just gonna put a mark where it's gonna be about even and then I have to trim our spacer block down. Now you can use a grinder, a cut off wheel, or anything you have to trim that off but we are gonna have to trim both of them so they can fit inside the hat channel. Now on the passengers side we are gonna have this exhaust bracket here so we're not gonna be able to get a step bit in far enough where at the angle that we can get our spacer block in. Because of that that's why we only need to drill the bottom out so that the hardware can come through so we're gonna leave the outside of the frame and meet up with our hat channel and feed our spacer block in from the side.I'm gonna take a magnet and I'm gonna push my spacer block into place and once I get it fairly close I'm gonna move back underneath and make sure that it's line up and I'll take a screwdriver to help me line it up. You can see my spacer block is right here, put a screwdriver in there just to hold it in place so I can remove the magnet. Now we can move back up top and start dropping all of our hardware through. To help you out you might want to use a screwdriver going through the rail and through the bed to hold that spacer in place. Now since it's in a weird position and that exhaust bracket is in the way we're gonna take one of our long hex bolts, followed by a flat washer, and very carefully you want to remove the screwdriver, make sure we don't knock the spacer over, and then we're gonna feed our bolt through, the screwdriver will help you get it lined up, make sure you go all the way through that spacer block and drop it all the way though.Four our three very rear mounting points we're just gonna take our half inch carriage bolts and drop them down just like we did with the forward rail. Then finally we're gonna have one long carriage bolt and we're gonna drop through the drivers side forward mounting point and then go back underneath, put our spacer in this inside, and get our hardware in place. Don't forget if it's on a low spot you want to grab another one of these U spacers and slide it under so that it won't crush the bed. You may need to kind of lift up a little bit just to get that spacer in place, make sure it goes all the way around the bolt. We'll go around and make sure that we get this in place and any of the low spots on the bed.Over here on the drivers side frame rail you just need a flathead screwdriver and we're gonna pop that connector holding the wiring harness down to the frame, you want to move it out of the way. We can take our tube spacer and we're gonna slide it around the bolt going to the hat channel and push it into the hat channel and just kind of push it to the side so that the bolt will keep it in place. Just like the forward rail we're gonna grab our bracket, since this is the drivers side this is gonna be the larger of the two brackets, gonna have to just kind of move the wiring harness around a little bit so we can get our bracket in place.Once you get your bracket in place we're gonna loosely secure our bracket again with those M14 bolts and the conical tooth washers, making sure that they face towards the frame and the bracket. Just gonna loosely put them in that way we don't have to worry about the bracket falling down. Just like the forward bracket I'm gonna take our spacer block and a half inch flange nut and loosely secure it to our bracket. We'll repeat that same process on the other side.Because of the position of where this exhaust bracket is it holds it in place and where our bolt goes through the hat channel we're not gonna be able to easily to get this bolt and plate in place. We're gonna grab an extra set of hands and have them pull the bolt up and we're gonna get everything in place sneaking in through the side here I'm gonna have them thread it in from the top.We're gonna go ahead and snug down all of our hardware and per the instructions they'll want us to snug and tighten down the bolts that are attaching the rails to the bed first so using a three quarter inch socket we're gonna snug up all the vertical bolts first. With all the brackets tightened to the rails we're now gonna tighten the brackets to the frame. We'll be using a 19 millimeter socket and snug them all down. I'm gonna come back with a three quarter in socket and torque the rails to the specified amount in the instructions, we'll repeat that for any remaining hardware.Then we come back with our 19 millimeter socket and torque the brackets to the frame and we'll repeat that for any remaining frame bracket bolts. With our rails torqued down we can go ahead and reinstall the bolts that will hold our heat shield in place. Now all we have left to do is put our spare tire back and that'll finish up our installation.That'll finish up your look at the Curt custom fifth wheel installation kit for Ram trucks, part number C16427-204 on our 2018 Ram 2500.

I haven’t installed yet, but looks to be very good quality and good installation instructions
Thank you for such a fine product!! We installed the fifth wheel hitch in my 2015 RAM 2500 Mega Cab without any problems. It took us 5 hours to complete the installation and all the brackets and bolts went in without an difficulties!!
the no drill kit was just that,no drilling except the bed and that was not too bad. I would reccomend this kit to any one installing rail for a hitch.....

Doug

8/24/2024
Working as it shoul, No issues!!
The installation Kit for the Ram Truck was great. Had it installed within 3 hours and ready to use. picture is attached.
the service from etrailer was just great. Order shipped the same day and I had it on the 2nd day.

A little tight to get into but overall a pretty simple straight forward install. Great quality and heavy duty material.
Excellent product. It took about 6 hours to install. The customer service is second to none and is highly recommended.
Great fit and product easy install did it in the dirt on drive way with no issues on 2016 Ram 2500
Perfect sense. No issues installing wha tsoever.
Installation was easy, just took a little longer than I expected but being 67 it takes longer than it used to. Saved myself just over $1200 doing it myself.
Fit great and was easy to install
Haven't had a chance to use the hitch yet but I got it installed without too much trouble. It took about 4 hours to install, the frame mounting brackets and rails, at a leisurely pace. The unit seems to be very sturdy and it is certainly built heavy. I'm looking forward to testing it out soon.
Before even starting the install I was sure to read the directions a couple of times to make sure this was something I wanted to attempt on my own. I hadn't installed a hitch before but had assumed since it was a custom kit it wouldn't be too difficult. The directions stated that the total install time for the diy'er was 180 mins. I read through and took note of all the tools I was going to need. What I would have REALLY appreciated was a "tools required" list at the top of the instructions. I thought I had all the tools needed but at the very end when you get to the rear rail you need a 7/8" bit for the bottom of the bed support. I advise you have one at the ready. I had to hone it out with my 9/16 which was a giant pain. Everything else went really smooth. On my particular application I had a real hard time torquing the front right bed bolt on the rear rail to spec (110ft-lbs) as the mount for a cross-bar makes it nearly impossible to fit a torque wrench in. (I ended up having to use 3/8" drive extensions to go up inside the bucket and torquing it from the bottom.
Total time:(including a couple of breaks, meltdowns, and a bunch of swearing and a 2yr old hiding dad's parts) 180 mins. Touche' Curt Mfg., touche'...
Experience level of installer: None
This is something that the average person can do. Make sure to watch all the helpful videos here on etrailer.com, read through the directions before starting, and make sure you have all the necessary tools to help ensure your installation goes as smooth as possible.

Joel P.
3/25/2015
Rails work flawlessly. Between two hitches and a GN adapter all have fit without any problems.
Product was great, installation instructions were well written and easy to follow.
I think after using it for about 5,000 miles of pulling our fifth wheel there must be a better system out that reduces the expected jarring from the movement of the hitch due to needed clearance to use pins.
I might have the hitch welded to the rails or find one that is not removable.
If you have a solid mount hitch, please let me know.

Tyler M.
12/16/2020
Hi Sam, Thank you for your review! If your truck does not have the OEM gooseneck package, then I would recommend getting the B&W Companion 5th Wheel Trailer Hitch - Dual Jaw - 20,000 lbs Custom Underbed Installation Kit for B&W Companion 5th Wheel Trailer Hitches, part BWRVK3500-5W and Part BWGNRK1384 . This setup will give you a much more solid connection to your truck and should help eliminate the jarring you are talking about.
Perfect fit,easy installation I’m happy with the product.
Fit great. Was able to do on my own and I'm far from a mechanic. Took a little elbow grease and time but is a doable project for most.
Simple install, didnt have to drill frame ,seems to be very heavy duty
This product worked perfectly on my truck, bolt holes lined up nicely and was easy to install.
I've pulled my fifth wheel travel trailer on it and with the gooseneck adapter I've pulled some serious weight on my 32' gooseneck trailer without issue, very pleased with it.
Darren
3/26/2019
Product has been great, no issues to report.
Does what it is supposed to do. I’ve pulled my 5th well 4000 miles with no problems since I installed it. Very happy with the product.
However, Installing it is no easy task. Every truck is slightly different, and Directions are vague but You-Tube videos help. Swivels and various lengths of extensions are necessary and even then getting a torque wrench on the bolts is tricky. Drilling is required as well as a step bit. Final alignment is very important. If you are not mechanically inclined and patient, you might consider getting it professionally installed.
Excellent service and products!
Took about 5 hours to install but fits great using factory holes. Take your time lining up bracket before drilling. Only issue so far paint did flake and rust where hitch locks into bed rails. Will need ocassional sanding and touch up.

Rich R.
12/17/2021
Little bit of rust forming around slots where Andersen mounts to rail Other than that, working well.
Great people, great service and great products. Installation went as smooth as one could wish for with no mistakes thanks to the helpful advice given in the videos. Etrailer will be my only source for my trailer and hitch needs. A special thank you to Katherina.
Fit and finish was good took about 4 hours to install correctly all the hardware was correct this is the second set of this brand I installed no problems with either
Brackets and rails were of high quality and were a perfect fit on my 2015 Dodge Ram 2500 HD, using the factory frame 'jig' holes for attachment
.
INSTALLATION NOTES: I looked up eTrailer's installation Video on the Dodge-specific custom brackets (in this case on a 2014 Dodge Ram 2500 HD). It was invaluable! It stated the task would take 1 and 1/2 hours for an expert; 3 to 4 hours for a novice. I am NOT an expert but have torn down and rebuilt an engine, replaced clutches and transmissions, and done brake jobs on my vehicles. Being admittedly slow because I want to be thorough (I wanted NO mistakes in drilling the holes needed into my new truck's bed), the task took about 3 days.
THE ISSUE: Though the under-bed brackets were perfectly made, there are two differences between the 2014 Dodge shown in the video (which I suspect was Gas engine equipped) and my 2015 Dodge 2500 (Cummings Diesel).
- CLEARANCE BETWEEN DIESEL FUEL TANK AND FRAME appeared to be MUCH less on my 2015 Dodge than the fuel tank on the 2014 Dodge (Gas?). The front left (in front of rear axle) frame bracket installation was WAY more difficult than in the video due to this clearance issue. A standard Torque wrench head with socket could not be fitted over the forward-most bolt due to this clearance issue between the Diesel fuel tank and the frame. I finally broke down and used a 'breaker' bar/socket combo and a piece of pipe to get that particular bolt tightened within a reasonable range of the proper torque.
- The rear axle suspension in the 2014 Dodge installation in the video was different than my 2015 truck. A significant mounting bracket for the new torsion bar was attached to the right-rear portion of the axle. I was adamantly against temporarily removing it (not even sure if I could have -- I THINK it was welded in place). Again clearance issues made installation of the right rear bracket quite a challenge for me.
Still I applaud eTrailer for making a high-quality kit that fits the bill!
Haven't installed 5th wheel rails yet but the service and shipping was great. Thank you

Bret S.
4/27/2018
Great, easy installation, great instructions, a little time consuming but that was expected for a excellent hitch specific installation.
The only reason I am not giving a 5 star is I get a lot of noise out of the unit I bought. I had the Ram dealer install my unit so I would hope it’s installed properly however I get a noise when towing my fifth wheel that sounds like the bed is twisting and moving. I had the dealer lift the truck up and I personally checked to make sure the sleeves that go in the bed supports were properly installed. After everything was checked for tightness and proper installation I still get the noise. This is my first fifth wheel that was not factory installed so perhaps this noise is common. This is my only complaint. This has otherwise been a great product.
Do you have a question about this 5th Wheel Hitch Rail?
Info for this part was:
At etrailer.com we provide the best information available about the products we sell. We take the quality of our information seriously so that you can get the right part the first time. Let us know if anything is missing or if you have any questions.


Ron
2/28/2025
Working great, I have had no problems or issues