


Quickly and easily install a 4-way trailer connector on your vehicle with this custom harness. T-connector plugs directly into existing wiring. Powered converter reduces strain on wiring system.
Features:
This custom-fit T-connector plugs into your vehicle's wiring harness, which is located behind the driver's-side and passenger's-side tail lights. You will have to remove the tail light assemblies to access this harness. Once you've plugged in the connector, run the red hot lead up to your car battery. Connect the included fuse holder, and then connect the fuse holder to the positive terminal on your battery.
Once installation is complete, the 4-way connector will be stowed beneath your vehicle, near the trailer hitch. A mounting bracket (sold separately) is recommended to keep the connector secure.
It is recommended that you use a small amount of grease on all electrical connections - the plugs on your automobile and the 4-pole connector itself - to help prevent corrosion.
A tail light converter is built into this T-connector. This converter is a battery-powered unit that bypasses the electrical routes that are used by a basic wiring harness. As a result, there is virtually no draw on your tail light circuits.
California residents: click here
Videos are provided as a guide only. Refer to manufacturer installation instructions and specs for complete information.
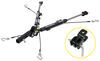
Today, we're going to take a look at the Hopkins plugin simple vehicle wiring harness with the four way flat trailer connector. Now this is a custom fit part. It is designed to fit the 2017 and newer Chrysler Pacifica vehicles, and on a custom fit part like this, I always like to recommend for you to go to our website. Use the fit guide, put in your year model vehicle and it'll show you if this'll work for your application.Now this harness provides a four way flat trailer connector at the back of your vehicle to power your trailer's signal lights. This is compatible with the five pole, six pole, and seven pole adapters that we do sell separately. This does connect very quickly and easily.
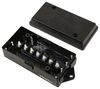
All you have to do is locate your connection points, which are located behind the tail lights of the vehicle. Plug in these connectors to each side of the vehicle.The one with the yellow wire will go to your driver's side, green wire will go to your passenger side. Once those are plugged in, have your white wire with an eyelet on it, ground that white wire, and then this red wire with the butt connector. You'll run this to the front of the vehicle, the vehicle's battery, and then just run this wiring out the back to plug into your trailer. It does include this black box, which is the powered taillight converter box.This will connect directly to your battery to avoid overloading your vehicle's electrical system.
They do use protective connection terminals to help resist corrosion. Does come with everything shown here. And just to go through how you would connect this, like we mentioned, you'd go to the back of the vehicle, locate the points behind the tail lights. Once you get access to that harness, you'll unplug it and then you'll plug in this to the harness and the other two, the taillight. And I mentioned the yellow wire is for the driver's side.Once that's all connected, then you'll take the other connector with the length of green wire that goes over to the passenger side.
Plug that in behind the tail light. Now this black box is a little heavy, so you do want to secure that to a safe place so it doesn't bounce around. Maybe use some of the cable ties to secure it down. Once that's all secure, run this wire out the back. You have two wires left to connect the red wire and a white wire.The white wire is the ground, has an eyelet on it.
They do include this grounding screw that you're going to attach to make a good clean ground and then this wire will run to the front of the vehicle where the battery is. They give you this extra length of wire to do that, so you connect to one end to the butt connector there. Run this up to the front. When you get to the front, you don't want to connect it directly to the battery. You want to run it through this inline fuse holder, so you'll connect that just like that. And then this end will connect to the battery. Pop open your fuse holder, take the included 15 amp fuse, insert it into your fuse holder. Whoops.Once you get it inserted, put your cap on and your system will be all ready to go. They do give you some extra little packet here of terminal grease to put on all your electrical connections and some extra cable ties to take up any Slack in the wiring. But that should do it for the review on the Hopkins plugin simple vehicle wiring harness with the four way flat trailer connector.
Info for this part was:
At etrailer we provide the best information available about the products we sell. We take the quality of our information seriously so that you can get the right part the first time. Let us know if anything is missing or if you have any questions.















Thank you! Your comment has been submitted successfully. You should be able to view your question/comment here within a few days.
Error submitting comment. Please try again momentarily.