
TorkLift Truck Camper Tie-Downs - Custom Frame Mount - Front and Rear


To see if this custom-fit item will work for you please tell us what vehicle you'll use it with.


Thank you! Your comment has been submitted successfully. You should be able to view your question/comment here within a few days.
Error submitting comment. Please try again momentarily.


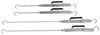
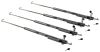
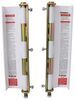
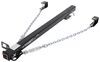
These frame-mounted tie-downs secure your camper directly to the truck’s frame, lowering the center of gravity and keeping everything stable during long-distance travel. Because the camper’s weight is distributed evenly across the bed, it won’t sway or shift even in strong crosswinds. That means smoother handling and a safer, more comfortable drive wherever you go.
The tie-downs attach using pre-existing holes in the frame, so there’s little to no drilling and no need for modifications. The custom-fit design mounts tight to the frame with minimal loss of ground clearance. Once installed, you’ll have a clean setup that’s easy to remove or adjust without affecting your truck’s structure.
When you’re not hauling a camper, you can remove the arms and leave the brackets in place. The brackets tuck neatly under the truck, staying nearly invisible so your vehicle keeps its clean look. You’ll hardly notice they’re there until it’s time for another trip.
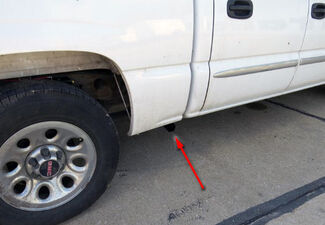
Each tie-down is made of heavy-duty steel with a high-impact powder coat finish that protects against wear from weather and road debris. This adds an extra layer of durability so your gear stays strong season after season, even after thousands of miles on rough roads.
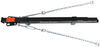
The tie-down arms include two pin holes so you can extend them to clear fenders or sidewalls. Dual anchor holes in each plate let you fine-tune your setup for the best angle on your turnbuckles (sold separately). That extra flexibility helps lock in a solid connection that keeps your camper secure from every direction.
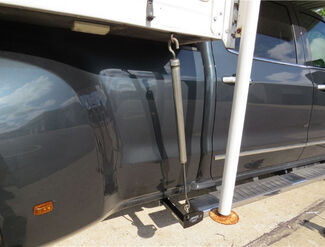
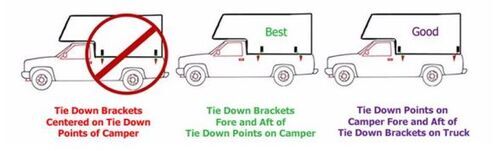
Videos are provided as a guide only. Refer to manufacturer installation instructions and specs for complete information.
Hey neighbors, Kevin here with etrailer, and today we're gonna be taking a look at, and showing you how to install, Torklift's frame-mounted camper tie downs for both the front and rear on our 2025 Toyota Tundra. So if you're like our neighbor today and you're wanting to take your Tundra out and have that in-bed camper in it, instead of towing one behind you, then camper tie downs, like our frame-mounted ones that we're installing today from Torklift, are gonna be an essential component. Now, along with this you will also need to pick up some turn buckles, and that's gonna make that connection right on these hooks right here up to the mounting points on your campers so that you can fully secure it down. Now, torque lift has a couple of options, but you will want to take some measurements, and you're gonna wanna figure out exactly where those mounts are on your camper. Going along with those measurements, you're gonna wanna figure out from the mounting point kind of down here at your frame. So if you kind of just go under your fascia, so our rear bumper right here, and then measure up to that mounting point where it is on your actual in-bed camper, that'll kind of give you a better idea of what size turn buckles that you're gonna need.
Along with that, if your camper sits further out, maybe it sits over the bed rails. You can also extend these as well by simply pulling out the pin and clip and going into that second hole. So that's gonna give us about four more inches of room here, so that we have it sitting out further and we can make that connection nice and straight. Now if we don't wanna have this in, maybe we're done with our camper, we're putting it in storage and we wanna put these away, you can easily slide it out, put it aside, maybe just set it in your garage, and be good to go. That way it's not out there and getting damaged, or just kind of getting worn down over time due to the weather.
As far as the installation goes, if you have a non-TRD model, it will be super simple for you to easily just get those brackets right up into place and bolt them down. The rear is especially easy, because all you're doing is unclamping some factory bolts right at your hitch and frame, and then sliding in the new brackets, tightening it all back down. Now if you do have a TRD model, we're gonna show you exactly how to get to the body mount bolt so that you can remove that. There's a little rubber piece that's gonna be right in your way, if you have the TRD models, for the top bolt on our front frame brackets that you'll have to remove, that way you can actually get to them, tighten it fully down, so that way your bracket's nice and secured to the frame itself, and then you can pop that right back into place and be good to go. Now if this is something you don't feel like you could easily do yourself at home, then reach out to us and use our dealer locator.
It'll help you find a shop within your zip code so that you can get these installed with no problem. Starting out our install, I'm gonna work with the front tie downs first, and I'm going to pop out two little covers. We've got one right here behind our body mount, and we're gonna be fishing some bolts through here. I'm just using like a little tiny flathead screwdriver to kinda get up under there. Now we can try and work it out.
It's got a couple of clips, there's like one on each side of it. So it can be a challenge if you're not hitting those clips to kind of compress them. And if you're really having trouble, once you get that small one in, you can also come back with a bigger one and then pry it out more. Here we go. And we're gonna also pop out this one right here as well. So I'll get my little one in there first. There we go. For our frame brackets, they're gonna look pretty much the same on both sides, so you will need to make sure that you're actually putting the correct one in place. If we look at it, we should have this support bracket right here and here up against our receiver tube for our tie down, and the little slotted hole right here is going to be facing up with another hole down below. And that's gonna butt right up against our body mount here. So it should sit in place just like that. So good idea to test-fit right now and make sure that you got the correct bracket, 'cause you could potentially get the other one on just a little bit, and then be fighting it a whole bunch and not realize that you had the wrong bracket. So we pop that back down. And now we are going to take our fish wire that's included with our kit and we're going to pop in the bolt side of that, so that's the threaded port right here, and we're gonna fish this from our hole over here out to over here, so that way we can feed all of our hardware in and have it pop out on this side. I was having some issues with this when I did it before. There inside of the frame there is metal that kind of runs along the top half of it. So what I had to do on that side was I grabbed a little magnet, I felt for that little piece, and then I was able to pull it up just enough so I can get my fingers on it in this hole. Might need to feed in a bit more. This is gonna be just kind of a challenge so it'll be a little bit time consuming. You might just luck out and hit it first try. But if you don't, definitely pick up a little magnet stick so you can reach in. So now with our second one, we're gonna come through this back hole right here and right out the center. So our hardware is going to be a hex bolt, one of these split lock key washers, and then also a spacer block. So we can throw that on and then thread it into our fish wire. And then once we get that threaded in, we're actually gonna pop that hardware off a little bit so we can sneak it through. Then once we're in, we'll use our fish wire to pull the bolt up into place. And we'll do that same thing over on the top bolt that we put in as well. There we go. What up And you might need to wiggle it a bit just to get that to line up perfectly. I find it's a little bit easier if you stick your finger in and kind of butt the end of your finger up to the bolt. We're almost there. There we go. Next we'll have the spacer block. There's gonna be two sides on the side where you can see the nut pressed into the spacer. You're going to want to have that facing towards the rear of the truck. So as we slide this up into there, it will be facing back, because we're gonna stick our smaller hex head bolts right through that, along with a split lock washer and a flat washer. One thing that they say to do later on is to pop in this bolt, but once you have the bracket in place it's a little bit harder to do, so you might as well just throw it in right now. Slide it up. And then once you see that bracket, you can put this on with that split lock washer and flat washer to help hold it in place. And that opening that we had in our bracket, we're gonna wanna slide that right up into this. So only put a couple of threads in that way you got enough room to kind of maneuver with. Pull our bolts back up, and then we will fish our fish wires through the bracket itself. Pop that in, and you can even bend it a little bit, so that way it doesn't pop back out on there. And as we go, you'll wanna pull up. Got a lot of moving parts here to kinda work with. You also gotta get it through these bolts. There we go. And if you're having a hard time getting it to line up with that, honestly, you can just pop it right out. Just be careful to hold up that plate. So like right now we're fighting this when we could easily just put it on last. So I'm actually gonna do that right now. We'll just pop right back off. I'm gonna push up on that bracket from below, and then once I seat my actual frame bracket, I'll slip that right in, and that'll just make it a lot easier to do. Now we'll fish our bolts out, and what I like to do is just use my fingernail and press against the bolt to keep pressure on it so that way it doesn't slip back out. We can pull our fish wires off. And then we're gonna slide on a flat washer, a split lock washer, and then finally our nut. On this other one, it is gonna be hidden behind our body mount, so we are going to have to get inside our vehicle and we're gonna get a wrench on the bolt that's right here up top, because it's hidden behind the rear seat. And then we're gonna have a wrench down here to take this nut out. And so we had to drop the seats down in the back, and we're pulling out the plastic trim that goes behind it. You're gonna wanna start on the driver's side. This piece will pop out. There's no bolts or anything holding it in. It's just push pins on the backside. So once you unclip that, you can pop that out. And then you can see right under the support for the seats is one of our body mount spots. There's gonna be a little plastic black plug that covers it, but that should be about it. Just get a wrench on that, and then you'll be able to hold that down. For that size, it was a 17-millimeter, so you want that down in here. We're using just half inch with a deep ball socket and we're good to go. On the other side though, there are some bolts you're gonna need to take out. So if we look, there's one right here on this end, there's another one on that end, and then there's one that covers up the toolkit for your spare tire tools, and that's right there. So you'll need to remove that and then you can pop it out from those push pins that are clicked into the wall here and then lift it right outta here. So our other body mount cap is right under this brace as well. But unfortunately on the passenger side we also have our jack, which is welded into all that framework. So really can't see the body mount. You'll have to just feel for it, get your hand in there. And like I said, it's directly below this brace. I also popped out this wire harness right here just to give myself a little bit more room for my wrist. Got it. So there is not really a good way to get a wrench in there. We have this little single tool for half inch sockets we're gonna try out and see. Gonna take some grip strength, so if you are the partner that's helping out and holding that bolt, make sure you have that finger strength to hold it. But I'll slip this in and get under there, and I can start taking the nut off from the bottom side, which we can show you in just a minute. All right, on the bottom side there's a nut on that bolt right there. And that bolt is what our partner up top is gonna be holding down. Get on it just a bit, and then I can start cranking it off. All right, now we can pull this off and now we finally have access to pull our bolt through. And we can get on a flat washer, a split lock washer, and then a nut, just like we did with the bolt below it. I recommend using the screwdriver to hold it in place while you get everything up, or, like I said before, if you wanna use your fingertips, that's fine too. Now for our last bolt, we'll throw on another flat washer, split lock washer, and then a nut. And we'll come back and tighten down our other the bolt as well. All right, with these all snugged down, we can come back and torque them as well. That's good. Once we have all of our hardware torqued down, we can put our body mount back into place, and we can do the same thing over on the other side. Now that we have our side once installed, I'm just reinstalling all the plastic that we removed. Make sure that you fully tighten all those bolts down. And this all just clip right back into place pretty easy. All right, last part here. If you still saved that little rectangle piece that we popped out so that we could fish our stuff through, you can pop that right back in. Give your frame a little bit more protection, keep bugs, water, any kind of other stuff out of there. And then we can pop in our arm here for our mounting point. This is gonna have a pin and clip that will push right through to secure it. For the rear, the instructions are gonna tell you to remove the nut from this factory bolt right here on the backside, which attaches our hitch to our frame. You can say this one and this one, but later on they're gonna tell you to also remove this one as well. So we're just gonna take all three of these nuts off right now. And to do so, you're gonna need a 22-millimeter socket and wrench. That wrench you want on the backside here just so that bolt doesn't spin on you. And then we'll start popping these off. Once you get it broke free, should be pretty much able to kinda do it by hand. And we'll set those aside, 'cause we're gonna have to reinstall them. Now we're gonna take one of our side plates. You'll notice how it has this bigger curve and this side has more to it. That side is gonna be facing towards the back of the vehicle. We want the skinnier side going towards the front. And that's gonna line up with our outer bolts. And you'll also have it line up right there. And we'll just reinstall these two factory flange nuts and the flat washers. You don't have to fully tighten it down just yet. We can do that all kinda at the end. So the next step is going to be using one of the smaller bolts in your kit with a washer. Now on one side we do have a weld nut, on the other we do not. So, this side is the one without the weld nut. So what we would have to do is our bolt and washer will slip through, we'll add on another washer, a split lock washer, and then finally our nut. On the other side, where we do have the weld nut, we just need to use a bolt in the washer and we won't need that weld nut, or won't need the nut washer and split lock washer on the inside. So you can see right over here that was from the factory, we we inchesre easily able to just put that bolt right in. And we'll just tighten that down, and move on to our next step. All right, so I've tightened these two both back down so that I can draw that back in. And now we can slip in our bracket. So we're gonna put this on the backside, and you'll have that receiving tube slide right up in there. We'll take that middle bolt, we'll slide that in, and then we'll replace the washer and flange nut. And then we're gonna have some hardware that we're gonna put on these two sides right here. Now we can torque down all of our hardware to the specifications listed in our manual. Each one of these is gonna have a different torque spec, so make sure that you're actually following along in the manual. Around the last step, they have it listed for the factory bolts, and then each of the bolt sizes that we're using in the kit. Now with that all torqued down, we can slide in our arm, we'll pop in our pin and clip, and then we're gonna just repeat this process over on the other side. And then that will do it for the installation. Well, I think that about does it for today's look at and installation for Torklift's frame-mounted camper tie downs for both the front and for the rear on our 2025 Toyota Tundra. My name's Kevin, and if this video wasn't helpful to you, or you're still looking for that fit for your vehicle, please feel free to reach out to us via our Ask The Experts link, a comment on this video, or a phone call to our customer service department, and we'd be happy to help you out on your journey.
Ratings & Reviews


Straw

8/24/2026
A year later, no issues with tie downs, except normal wear and tear and metal to metal wearrust progression. These tiedowns are designed great and fit function was clearly created by someone who knows not only design but install ! E-trailer is “the” place to buy rv, camper, towing etc products - the install videos are sooooo helpful ! Thx ET !


Lazer S.
9/16/2025
It definitely is safe the way you have them, Paul! In a perfect world, the turn buckles would be perfect vertical, but this an imperfect world and not all campers have the attachment points in the same place. If you take a look at some of the installed pictures on the TorkLift Locking FastGun Turnbuckles # TLS9529-2-LK page, you can see most of them are at an angle. It's perfectly normal. Are you running any suspension enhancement on your Silverado?

Paul
9/27/2026
These tie downs are great, so easy to use. Camper never budged a hair


Kate F.
8/10/2026
Thanks for the pictures Rich. We will be reaching out =)
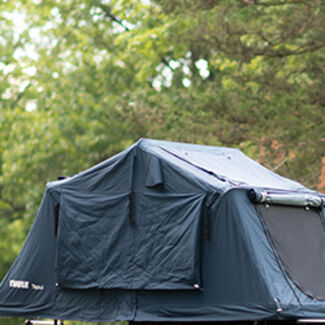
Bob
11/1/2025
I have not had any issues at all with the tie downs.

Heather A.
4/10/2026
Looks great! What kind of camper do you have?
Lazer S.
10/14/2025
Install looks great, Megan! Especially for it only taking two hours! They were moving. : ) Happy we confirmed what you found as well. Tie downs can be a pain in the rear with all the options out there. Now I do have to ask though, have you guys thought about any kind of suspension enhancement for the rear axle? It's a little hard to tell, but it looks like the back is sagging a bit in your last picture.
Clay
7/31/2026
A year later and I would not do anything different. Absolutely the best system available especially paired with the fast guns. The camper is solid mounted and does not move. Yet can still be off loaded in just a few minutes. Remember good stuff isn’t cheap and cheap stuff isn’t good.


Nick S.
1/12/2026
I love these TorkLift tie downs, and it is great to hear you are liking the quality as well. What kind of truck camper are you going to be running with these?
Kate F.
8/20/2026
We appreciate the kind words Charles! Where did you take the in-bed camper for the first trip?

Gwendolyn Y.
9/18/2025
Install looks great, Dale! Where're you headed off to now?
Kate F.
6/5/2026
I am happy to see you went with the best ThatDennis =) Have you been able to get out for your first trip?
Info for this part was:
At etrailer we provide the best information available about the products we sell. We take the quality of our information seriously so that you can get the right part the first time. Let us know if anything is missing or if you have any questions.























Kate F.
6/5/2026
Great set-up Viviana!! Glad to see you went with the best =) Where did you go for your first trip?