
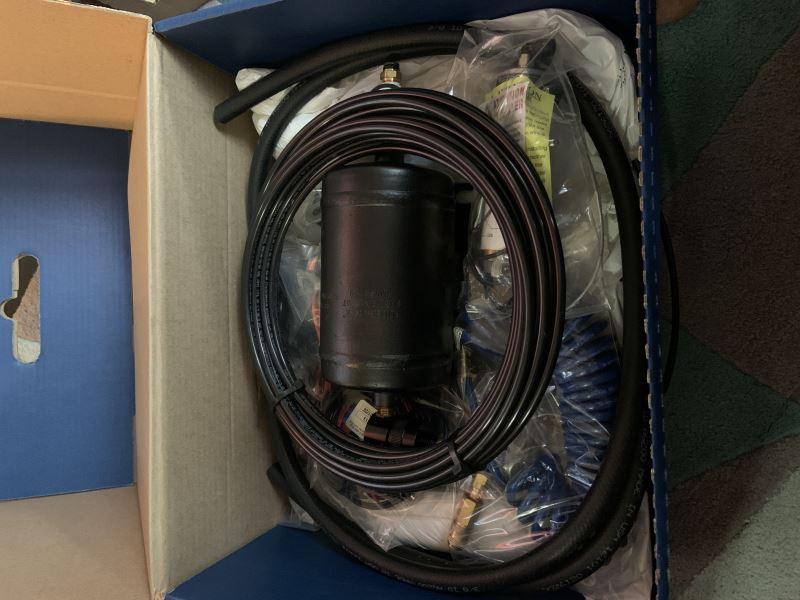
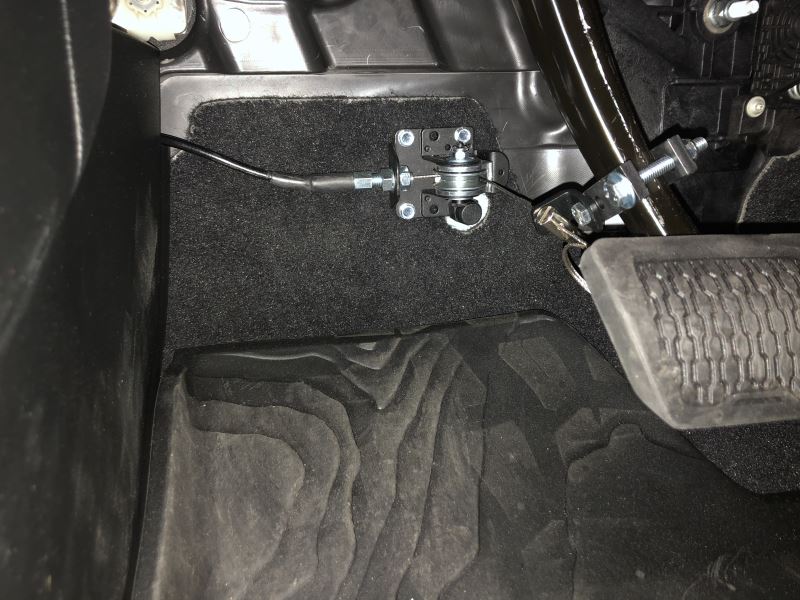
# 1
Demco Stay-IN-Play Duo Flat Tow Brake System for RVs w/ Hydraulic Brakes - Proportional
I mounted this in a 2014 Chevy Spark. Finding a spot for the main control unit was interesting, but I found a video for a 2017 Spark that I could use. I did have to drill an extra hole in the mounting flange and car. I haven't taken it on a trip as of this time, but a tow around the block indicated it was working. One note, watch about placing the LED indicator behind the tinted part of the toad window. It makes it harder to see from the camper camera.

I installed the Stay n play on a 2017 Jeep Cherokee Trailhawk. I pull it with a Diesel Sprinter, and braking control is very important to me. Previously I used a Brake Buddy. The Demco system is a world of difference. The proportional braking, simplicity of design, ease of engagement/disengagement, and reliability have provided an improved sense of confidence and security when flat towing. Installation was a challenge but is well described in instructions and videos.
# 2
Roadmaster InvisiBrake Flat Tow Brake System - Preset
The InvisiBrake system vacuum pump was too weak and slow to respond . I installed an external vacuum pump from Summit Racing which maintains 22"of vacuum on the brake chamber at all times ,the same as when the Ram engine is running . I installed an isolation valve on the Ram manifold vacuum line and a momentary test switch in the Ram to simulate the coach brake lights being on . That way I can take the Ram for a drive and set up the brakes as they should be.
Read the instructions and only use the trailer video/s as a guid!! Install was tough but doable. Take your time if you want a clean install. Lastly, the kit comes with updated check valves. The video will tell you that the "red side" faces the engine. That's not true if you are using the "black side" check valve. The black side faces the engine while the red is opposite. I wasted several hours troubleshooting a stiff break pedal when in reality, I had the check valve installed just as the trailer video explains it. My bust for trusting the video and not reading the install instructions fully.
# 3
Roadmaster BrakeMaster for RVs w/ Air or Air-Over-Hydraulic Brakes - Proportional
JeepThis braking system does what it's suppose to do, smooth proportional braking between motorhome air brakes and the tow vehicle. The only reason I did not rate at 5 stars is that there is a slight misalignment of air cylinder mounting bracket and 2022 Jeep Gladiator brake pedal.
The install on my Ford Maverick is clean and functional, so this is more of a customer service review... excellent customer service! During the 4-day towing set-up install, the forecast was for freezing temps and my rig was not winterized. I called in mid panic and the motorhome was moved indoors. A few months after using the tow set-up, a minor problem developed. I called and the CSR apologized and said, I can see how that might be frustrating, and a replacement cable (slightly longer) was sent free of charge.
# 4
Demco Air Force One Flat Tow Brake System for RVs w/ Air Brakes - Proportional
AF1 is amazing so far. I did the installation by myself. I have a 2014 Honda CR-V and bought it for towing. Watching the video helped me through it. The car installation portion was pretty straight forward. The video is better than the instructions overall, but I read through the entire instructions before beginning. I was able to install the RV tank without putting the rig on a lift. Depending on how big you are and flexibility, it can be done with the RV on the ground...it just takes longer. Also, I would recommend knowing where you are going to mount your RV tank. I mounted the tank near the rear and didn’t have enough brake tube after doing the car. Picked up an extra 20 ft at Autozone or order the tube with etrailer. The customer service center is very helpful too. Many thanks to Mariah for the outstanding assistance. Finally, I would say that if you order the brackets to mount the emergency brake away for your car, you may have to cut them down with a grinder. It is so much nicer not putting the brake buddy in the car now. Looking forward to enjoying it on trips. I drove the rig about 20 miles yesterday, and the light came on and I honestly couldn’t tell the car was back there other than looking in the video and seeing the light on the car during braking. Highly recommend this unit.
I wouldn't use anything else! Once this system is installed it's literally plug-and-play. Nothing to move or install into the car, each time you tow. Just plug it into the coach's air break system and you're done. Install video from etrailer made it even easier to complete. You do need a bit of mechanical guidance/assistance as you're connecting to both your vehicles and coaches breaking system but it has worked flawlessly for over 11,000 miles and in some pretty intense traffic.
# 5
Demco Stay-IN-Play Duo Braking System for RVs w/ Hydraulic Brakes - Wireless Monitor - Proportional
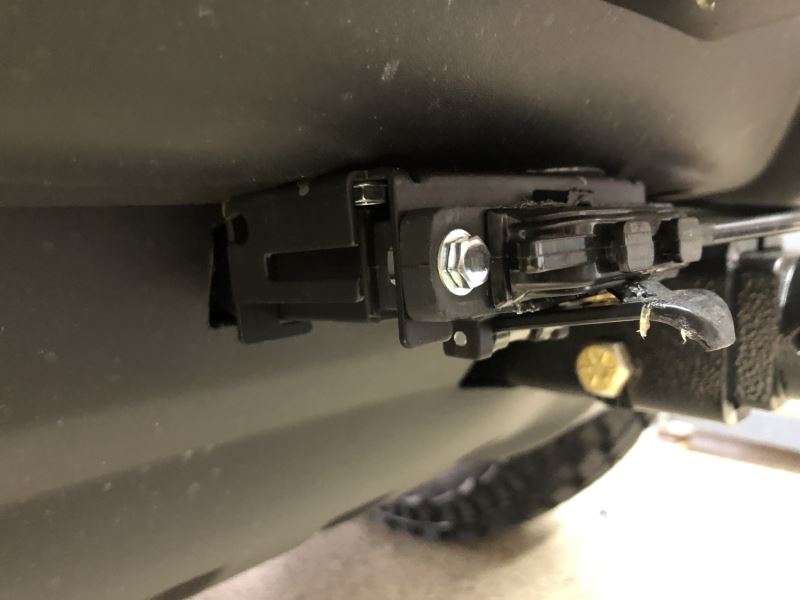
Upgraded from RVi3 system which was a portable unit and operated solely on inertia which in my experience only worked on moderate to hard braking. This system being a dual system works even with mild braking. I'm very happy with it. Installation took me several partial days (60+ yr old, moderate mechanical skills). The videos are very helpful and had one for my exact 2020 Jeep Wrangler. Installation is easy but access under the dash to install the air cylinder and a roadmaster brake switch is awkward and difficult. My biggest fear was the access there and cutting the vacuum line. The vacuum line turned out to be very easy. I had to adjust my brake light switch after installation when I tested the system. Everything is adjusted properly now and works as I hoped.
I installed this system in a 2023 2 door Wrangler. I also used an etrailer base plate and etrailer tow bar. I had originally purchased a Demco Delta Force Braking System. However, with the shape of the floor in the Jeep I was unable to use this unit. There are various places to install the stay n play duo in the Wrangler and the etrailer installation videos show this. I elected to install mine under the drivers seat as I wanted to keep it out of the elements. I fabricated a sheet metal bracket to mount it on that allows the rear seat heater duct to function unimpeded. Once installed the unit is out of sight and very simple to use. Just a flip of the toggle switch and its ready. I only needed to make a few adjustments to have it brake the way jeep the way I wanted. This is also a very simple procedure. I highly recommend this unit and appreciate all of the information etrailer has on their site to aid in the procurement and installation of their products.
# 6
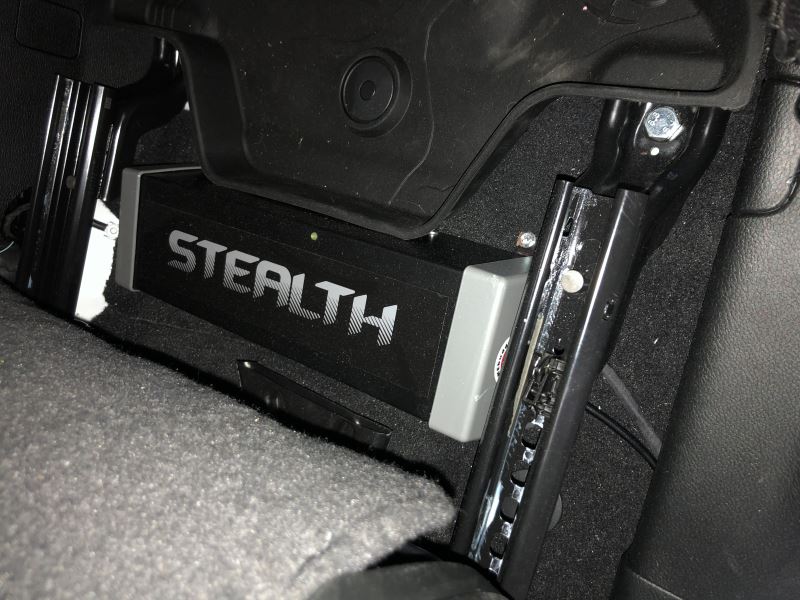
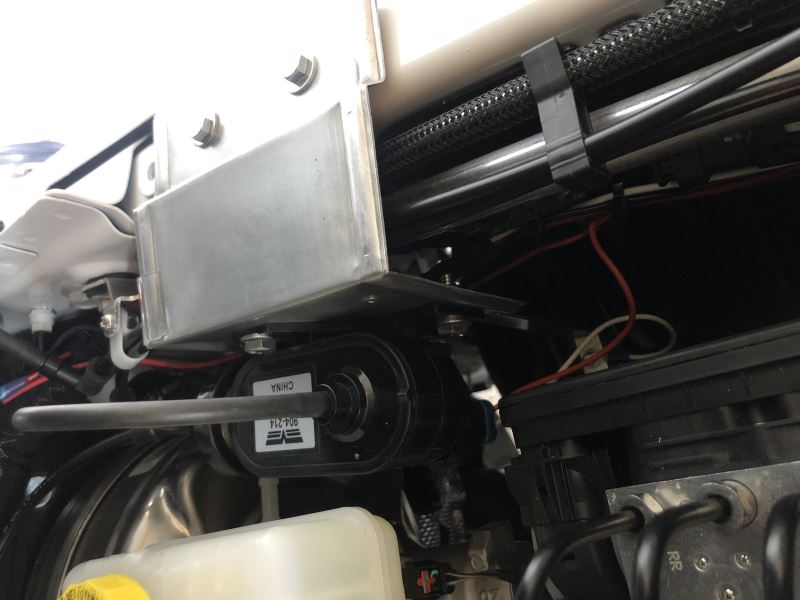
Brake Buddy Stealth Supplemental Braking System - Proportional
I choose the Brake Buddy Stealth for my 2021 Jeep Wrangler because I wanted a “stay in place” brake system and felt it would be a clean looking installation. I finished the toad side of the installation today and thought I’d leave some notes on what turned out to be a bigger project than I’d anticipated. Again, this is my experience on the 2021 Jeep Wrangler 2-door. Your experience on other vehicles may vary. I started this install after installing a Demco Tabless Base Plate. Right out of the blocks, there’s really no convenient location to mount the cable connector to the Demco baseplate. I chose to mount it to under side of the bumper on the driver’s side. To provide clearance and a route for the wires, I had to cut a notch into the plastic air dam. I used one of the already screw screw holes and used self tapping screws in the other three locations. For added strength I epoxied the connector to the bumper as well. Since the bumper would be unremovable if the connector were hardwired, I added a waterproof connector. The kit is stingy with wire lengths, so I substituted my own wire. The Stealth unit itself i mounted beneath the driver’s seat. Don’t be fooled into believing there is clearance when testing with the driver’s seat positioned for rear seat access. Once the seat is returned to normal operation it lowers a bit and the box keeps the seat from being move forehand aft. I solved the problem by installing 5/8” thick nylon washers under the rear end of the seat slides. I also cut away a bit of the carpet under the front, inboard corner of the box. You will need to remove the driver’s seat in order to attach the front screws of the box. Be sure to disconnect and isolate the neutral battery terminals to prevent inadvertent air bag discharge. After removing the interior trim from the A-pillar, the door sill, and the driver side foot well, The wiring and cable tucked nicely away along with the OEM wiring and wiring for my taillights. I mounted the pulley horizontally behind the brake pedal. Installing the vacuum pump was my biggest worry and challenge. Instructions are to zip tie it “somewhere”. That seemed pretty casual for a safety system. I chose, instead, to fabricate an aluminum bracket that attaches to the lip of the engine compartment and to the wheel well (this latter attachment point is necessary to keep the pump from vibrating). Finally, the kit comes with 3/8” fittings to tap into the brake booster vacuum lines. The Jeep, however, uses 8mm nylon tubing. Brake Buddy, via etrailer.com, stated that the tubing would stretch and all would be good. Again, this felt casual for a safety system. Instead, I purchased an 8mm check valve and a 8-6-8mm barbed tee through Another online retailer to do the job right. I had to heat the Jeep tubing to fit even the 8mm tee, so the is no way the larger 3/8” fittings would have worked. See photo of my finished vacuum line installation. Bottom line, it was a POA install, but looks great. Hopefully it will stop the Jeep when towing. I’ll find out soon. :D
I am a proficient DIYer (and was an auto mechanic many years ago). The installation took a lot of time - perhaps 8-10 hours for the brake controller. The most special tool needed was a rotary cutter (e.g., a Dremel tool). A cordless impact driver was also very helpful, especially with the self tapping screws. Getting the pully in the perfect position under the brake pedal took some trial-and-error to get perfect. Also, the included bolts for the brake pedal bracket where too short to accommodate the width of the brake lever - easily remedied with slightly longer standard bolts. Be very mindful of what is on the other side of the sheet metal you are planning to drill into. The brake supplemental vacuum system was a bit of a challenge, as the instructions are very vague regarding how to mount, and the space I had to work with was surprisingly tight. I ended up creating a mount on the inside front fender, and bolting the pump to that. Also, tapping into the vacuum lines took a couple of tries to get a leak-free connection. Think ahead about this, and be prepared to get a few small parts like hose clamps or right-angle hose connectors. This would be a potential consideration for any vacuum boost added on any vacuum power-assist application with any controller. I mounted the Brakebuddy main unit under the rear seat - that was a perfect location, and much better than the often suggested location under the driver's seat. I was very pleased with the installation result. I paired this with a Nighthawk tow bar. Be warned that the tow bar's included cable will not be compatible with the Stealth, as the Brakebuddy uses a proprietary connection at the towed vehicle. The upside of this proprietary connector is that all connections are build in, including the brake away cable and the battery charging line. (I modified the Nighthawk by replacing the included cable with a 4-pin cable to power the lighting system on the bar. This is just for extra safety and cool looks - I could have just not used the tow bar's included cable). With 1,200 miles of towing behind us, I can say I am very pleased with the performance. I rarely notice any difference in braking effort or effectiveness - which is a big advantage for a proportional system. My favorite feature is the ease and speed of connecting or disconnecting the towed vehicle. I'd give this a 4.5 stars out of five if I could, because I did need to add a few parts and make a couple trips to the hardware store to complete the installation. However, the excellent performance and ease of use once installed more than makes up for the inconvenience during initial installation. Special appreciation to the people at eTrailer, especially Nicole T, who provided support and guidance from pre-sales to installation. Also, I called Brakebuddy's support line with a concern, and they immediately picked up the line, addressed my question, and offered to immediately ship any parts if needed.
# 7
Demco Air Force One Flat Tow Brake System for RVs w/ Air Brakes - Wireless Monitoring - Proportional
Overall a great system, there are some intricacies to the install as it pertains to old instructions with LED light in the TOAD vs. CoachLink Wireless and also the 3 wire reed switch vs. the newer 2 wire one. But using the provided written instructions along with YouTube videos you can figure it out. My other challenge was my Jeep is a 392 model and thus the battery and fuse box are in swapped locations, as well as a different VAC line layout, but again you can figure it out…just takes some time to study and trace the routing. My only real complaint was ordering, I was quoted the wrong system for my RV (Stay and Play) vs. AF1 since I DO have air brakes. etrailer was helpful in getting the return process but wants to charge me the shipping and possibly restock fee, I am working with them on this and hope to get a good resolution.
We have put over 10k miles on this system. Everything has worked perfectly. A job very well done by Etrailer. Thank you!!
# 8
Roadmaster BrakeMaster for RVs w/ Hydraulic Brakes - Proportional
Kit fits great! Hooked up a 2004 Workhorse to a 2002 Jeep Liberty. It might be preferable to be handy with some advanced mechanical skills and tools to install this efficiently. Directions are great but you do need to figure out your own locations for certain items like the break-away reservoir, compressor, routing lines and wires out of harms way, but not bad at all. Parts are great, everything there but added a couple different wiring splices of my own.
2012 Chevrolet EquinoxYour customer service leaves nothing lacking, and this follow-up from you is so out of character for the many web sites I have purchased from over the years. I am impressed by you and your company. I bought the tow bar and the brake system for my Equinox, and installed them my self (I am 70 years old) - and with your provided instructions and video, I had no problems (even though I was surprised by the number of parts and detail that went into the assemblies). Both systems have worked very well, with no problems. I am completely satisfied with them, and have told my friends and traveling acquaintances about your company. Thanks for your follow-up!
# 9
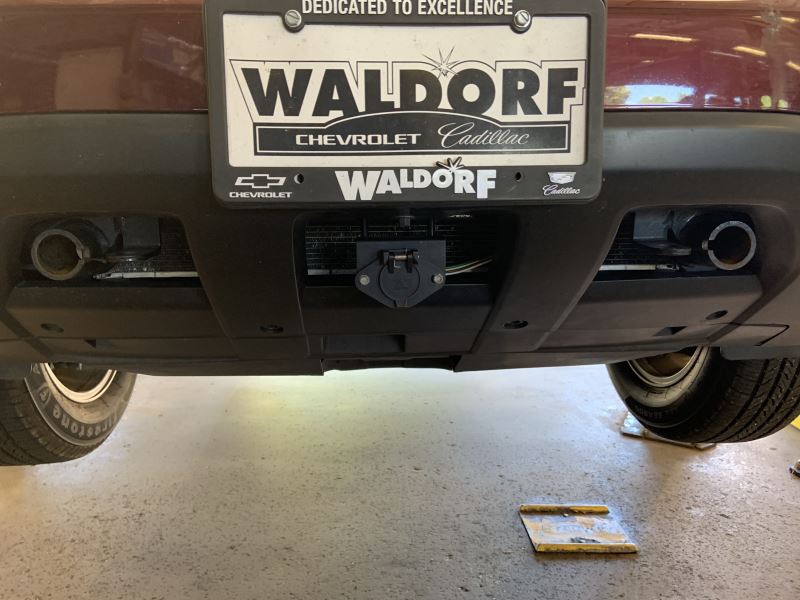
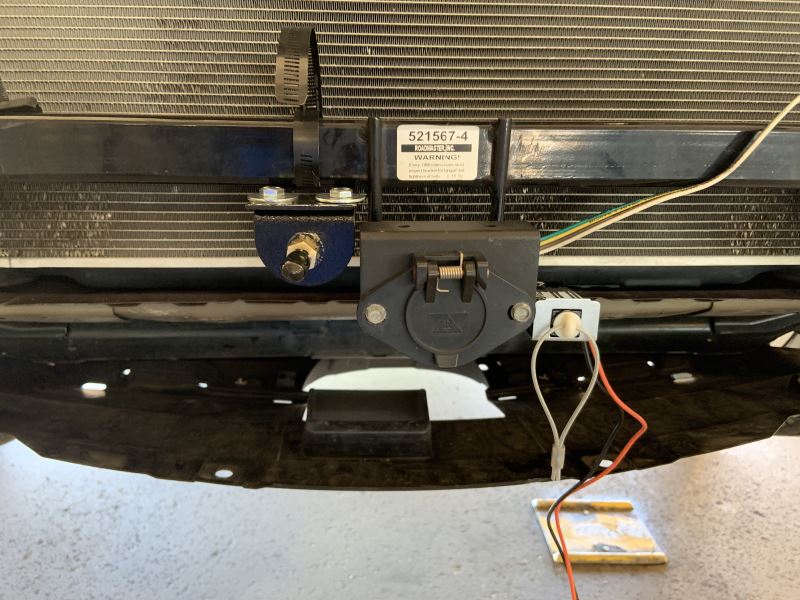
Demco Air Force One Flat Tow Brake System for 2020 and Newer Tiffin Chassis RVs w/Factory Air Brakes
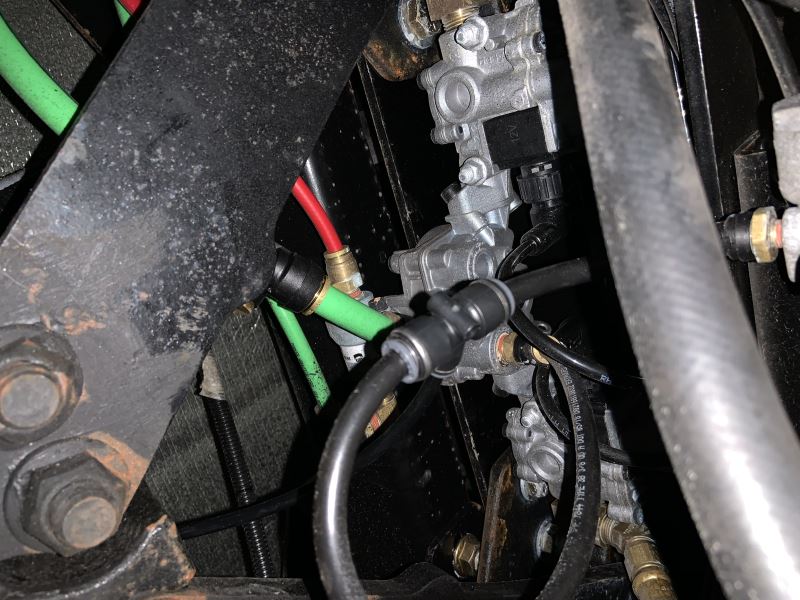
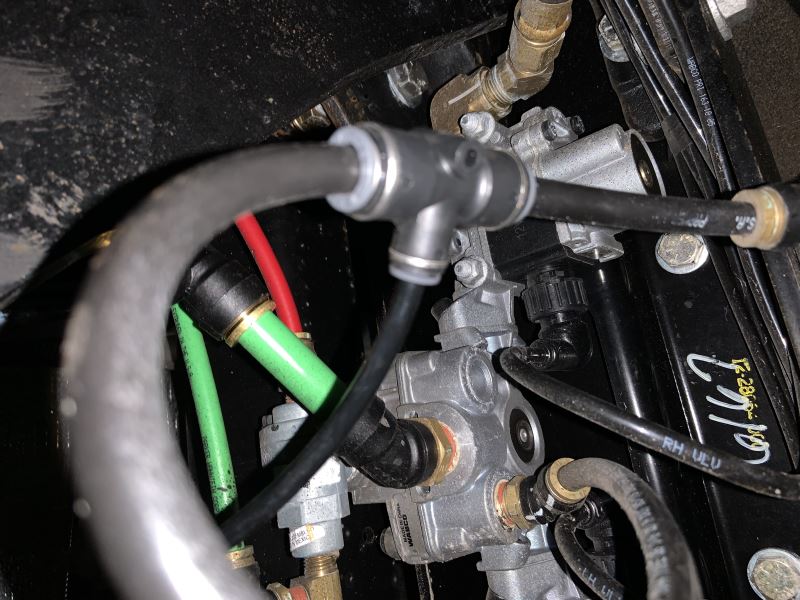
Towing a 2020 F250SD with powerstroke. The Blue Ox Patriot 3 just would not press the petal enough. This applies the breaks well. Had to mount the box behind grill due to no room under hood. Used some copper wire to make sure it stayed in place. Had to cut a bit of the plastic cover over radiator. One thing did that was a little off the instructions is I did not run power into cab with air hose. I took power off my charging coach-> Toad charging circuit because it was under the bumper. For the reed switch I ran a wire to passenger side fuse box and used a fuse tap. Every thing else was pretty easy. I am pretty handy and have all tools needed. I installed in about 6 hr.
After the install, we have had no issues with this product. We enjoy the fact the supplemental brake system is an installed item and we are not required to do anything except hook our "toad" up and be on our way.
# 10
Roadmaster BrakeMaster w/ Pressure Reducer for RVs w Air or Air-Over-Hydraulic Brakes - Proportional


What our customers are saying:
"Easy place to shop. Fast delivery and great products. Very happy with my purchase."