Most Popular 500 lbs Vert Load for Ford Expedition
change vehicle# 1
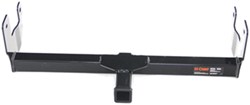
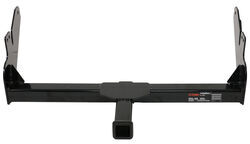
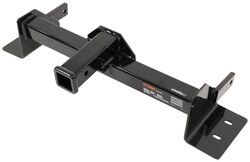
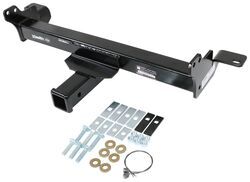
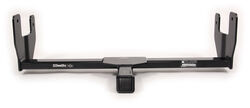
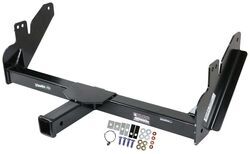
Curt Front Mount Trailer Hitch Receiver - Custom Fit - 2"
- view all Front Receiver Hitch
- Custom Fit Hitch
- Front Mount Hitch
- 500 lbs Vert Load
- 9000 lbs Line Pull
- 2 Inch Hitch
- Square Tube
- CURT
More Information >

This hitch is high quality and fit perfectly. Install was relatively easy. I needed this hitch because I tow a travel trailer and need to carry my bike rack and bikes as well. I can move the bike rack to my rear factory hitch when I'm not towing, very simple. The pictures show my truck / RV with my bike rack installed in the front hitch.


I use the hitch for our E-bikes bike rack. It is so nice to use especially since I tow a camper and didn’t have a way to haul the bikes. Very sturdy and it was easy to install.

# 2
Curt Front Mount Trailer Hitch Receiver - Custom Fit - 2"
- view all Front Receiver Hitch
- Custom Fit Hitch
- Front Mount Hitch
- 500 lbs Vert Load
- 9000 lbs Line Pull
- 2 Inch Hitch
- Square Tube
- CURT
More Information >
This thing is well built, it fit perfect, This will come in handy for my needs. Instructions are very clear. If I was to rate the install on a 1 to 10 scale it would be a 5. Fishing the bolts thru the frame with the wire provided was much easier than I expected. I do recommend this hitch.
the install went very good but i do have one suggestion and see if your maker can put a notch in the middle hole to look like the tow hook it would make the install way more user friendly also had a little problem with one of your bolts after i had fished it down the hole the treads were burred and the nut wouldn't go on all the way so i had to fish it back out what a pain that was but got it done and replaced with one of the other bolts that you supplied me with and it went on great. now i have a ? about the hitch height mine only sits up at about 11 inches and change will that work with your snowplows that say they need 13 inches or will i have to do something different? but thanks for the great turn around time in getting it here quick.

# 3
Curt Front Mount Trailer Hitch Receiver - Custom Fit - 2"
- view all Front Receiver Hitch
- Custom Fit Hitch
- Front Mount Hitch
- 500 lbs Vert Load
- 9000 lbs Line Pull
- 2 Inch Hitch
- Square Tube
- CURT
More Information >
2003 F-150 4X4 Lariat. I accomplished installation alone in about 1 hour as a complete newbie. Here are my tips: 1. Read instructions and other comments ahead of time. 2. Spray the tow hook bolts a day or two ahead of time with a penetrating oil spray. 3. There is nothing to hold the factory nut plate (inside the frame rail) when the tow hook bolts are removed. After I removed the first tow hook bolt and loosened the other one for some "working room), I threaded a thin piece of flexible wire through the bolt hole and nut plate, out another nearby hole on the side of the frame rail and twisted it together to keep the factory nut plate in position. Then, I removed the second tow hook bolt and the tow hook. Leave the flexible wire in place for now. Do the same on both sides of the vehicle. 4. You have to temporarily remove the tow hooks completely but I did not have to remove any other trim / fascia. 5. The fish wire is essential. I passed the empty threaded portion of the fish wire through the bolt hole for the new bolt from below and advanced it toward the front of the vehicle. There is enough room once it comes out of the front of the frame rail to thread on the new bolt ... with the new nut plate included ... then pull it into the inside of the frame rail behind the bumper fascia ... then wiggle / "jimmy" it back until it drops into position. 6. Once the new bolt / nut plate was in position, I used a few drops of super glue to tack the nut plate into position through another nearby square hole where the new nut plate was visible. Do the same on both sides of the vehicle. 7. I used a hydraulic floor jack to position the receiver under the vehicle. A little metal lip at the center of the receiver fit right into the notches on the cup of the jack. 8. I carefully raised the receiver into position with the jack. I started a little bit toward the back of the vehicle. This let the front lip of the receiver slide forward into the fascia opening for the tow hook. Once the front of the receiver was through that, I lined it up, raised it and the new bolts (with the super-glued nut plates inside the frame rail) came through the receiver mounting holes perfectly. I put the two new nuts on the two new bolts "finger tight". 9. I raised the receiver a little further but leaving a few mm of space between the front of the receiver and the frame rail ... where the flexible wire mentioned above was coming out. The holes should line up at this point. Leave the flexible wire in place for now. 10. Use one hand to hold the tow hook in position. Thread one of the original tow hook bolts through the the tow hook, the receiver, the hole in the frame WITHOUT the flexible wire and into the nut plate inside the frame rail "finger tight". This will "grab" the factory nut plate inside the frame rail. Now, you can untwist / pull out the flexible wire through the other tow bolt hole and thread that bolt as well. Repeat the process for the other side of the vehicle. 11. Now, all 6 bolts / nuts are threaded in position "finger tight". Tighten / torque them sequentially ... and you're done!


Installed this hitch on my 2000 Ford F150 4x4. It fit perfectly. No facia needed to be removed and no frame drilling was necessary. I simply removed the tow hooks and skid plate and bolted up the hitch and reinstalled the tow hooks. I notched the edges of the skid plate to clear the hitch frame (small angle grinder worked fine for this) and reinstalled the skid plate. Installation was simple and straight forward. The attached pictures may be a little dark but I attempted to show the hitch tucked up against the factory facia.

# 4
Draw-Tite Front Mount Trailer Hitch Receiver - Custom Fit - 2"
- view all Front Receiver Hitch
- Custom Fit Hitch
- Front Mount Hitch
- 500 lbs Vert Load
- 9000 lbs Line Pull
- 2 Inch Hitch
- Square Tube
- Draw-Tite
More Information >
A solid mount. Shims for filling any gaps between the frame. It takes a bit of fiddling to get bolts in place. Overall a couple hours to install. Just what I was looking for.


The hitch is working out fine,it's what you need up in the Badlands. See Attachment as picked up on the trail Cam. I can hook it on to the rear hitch if needed also. Steve

# 5
Curt Front Mount Trailer Hitch Receiver - Custom Fit - 2"
- view all Front Receiver Hitch
- Custom Fit Hitch
- Front Mount Hitch
- 500 lbs Vert Load
- 9000 lbs Line Pull
- 2 Inch Hitch
- Square Tube
- CURT
More Information >
Gave it 5stars cause it was so easy to install…only potential issue is its height…but…. In fairness to drill and cut brackets to raise it would require cutting “upper valance” something I’m not prepared to do….yet


I bought the front trailer hitch for a bike rack while pulling my camper and that works great. I decided to try it pushing the trailer into my garage and really like that. Takes some learning since only very small adjustments in steering wheel make quick change in the trailer directions. Installation was simple, but requires more strength than I have to lift hitch into position (tight fit) and bolt it in place. I found a local curt dealer who installed it for about a hundred bucks. Money well spent.

# 6
Curt Front Mount Trailer Hitch Receiver - Custom Fit - 2"
- view all Front Receiver Hitch
- Custom Fit Hitch
- Front Mount Hitch
- 500 lbs Vert Load
- 9000 lbs Line Pull
- 2 Inch Hitch
- Square Tube
- CURT
More Information >
Super easy to install product thanks to the video! Took all of 25 mins to install
 1998 Ford F-150 and F-250 Light Duty
Great product,easy installation and dealing with etrailer has been a real good experience.
# 7
Curt Front Mount Trailer Hitch Receiver - Custom Fit - 2"
- view all Front Receiver Hitch
- Custom Fit Hitch
- Front Mount Hitch
- 500 lbs Vert Load
- 9000 lbs Line Pull
- 2 Inch Hitch
- Square Tube
- CURT
More Information >
Installation was a breeze. It also is tucked out of the way.

This hitch was very easy to install....I had to trim the lower air dam to fit around the receiver and that gives it a clean neat look. I didn't like that I had to remove and leave the shields around the tow hooks off. But overall I'm very pleased. I plan to use this hitch for maneuvering a camper in a narrow spot beside my home, and for a bike rack when towing a camper.


# 8
Draw-Tite Front Mount Trailer Hitch Receiver - Custom Fit - 2"
- view all Front Receiver Hitch
- Custom Fit Hitch
- Front Mount Hitch
- 500 lbs Vert Load
- 9000 lbs Line Pull
- 2 Inch Hitch
- Square Tube
- Draw-Tite
More Information >
Excellent from researching, ordering, fast shipment! Years ago I purchased a front hitch for my 2008 F-350 from etrailer. It was a no brainer to buy for my 2024 F-250. The videos make installation a breeze. Thank You


I put this on my 2022 F450 so I can carry a bike rack while carrying my slide in camper. Overall fit was great and the video on this site was very helpful. I did have to slot the brackets on the auxiliary cooler about 1/4" with a file so it could sit up higher so the hitch wouldn't put a lot of pressure on it. After that it all fit together nicely.

# 9
Draw-Tite Front Mount Trailer Hitch Receiver - Custom Fit - 2"
- view all Front Receiver Hitch
- Custom Fit Hitch
- Front Mount Hitch
- 500 lbs Vert Load
- 9000 lbs Line Pull
- 2 Inch Hitch
- Square Tube
- Draw-Tite
More Information >
 2012 Ford F-150
Finally got it installed with the help of a seven year old (because her hands were small) holding a fastener at a difficult-to-access location. The front hitch works fine. Used a floor jack to hold it in place during installation. Instructions not particularly clear or accurate in my case. I should have been told that the front air foil needs to be removed completely (and discarded). With the labor provided by two adults & a little girl, it took the better half of a day to install it. It ends up being pretty low - I had to mill and grind the bottom of my hitch ball adapter so it wouldn't catch on anything when backing up. You need at least a 6" high hitch ball adapter.


This is the second front trailer hitch that I have purchased from etrailer and once again the service and delivery were excellent. If your not mechanically inclined the instructions leave a little to be desired. Installation on my 2013 Ford F-150 was straight forward and took me about 3hrs. The unit is heavy duty and solidly made, so you will need some type of lifting device to hold it in place while you bolt it into place. You ma y also have to cut out two additional notches in the facia to enable sliding the receiver forward enough to line up the bolt holes. I use this front hitch for moving airplanes and it does a great job.

# 10
Draw-Tite Front Mount Trailer Hitch Receiver - Custom Fit - 2"
- view all Front Receiver Hitch
- Custom Fit Hitch
- Front Mount Hitch
- 500 lbs Vert Load
- 9000 lbs Line Pull
- 2 Inch Hitch
- Square Tube
- Draw-Tite
More Information >
Great products, great prices, fast shipping and a great company to do business with. Easy install, and it took longer to trim the air dam than installing the hitch.


Great solid piece, as you would expect. Extra longer bolts are included in case you have the factory tow hooks, a nice touch and saves $10 at the hardware store. Not a complaint, just info; you have to remove the bumper to fit the front bolts, they won't drop in past the bumper brackets at least on my '95. Cut a hole and some minor trimming, and it works with the factory air dam as well.

# 11
Draw-Tite Front Mount Trailer Hitch Receiver - Custom Fit - 2"
- view all Front Receiver Hitch
- Custom Fit Hitch
- Front Mount Hitch
- 500 lbs Vert Load
- 9000 lbs Line Pull
- 2 Inch Hitch
- Square Tube
- Draw-Tite
More Information >
The front hitch solved a storage problem that I was having with my truck camper.It fit perfectly. I added a Stow Away hitch frame and a UWS small aluminum storage box for my small generator. The photo shows a test fit before installation.

 2007 Toyota Tundra
This was one of the easiest accessories I’ve installed on my Tundra. It is a front receiver hitch so I don’t use it very often. Mostly just for bike racks when towing a trailer, but when you need it you need it.
# 12
Draw-Tite Front Mount Trailer Hitch Receiver - Custom Fit - 2"
- view all Front Receiver Hitch
- Custom Fit Hitch
- Front Mount Hitch
- 500 lbs Vert Load
- 9000 lbs Line Pull
- 2 Inch Hitch
- Square Tube
- Draw-Tite
More Information >
I bought this receiver to add front mounted 'accessories' on my 2007 Jeep Wrangler Unlimited Sahara. I plan on using this to add an extra bicycle rack, a cargo basket, a receiver mounted winch or other 'accessories' needed for my Jeep when I take my family camping. It will also be useful for "front launching" a boat or parking a trailer in tight spots. It took me about an hour to install, although I had already previously removed the lower wind deflector cowling, so did not have to spend time removing it or cutting it for a finished look. Detaching and moving the top trim panel between the grill and the bumper is a must to facilitate the installation. The receiver fits pretty close, although you do have to manipulate it to get the holes to line up with the frame. Follow the instructions and do not tighten any of the bolts until you get it lined up and all the bolts in loosely, then torque it down. As noted in the instruction sheet, the driver's side of the receiver does not sit flush against the frame, there is about a 1/4" to 5/8" gap. The instructions say to use the extra split washers (in the kit) as filler, but they would just rattle around loose in there and provide any benefit, so I omitted them. Once tightened down, the receiver tube was not parallel to the ground, it is slightly higher in the front, sloping towards the rear. It is not off enough to affect my intended use, but may be bothersome to those with type 'A' attention to detail. Overall a good product that will add a lot of flexibility to my Jeep~


2nd hitch, both fit up great. Left off the roll pan and built our own cover for the sway bar disconnect.
# 13
Draw-Tite Front Mount Trailer Hitch Receiver - Custom Fit - 2"
- view all Front Receiver Hitch
- Custom Fit Hitch
- Front Mount Hitch
- 500 lbs Vert Load
- 9000 lbs Line Pull
- 2 Inch Hitch
- Square Tube
- Draw-Tite
More Information >
This front receiver mount is exactly what I needed. Great build quality and easy to install. Thanks for getting it to me in a timely manner.

After a year of having this on my truck I can say that I wish I did it sooner! The installation is easy as can be. The hitch is super handy as both a tow point and also as a kind of skid plate/bumper. I have contacted multiple ecology blocks and other objects in my truck, the hitch is the first thing to touch so nothing on the truck gets damaged! This is a super strong, affordable, and versatile addition to any vehicle!


# 14
Draw-Tite Front Mount Trailer Hitch Receiver - Custom Fit - 2"
- view all Front Receiver Hitch
- Custom Fit Hitch
- Front Mount Hitch
- 500 lbs Vert Load
- 9000 lbs Line Pull
- 2 Inch Hitch
- Square Tube
- Draw-Tite
More Information >
UPS was rough on the box but everything still lined up without having to pry but was snug on the back bolts. Install was very straight forward and did it myself in my driveway in just about 90 minutes from pulling the air dam to putting tools away. Used my floor jack to support the hitch in the center and started with the front bolts on both sides and then pivoted the hitch into position for the back bolts and then snugged up all four mounting bolts to the 110-ftlbs torque spec. Hints. made sure that front of the hitch was just a a hair pointed up from level before tightening down all of the mounting bolts. I pulled the air dam completely off and then lined it back up in position lying on the hitch so I could marked it, so I knew exactly where I would need to trim it and then used my Dremel tool with a cutoff wheel to trim it to fit. Then bolted it back into position and was done. I'll try and update this post once I take some pictures other than the shipping box

Please read: I am not happy with this product. I have a 2023 F-150 with a 2” leveling kit up front. My properly installed hitch only has 8-3/4” of ground clearance sitting on my flat garage floor. It definitely appears to be the lowest point throughout the whole bottom of my truck.I didn’t even have to cut my air dam for the unit to align with the mounting holes in the frame. Like anyone else I wanted this to sit as high as possible, forcing me to cut as much air dam as possible. I believe the mounting holes in this hitch were drilled way too high, and now I’m either stuck with terrible clearance or I need to take it off and re-drill the holes lower on my own. Plus it points downward out the front and not on the same parallel plane as my truck. I put an accessory in it and it was barely above the ground out front. Super irritating. See photos. If anyone has help I’m certainly listening. The shipping and ordering was super fast and easy otherwise this would be 1 star.


# 15
Draw-Tite Front Mount Trailer Hitch Receiver - Custom Fit - 2"
- view all Front Receiver Hitch
- Custom Fit Hitch
- Front Mount Hitch
- 500 lbs Vert Load
- 9000 lbs Line Pull
- 2 Inch Hitch
- Square Tube
- Draw-Tite
More Information >
UPS was 8 days late for no good reason though it looks like they used the hitch as a crash test dummy. It’s a miracle the hardware bag made it but it did! I think this is superior than the other brands available. They always include these little threaded fish tape wires for getting the hardware into the frame. I’ve done a transit and now this. Saves a ton of time/headache. However the instructions just have a diagram. Took me about 20 min to get the first bolt in. Then 20 min for the rest of the install. So if you read this, you can probably get the whole thing done in 30 or so which is what i expected initially. Tools: 3/4” socket Torque wrench 1/2” drill bit & drill OPTIONAL: floor jack to lift hitch into place. Steps: - Drill forward holes to 1/2” and shoot with some rustoleum or equivalent paint. Let dry for 20 min while you eat lunch, take a dump, whatever. - send fish tape through forward mount hole and out front of frame rail. Figuring this is what slowed me down on the first one. the carriage bolt head won’t fit through any of the obvious openings. See pic. - put to bolt plate onto the fish wire then thread the bolt onto the wire. Pull em all through the hole and watch it assemble right before your eyes! - repeat on the other 3 bolts - jack hitch into place and finger tighten the washers/nuts on - torque down to 75ftlbs and boom! time to yank or be yanked! See all my pics and if this helps, send me an imaginary beer through the quantum field! Econolines rule!


I tried ordering this exact hitch off Amazon. Not once, but twice they shipped the wrong part number. Took a couple months to get my money back. Etrailer got it right the first time. I took about an hour to install on my 2006 class B+ E 450 motor home. The best advice I can give is take the 15 minutes to remove the front bumper (21 mm). With front bumper removed you won't need the wire chaser things. Jus stick your hand in the frame.
# 16
Curt Front Mount Trailer Hitch Receiver - Custom Fit - 2"
- view all Front Receiver Hitch
- Custom Fit Hitch
- Front Mount Hitch
- 500 lbs Vert Load
- 9000 lbs Line Pull
- 2 Inch Hitch
- Square Tube
- CURT
More Information >
Worked out great.. A little trimming on the facial of the bumper.. The fish line awesome little tool... Thanks

I have a 2005 Ford Explorer and this hitch fit well. There are three holes on each side of the hitch. The front two matched perfectly to holes existing on the frame of the Explorer. I had to drill into the frame for the third hitch hole but it was not too difficult. The hitch comes with a fishing tool to get the bolts where they need to go in the frame but it works pretty slick. Much easier than some fishing I've had to do with electrical work. I am not a mechanic but do handyman jobs around the house and was able to install this hitch by myself in 1.5 hrs. After placing the two front bolts, I propped the hitch up on boarts to where the bolts came through the hitch holes then screwd on the nuts to bring the hitch up & into place. For the third bolt, I drilled with hitch in place then put the bolts in the third hole.
# 17
Curt Front Mount Trailer Hitch Receiver - Custom Fit - 2"
- view all Front Receiver Hitch
- Custom Fit Hitch
- Front Mount Hitch
- 500 lbs Vert Load
- 9000 lbs Line Pull
- 2 Inch Hitch
- Square Tube
- CURT
More Information >

The fit was a bit too tight but we were able to make it fit. The shipping packing was pretty lacking. Since being installed we have been using it with a spare tire mount. That works great and it makes the spare tire more accessible compared to the standard under the bed mounting. When fully loaded with a camper and towing a boat moving the spare tire to the front improves the weight distribution.
Curt actually recommended that we use etrailer. They even gave me the confirmation that the hitch would work and told us you have a video. Thanks!
# 18
Draw-Tite Front Mount Trailer Hitch Receiver - Custom Fit - 2"
- view all Front Receiver Hitch
- Custom Fit Hitch
- Front Mount Hitch
- 500 lbs Vert Load
- 9000 lbs Line Pull
- 2 Inch Hitch
- Square Tube
- Draw-Tite
More Information >

This worked great on my F350 dually. We needed a front hitch to carry bikes while towing a 5th wheel camper. Instructions were easy to follow

This appears to be a great receiver hitch! The first one arrived bent because UPS employees threw or dropped it. e Trailer was fabulous in getting another one out ASAP. Assembly and fit was great as well. The only recommendation I would make would be to provide a template with measurements to cut the front rubber air damn to ensure a factory finish.
# 19
Curt Front Mount Trailer Hitch Receiver - Custom Fit - 2"
- view all Front Receiver Hitch
- Custom Fit Hitch
- Front Mount Hitch
- 500 lbs Vert Load
- 9000 lbs Line Pull
- 2 Inch Hitch
- Square Tube
- CURT
More Information >

Installed on the front of a 2008 GMC 4x4 Sierra. Primarily utilized for a hitch mount snow plow (DK2). Installed without any modifications - works good with the plow. * The hitch sits low to the ground (stock suspension). I installed a 2" leveling kit from RC and that helped with clearance. I am satisfied with the quality of the product - will purchase again from Curt for my Durango

Front hitch fit perfectly on a 1995 K1500. I was able to install without modifying the front tow hooks nor the fascia. This is the hitch you want.

# 20
Curt Front Mount Trailer Hitch Receiver - Custom Fit - 2"
- view all Front Receiver Hitch
- Custom Fit Hitch
- Front Mount Hitch
- 500 lbs Vert Load
- 9000 lbs Line Pull
- 2 Inch Hitch
- Square Tube
- CURT
More Information >
After struggling with the answering menu, Steve Z. was instrumental in locating a hitch to fit my van which was not specifically identified in any data search. Weird year, 2005, of popular Chevy Express van, my luck! Using manufacturers dimensions I purchased #31016 on 12/21 and it arrived on 12/24. It's a very well built, USA built, unit. It arrived rapidly, but was missing half of the mounting hardware. The remainder of the hardware was rolling around in the box. Zip lock baggie ripped apart spilling them. I used a hydraulic jack to elevate hitch into place, and an additional jack to push the drill up to drill the 6 mounting holes necessary. No factory hole alignment. All the nuts for the bolts were lost in transit, but by a Christmas day miracle, I found 2 metric nuts to fit supplied bolts that survived the delivery. I will acquire, and install remaining missing 4 tomorrow. The installation went smooth and easy using this technique. It took around 3 hours with much of the time searching for hardware.' Thanks Steve Z. and etrailer. .


The product works great. However, I was told that this front hitch receiver would bolt to existing holes on my 98 Four winds RV. That was not true, so installation was double the cost of what was estimated by the shop I took it to.









What our customers are saying:
"Very broad selection and outstanding service."