


To see if this custom-fit item will work for you please tell us what vehicle you'll use it with.


Thank you! Your comment has been submitted successfully. You should be able to view your question/comment here within a few days.
Error submitting comment. Please try again momentarily.
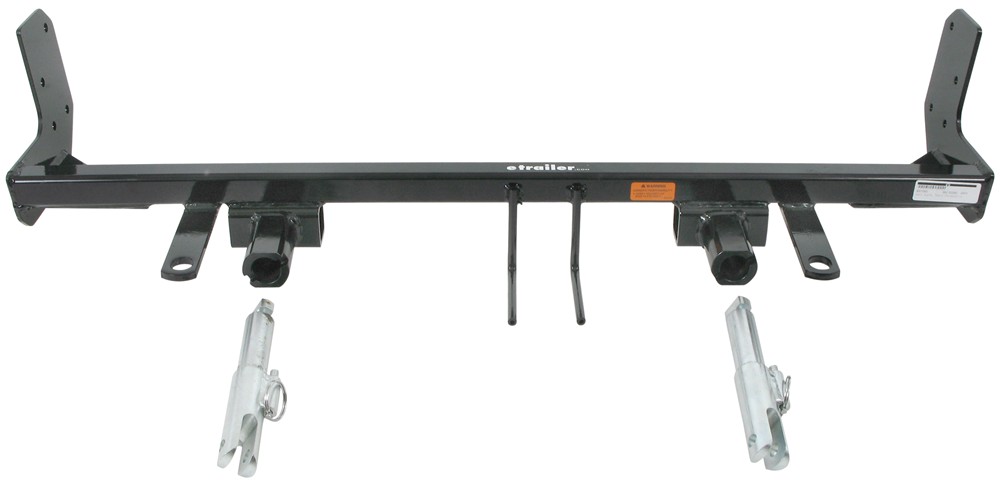
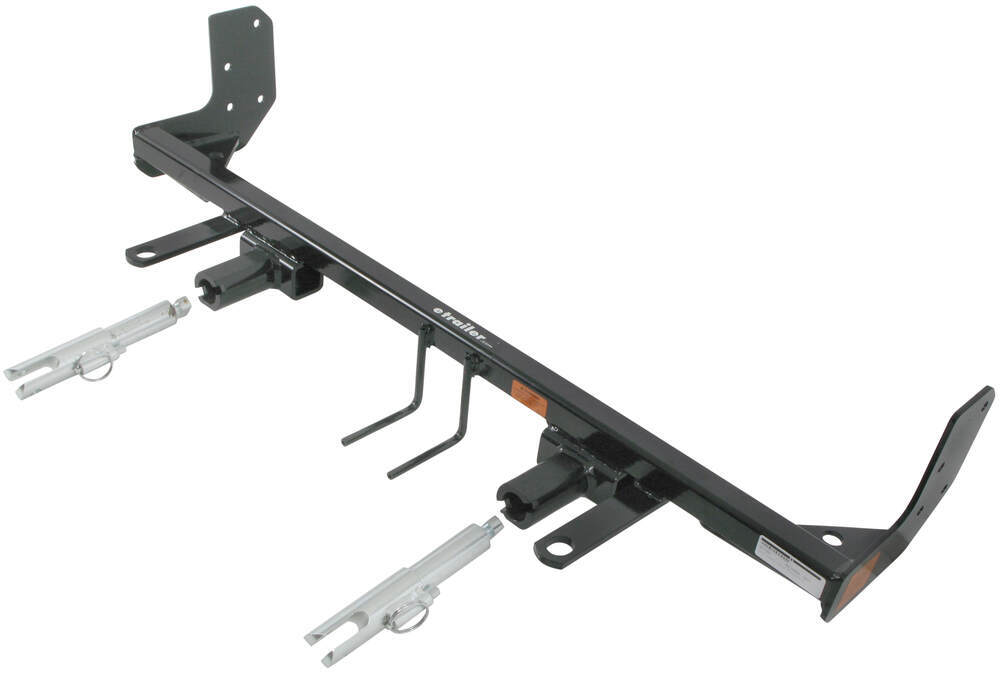
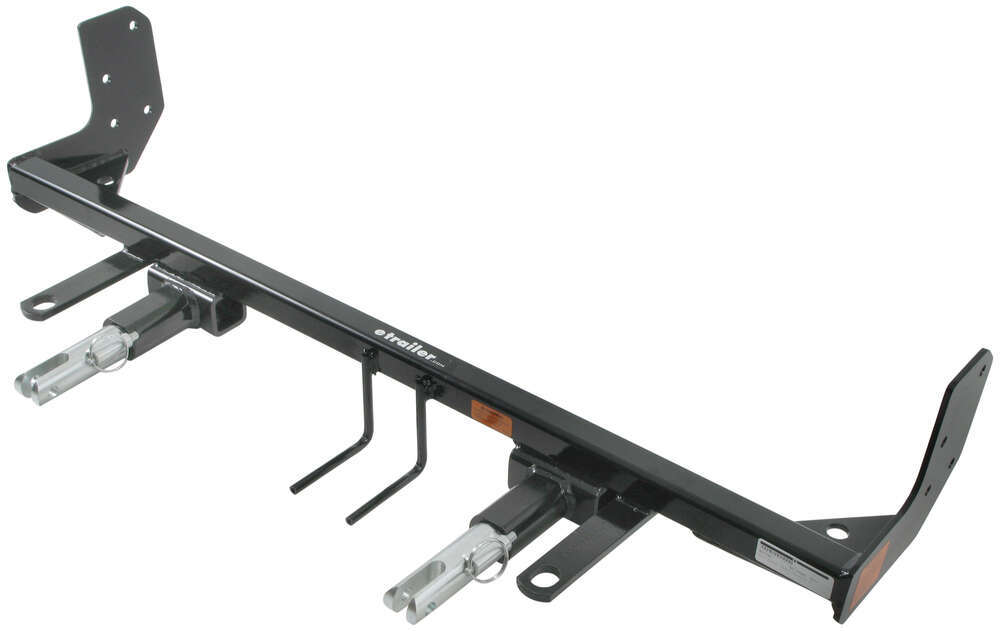
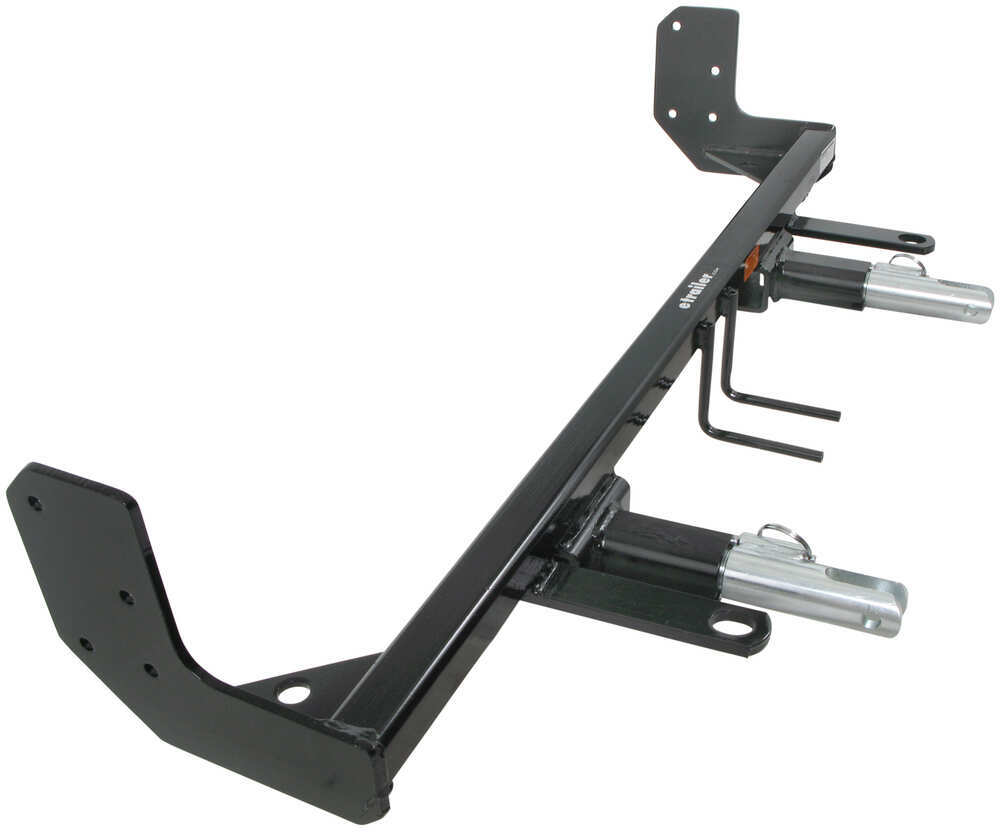
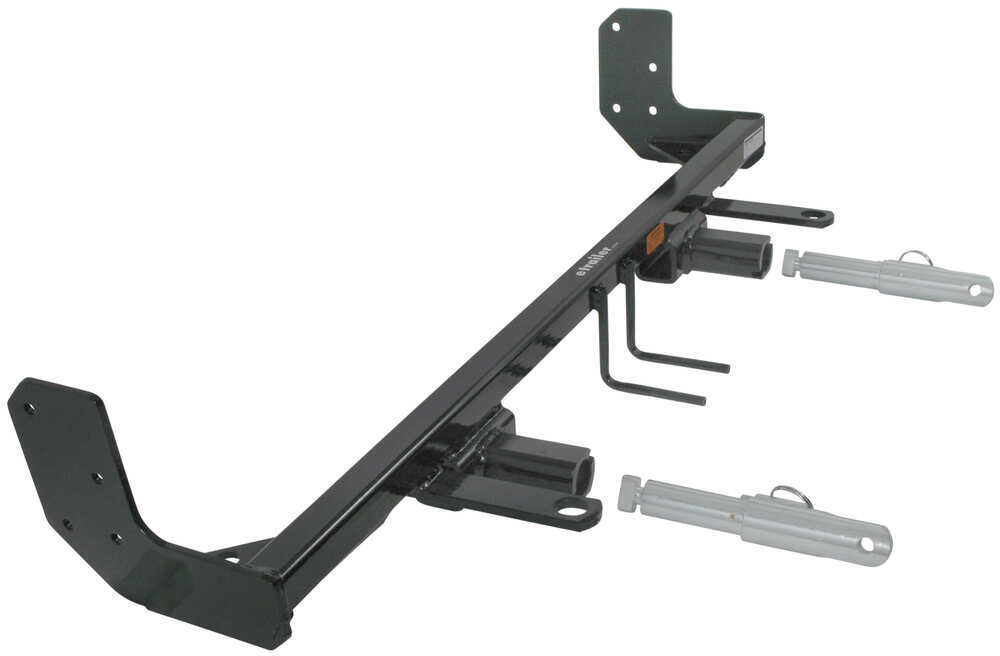
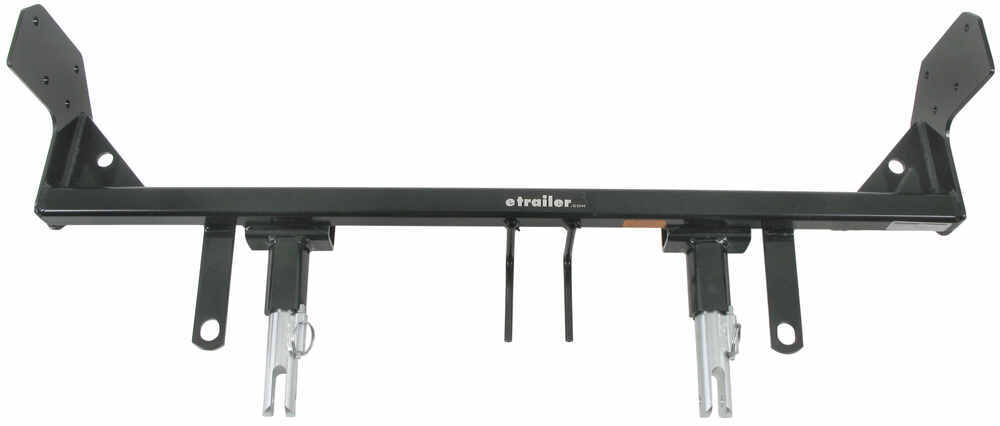
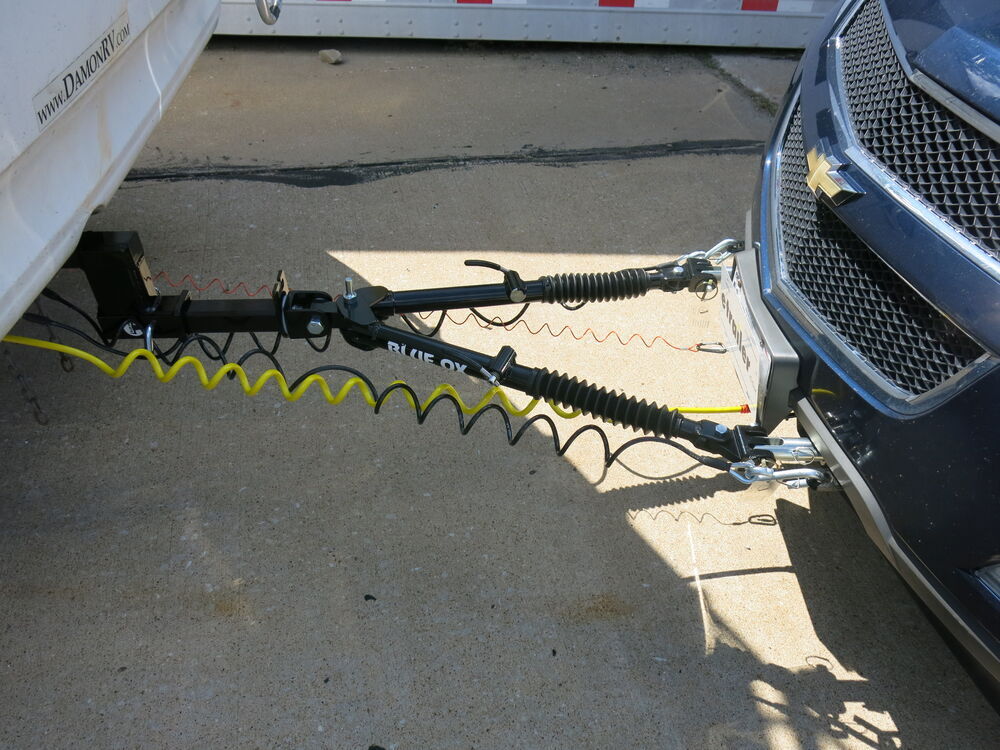
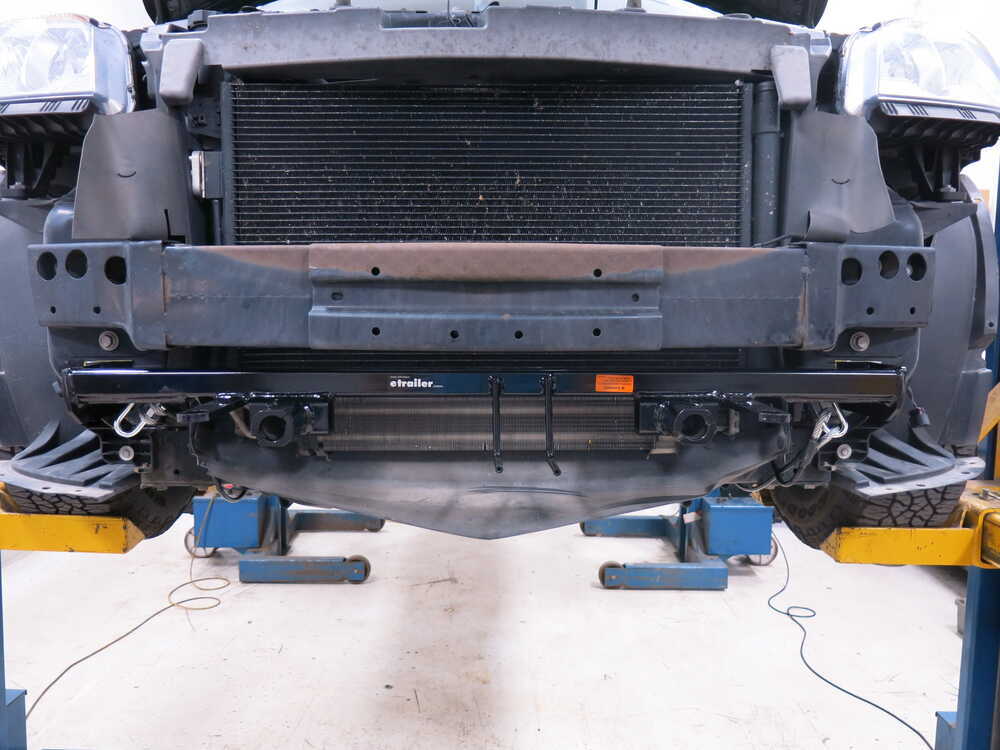
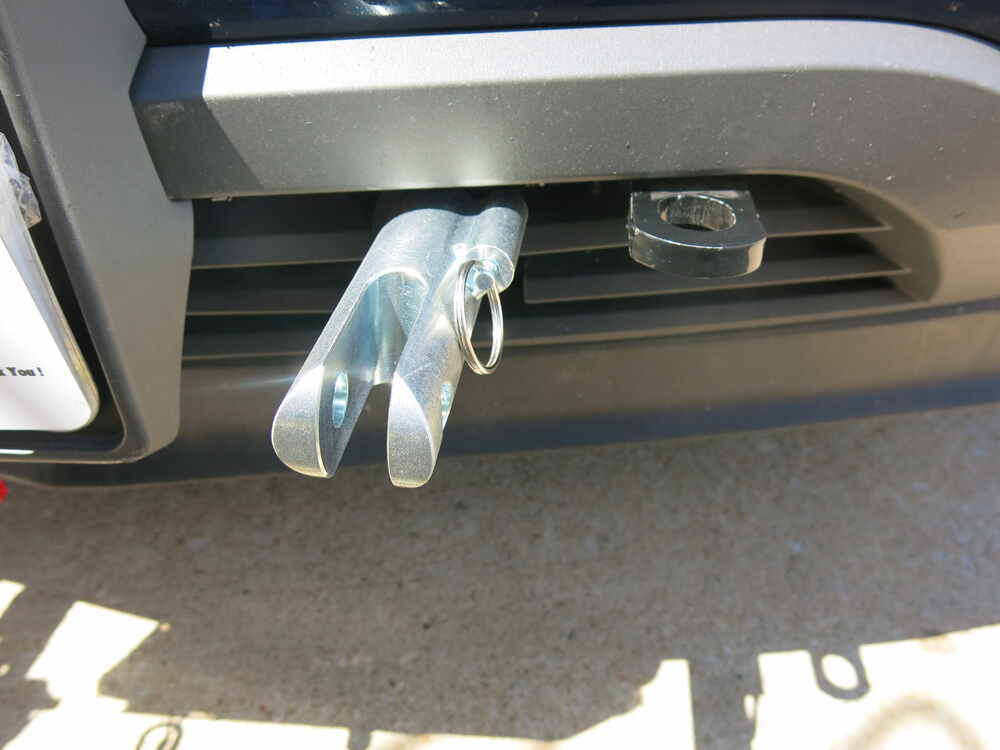
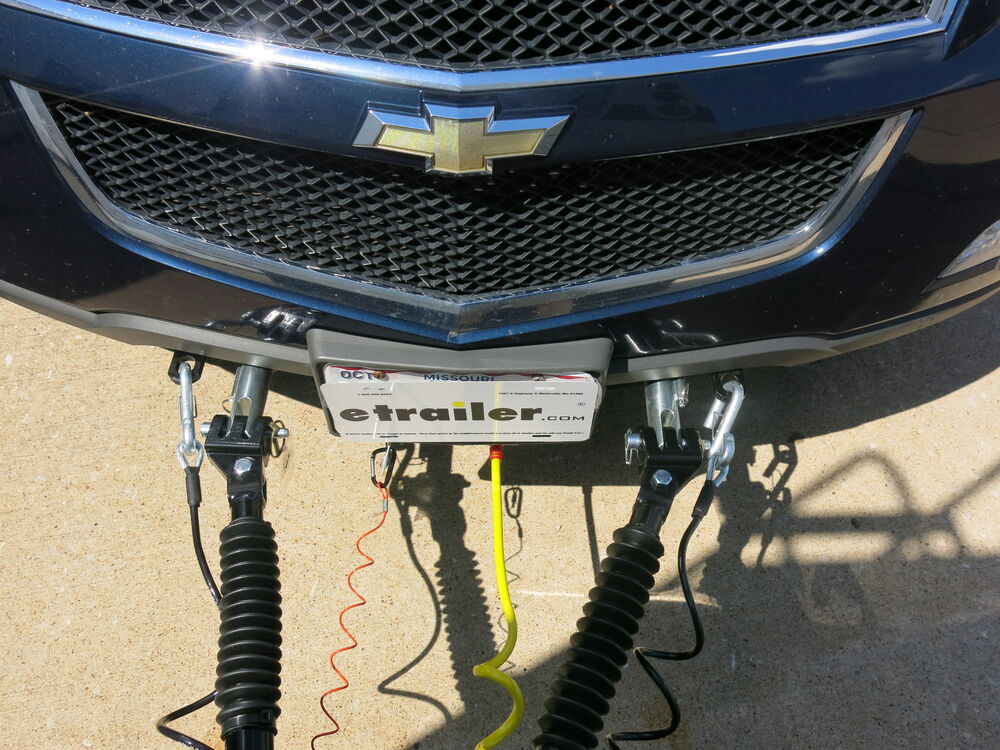
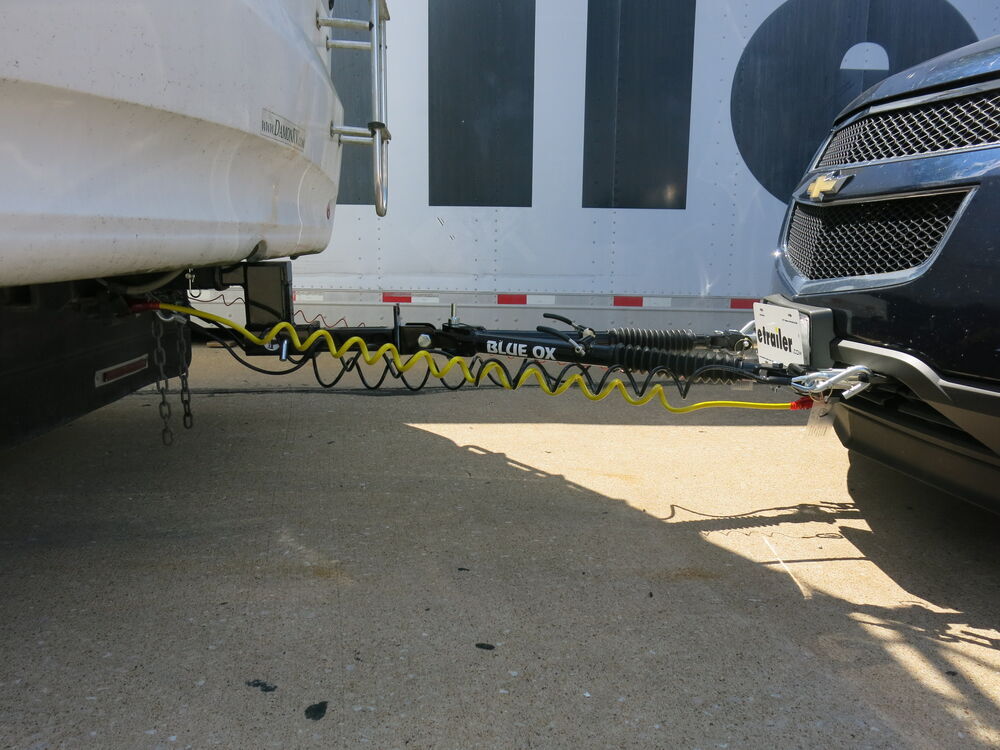
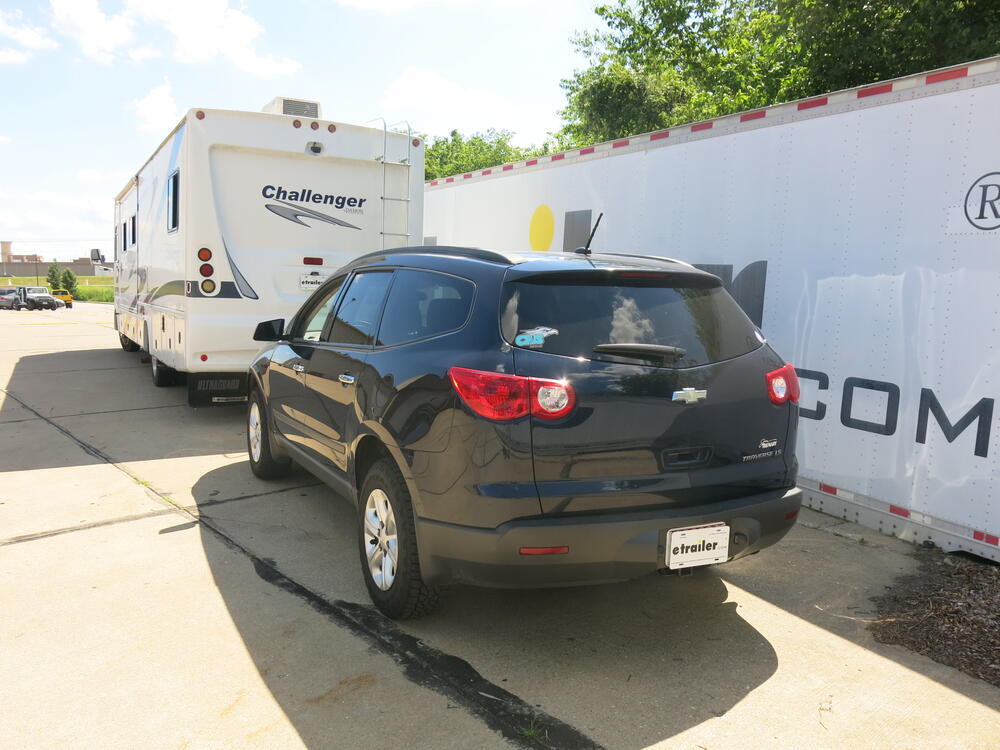
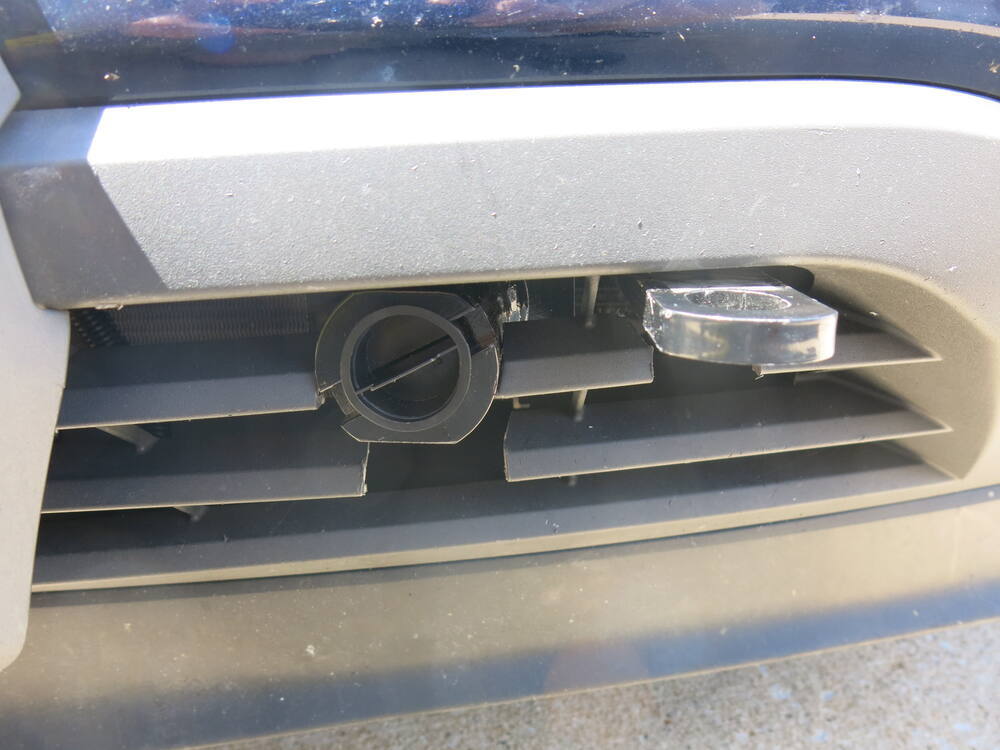


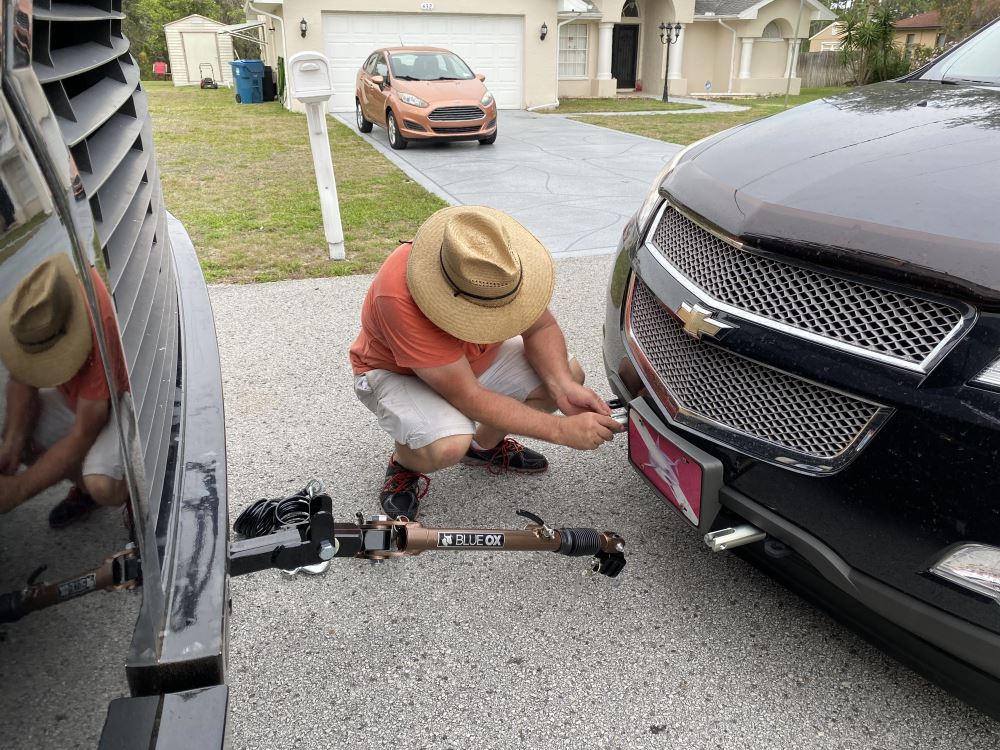
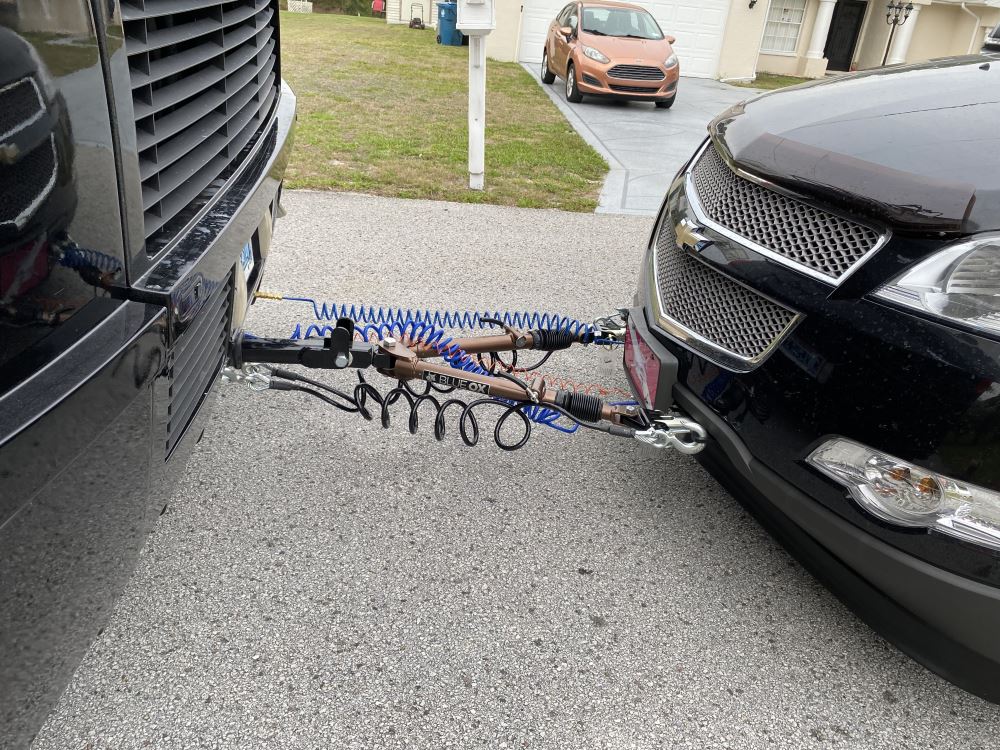

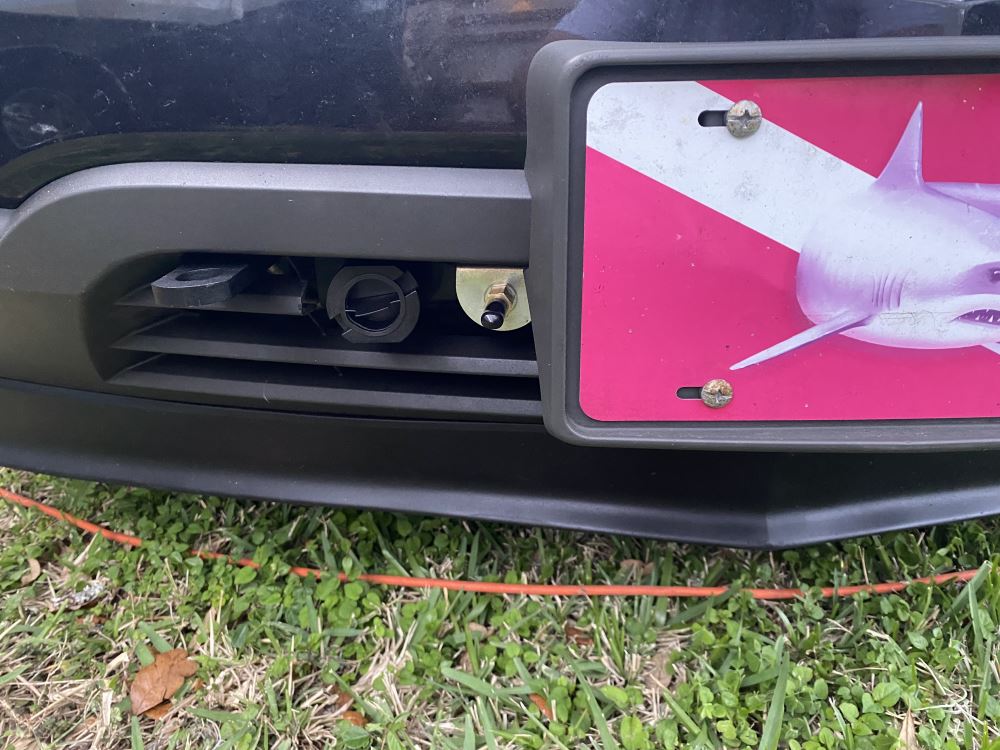

When you’re not towing, you still want your vehicle to look clean and uncluttered. This Blue Ox Base Plate Kit keeps things sleek with a completely hidden design and removable arms. The brackets don’t protrude past the front, so you won’t catch your shins walking by. Twist the arms out when you’re done towing and plug the included receiver covers in place to keep dirt and debris out while maintaining a finished look.

Getting ready to tow shouldn’t feel like a wrestling match. Each arm on this base plate slides into the receiver, twists to lock, and pins in place for a quick, solid connection. When it’s time to disconnect, just pull the pin, rotate, and remove the arms—it’s that simple. The secure twist-lock design gives you a reliable link to your tow bar while keeping setup and removal fast and frustration-free.

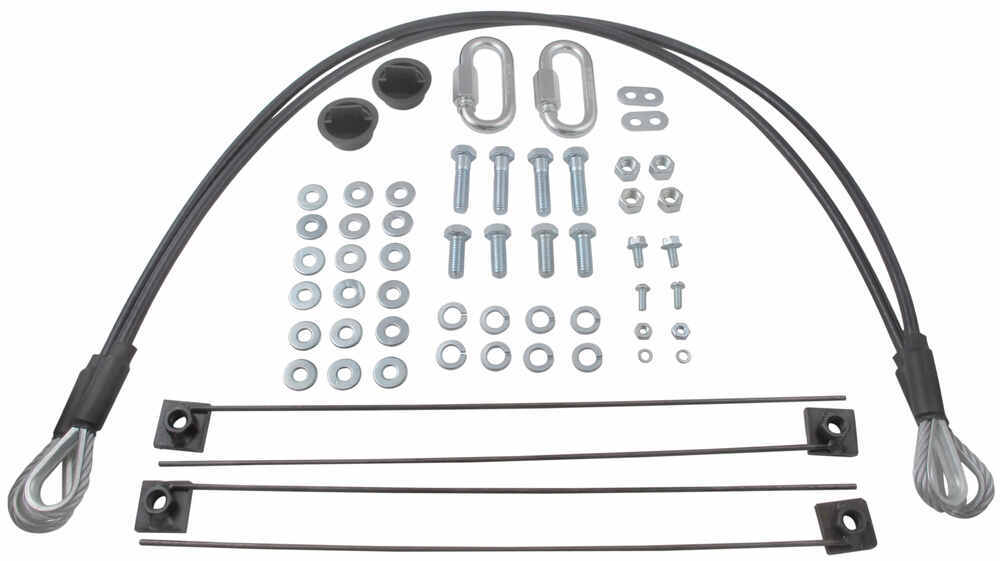
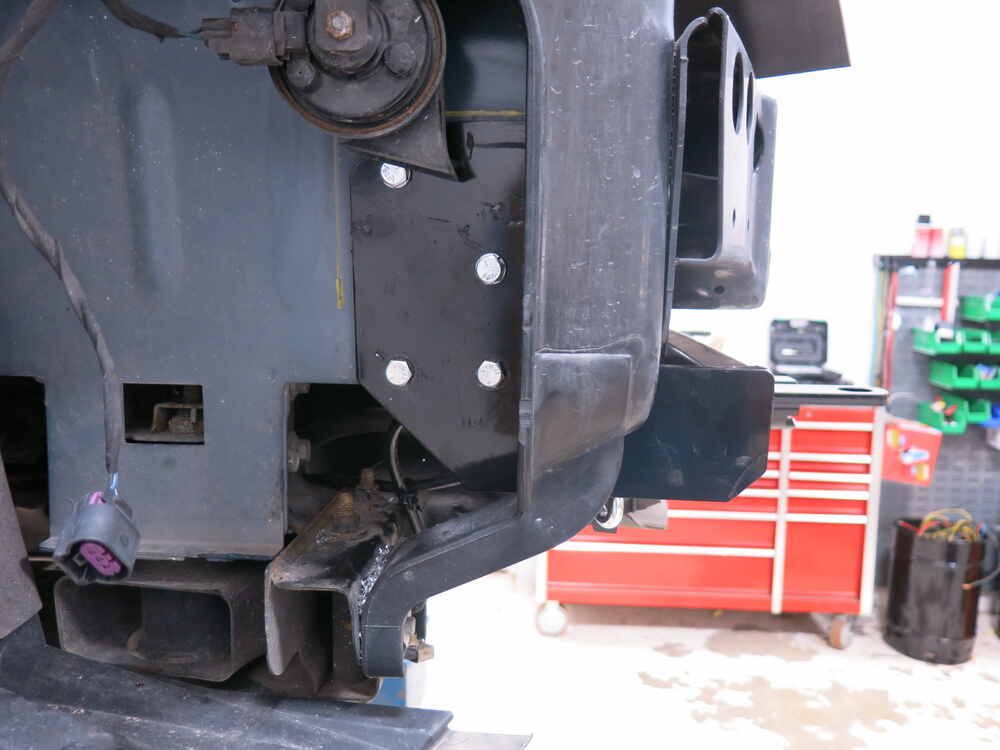
Flat towing adds stress to your setup, so this kit is built for it. The durable steel construction is powder coated to resist rust and corrosion, and the sturdy design spreads towing force evenly across the chassis to help protect your suspension from strain. It bolts directly to your vehicle’s frame using the included hardware—no welding required—for a secure fit that stands up over miles of travel.
Already have a tow bar or braking system you like? This base plate pairs directly with Blue Ox tow bars for a secure hookup. It’s also adaptable for use with Roadmaster tow bars using adapter RM-031 or RM-031-5, or with Demco tow bars using adapter DM9523041 (all sold separately). Integrated mounting points let you add an electrical connector bracket up front (sold separately) so you can keep your wiring organized and easy to connect.

Every detail is designed for stable towing performance—distance between brackets is 20" and bracket height is 16". The hardware setup ensures even pull alignment across your front end, giving you confidence that your flat towing system will hold steady trip after trip. A 3-year warranty backs up that reliability for long-term peace of mind.

Videos are provided as a guide only. Refer to manufacturer installation instructions and specs for complete information.
Hey everybody, my name's Ryan and here at etrailer we install, test, fit and review a lot of different parts. That way we could try to answer any questions those of you might have. And that's exactly what we're doing here today. On our 2011 Chevrolet Traverse. We're gonna be taking a look at and showing you how to install the blue ox base plate kit with removable arms. So you're gonna have a total of five main components needed to flat tow your SUV down the road safely.
First, one's gonna be the base plate. Base plate is gonna provide us with a solid and reliable connection point. That way we can hook our tow bar up to it. And that tow bar is gonna connect to the base plate here at the front of your vehicle to the back of your motor home. And that's gonna be that physical link that actually pulls your car down the road.
The third main component is gonna be safety cables and those are there in the event of an unlikely disconnect. Those are gonna keep the SUV connected to your motor home. The fourth main component is going to be tow bar wiring. And so that wiring is gonna plug in to the front here and to the back of your motor home. And that's gonna transfer the lighting signals to the back of your traverse, that way other motorists know your intentions as you're going down the road and last but not least the fifth main component is going to be a braking system.
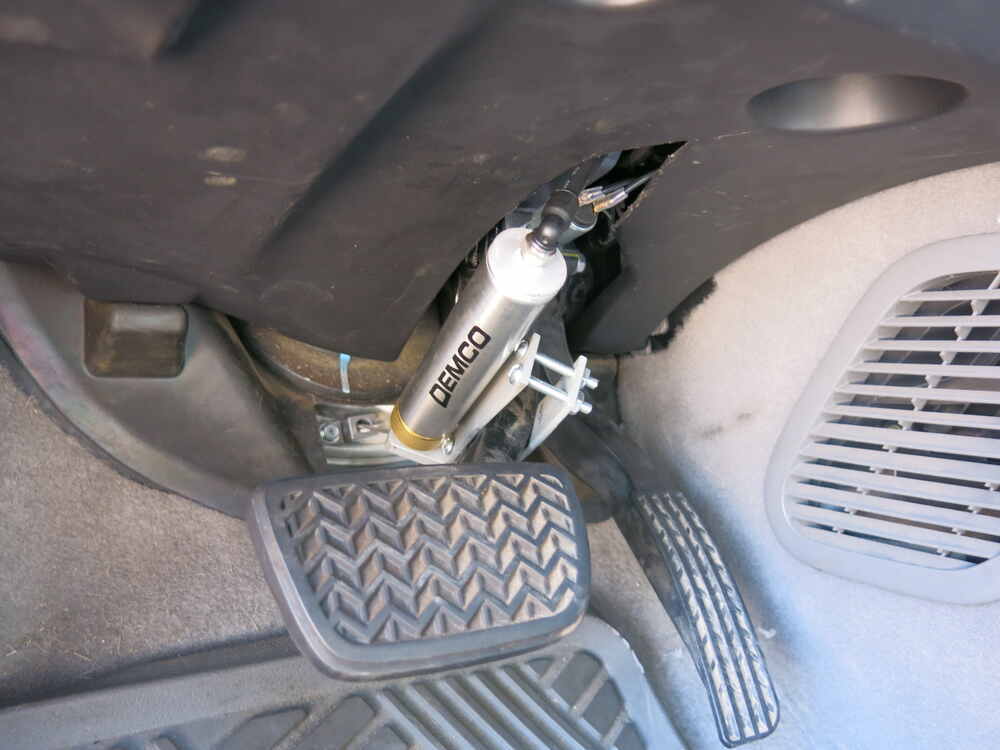
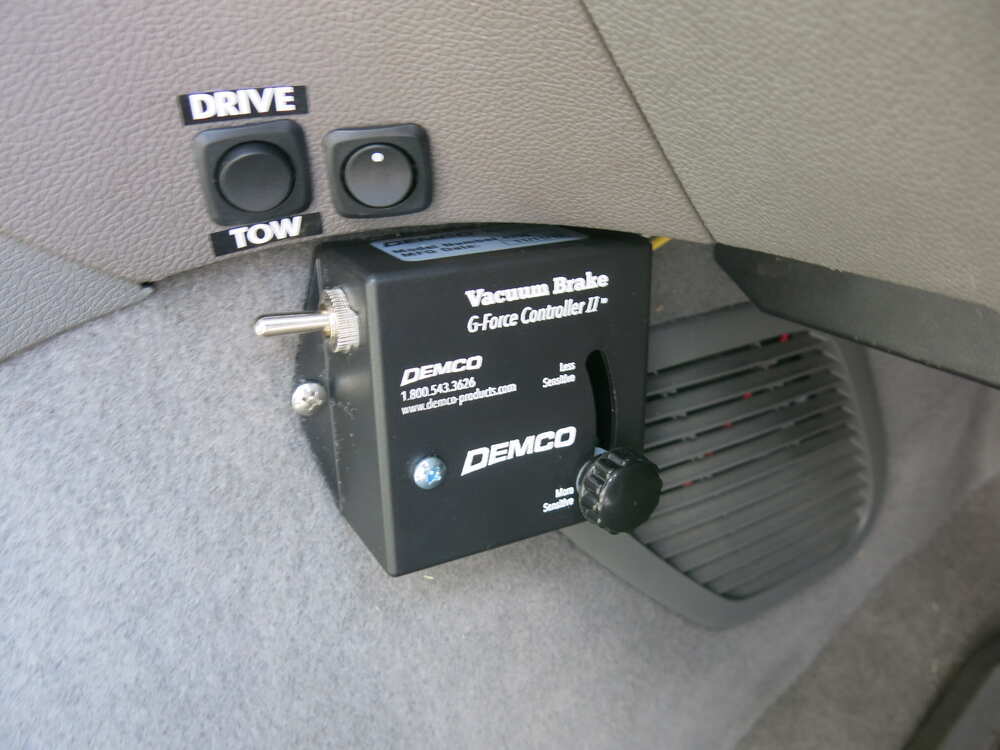
And what that braking system is going to do is apply the brakes and your Chevy. Whenever you hit the brakes in your motor home that's just gonna help bring you to a more safe and predictable stop. And these aren't necessarily needed, but there are two more products that I would recommend picking up, just to make your overall experience a little bit easier on you. And that is the Road master fuse bypass as well as the fuse master. And I say that because Chevrolet does recommend that we take two fuses out every time you want a flat tow and that can just kind of get tiring having to pop the hood, pull the fuses out remember to put them back in every single time you want to flat tow.
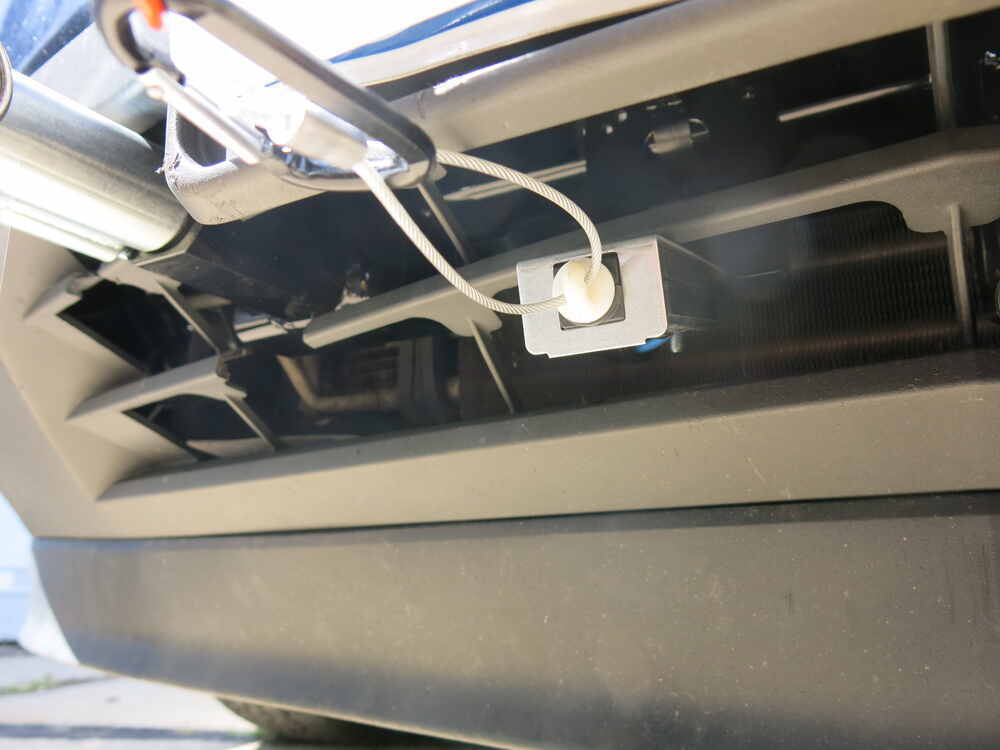
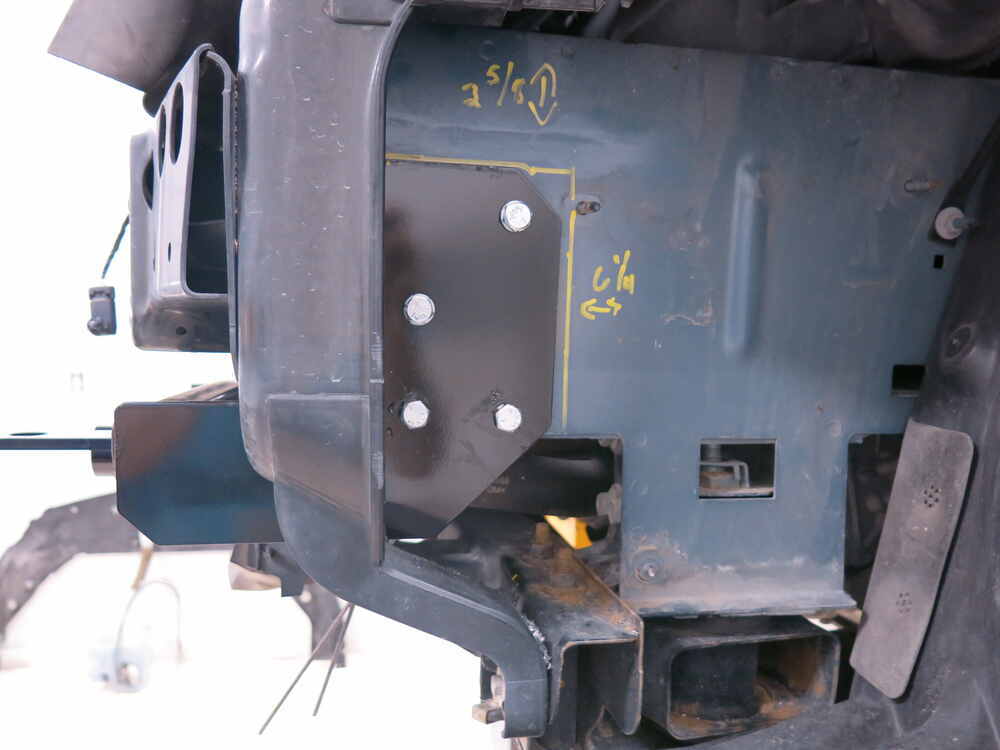
So with these two products are gonna do is eliminate that. So as opposed to manually pulling them fuses out all you'd simply have to do is flip the switch into the tow position, and you're ready to hit the road. Whenever you are flat towing, you're gonna want your base plate to give us that solid connection point and all of the base plates that we offer are going do that. But honestly, if it we're me, I would want a base plate that would look pretty good too whenever you're not using that. And honestly, I think this one does a great job of it. It blends in pretty well. We don't really have to modify our front bumper a whole lot and make a bunch of cuts and hack everything up. And with that being said this one's gonna give us a nice clean factory appearance. But even though our base plate does give us a nice clean look. It doesn't mean that we're gonna have to sacrifice the usability. It's still gonna be very easy to operate and figure out and everything else. One talks that I do like is the fact that they give us some of these little caps whenever we're not using it can pop those in. Not only does it look cleaner but it does help keep any contaminants out. That way everything will operate smoothly. And since we have removable arms whenever we are ready to hook up all we're gonna have to do is grab our arms, rotate them about a quarter turn until they lock into place. You can do that for the other side as well. Once we have those in there we're ready to hook up to our tow bar. One thing I do like is the safety chain openings here. These things are nice and thick, and I feel like if something we're to happen, I could really rely on these. And what's nice too. They come out just enough to keep everything looking clean and easy to use. So the majority of the safety chain hooks at least the ones that I've seen have been styles like this. And regardless of which one you have they're both gonna fit on there with no problem. This base plate is going work with the majority of blue ox tow bars. And even if you don't have a blue ox tow bar chances are pretty good. You can make it work. And that's because there's adapters available that you can put on your tow bar to connect to this base plate. So if that's your situation, you can always check right here at each trailer and find those adapters. There is one thing I do want to mention and that is the use of a high, low adapter. And I say that because say our vehicles gonna be riding at a certain height. Our base plate is, and chances are pretty good our motor home is going sit higher or lower than our base plate. And what we want is for our tow bar whenever we have everything hooked up we want that tow bar to be riding nice and level. So you want the hedge pen on your motor home side to be within three inches of the pen hole here in the base plate. So what you would do is parked on level ground, measure from the center of your base plate, hold air down to the ground record that measurement, do the same thing on your motor home measure from the pin hole to the ground. And as long as they're within three inches you're in good shape. You're not gonna need a high-low adapter. But if it exceeds that measurement I would definitely recommend picking up a high-low adapter to keep everything nice and level. And you can find a bunch of different sizes and types of high lows right here at etrailer. So at the end of the day, really clean, simple and easy to use base plate that you really can't go wrong with. Now, as far as the installation goes, I'm not gonna lie. It is a little difficult. You do have to remove the front facia and do some drilling to get the base plate in. But honestly, that's pretty common with a lot of base plates. So as long as you take your time and stay focused you should be able to do it at home. Speaking of which let's go ahead and put it on together now. To begin our installation, we're gonna be here at the front of our traverse, pop the hood. And what we're gonna need to do is remove this plastic cover that runs along the length of our engine bay here. And this is gonna be held in place by multiple pushpin style fasteners. So all the fasteners are gonna look like this and the way to get them out is you're gonna pry underneath the head of the fastener. I'm using a trim tool. Makes it easy but you can also use a Flathead screwdriver. We're just gonna pull the whole thing out like so. I'll do that same thing to get all of the fasteners removed. Once you have all the push pins removed, you could come here to the corner. You can see the seal is connected. You can just kind of grab it and pop it up and do the same thing on the other side. And once we have those removed should be able to grab our cover and set it to the side. Now we can do, we're gonna have three fasteners along this front edge, and we need to remove those in our case, they're just Phillips head screws. So we get those pulled out and do the same thing on the other side of our vehicle. And I want to mention from this point on anything we do to this side we're also gonna do to the other side 'cause it will be set up the same way. Now, if we come here to our wheel well along this front edge, we're gonna have two T15 fasteners that we need to pull out. And when you're doing that, it does help to turn your tire in a little bit. There's a little more room to work. So now that we have those out, we're gonna have one more fastener to be right there in the corner. And we're gonna use a 7mm socket to get that one removed. Now, underneath the vehicle, along the front edge we're gonna have a few fasteners we need to pull out. We're gonna have two T15 Torx bits. Get them out. And then you're gonna have a 10mm right here that you can pull out as well. If you look, our a plastic piece is actually broken there. So I'm not gonna worry about pulling that out. If you're as, as connected though you definitely want to get bolt removed. Now with an extra set of hands we can actually get our facia removed. So what I did is just put some painter's tape along the seam here. That way we don't have to worry about accidentally scratching up her pain or anything. And what you're gonna do is starting from the corner here. You can kind of just pull out on it and it will release these clips. We can work our way around. We may or may not have some electrical connectors. So don't pull this off completely just yet in our case looks like we are gonna have a connector. Kinda work this off, flip it around to disconnect it. You're just going to push down on the center tab, pull it apart. And there's gonna be the same one on the other side. Well, with this removed we can set it off to the side somewhere safe. So now if you look right here we're gonna have these flaps and we need to trim some of it up, to make room for the base plate. It's kind of a soft rubber. I'm just gonna grab a pair of scissors and cut that piece out. We need to get this removed and out of the way. So I'll just go ahead and pull out this push pin fastener and set it to the side. Now we need to do is trim out a portion right underneath our bumper here and this little plastic support. There's a diagram instructions that give you some measurements. And so I went ahead and drew those out. And when you're cutting this you want to make sure not to cut into the flange behind here. So you wanna level with the frame rail that's behind this and when you're cutting this you also want to cut just inside here. So you wanna make sure to leave this center rib in place. So we're gonna be cut on this side of it. And about here. I'm gonna use a couple of different tools to do this. I'm gonna use a Dremel tool to cut out this portion and a little ways down here. And then I'm gonna come back in with a saw to get a straight shot down here and get all this material removed. So can use a few different tools whatever kinda suits your needs, the best to get this done. Now just over here on the driver's side we need to remove this temperature sensor for the time being, let's use a trim tool to at least that fastener should just kind of pop out. And then what we'll do is just kind of lean it over the top of our bumper out of the way. On each side of her vehicle, we need to remove our horn. And this is pretty simple. We're just gonna have one 10mm bolt up here Pull that out. And what I'm gonna do is just disconnect it, that way it's out of the way. To do that there's a tab there in the center of the connector. You push it down on pull the two apart and I'll just set her horns off to the side. At this point, we can go ahead and remove our washer fluid reservoir. So we first want to start by disconnecting the electrical. I'm just gonna have a few of them. They're harder to work the same and just pull back on the tab and separate it. Just kind of push your wiring out of the way. And then we can disconnect the lines. I already pulled one off and what some of the fluid drain out, we just drained it into a bucket. Thankfully they Rosen a whole lot in there but these are pretty straightforward though. You just pull it off and your fluid will drain out of those there. And then to actually remove our tank, we're gonna need to remove these three 10mm nuts. Should be able to grab the tank. Kind of work it down. Now when I went ahead and did, is this drew out a couple of reference lines here on the side of our frame rail. That way it'll help us line up the base plate make sure it's gonna rest where we need it to. There are measurements in your instructions. And I will say one thing I did notice if we go the six and a quarter inches this way from the front of our frame, rail back it's going to not only interfere with this stud but also it's gonna interfere with some of our plumbing lines on the front of vehicle the base plates going view, make contact with them. So what I've done as a, shorten it up about a quarter inch that way it'll push a base plate a little more forward and we'll get that clearance that we need. Now we can grab our base plate and it's gonna slide in between them openings that we cut. We can make sure we get it in place. Once you have it roughly in place I'm gonna take a clamp, and just clamp the base plate. That way it'll kind of hold in position and we can get it exactly where we need it to be. Now, we know we have the base plate level and where it should be. We can drill out a hole and I'm gonna be drilling out this one here through the pinch weld to the size listed in our instructions. With that hole drilled out. We can take a one inch bolt and we're gonna apply some red lock tight. Matter of fact all of the hardware that we're gonna use to secure the base plate. We'll get some of this red lock tight. You can grab this right here to your trailer. We're gonna push this through. And then on the other side back here where the bolt comes through I'm going loosely secure a split lock washer and a hex nut. So when I went ahead and did, as I simply tighten this bolt down on each side of her vehicle, so I use a nine 16 socket and wrench to hold the nut from spinning. And once that's tight it's gonna hold our base plate and position. That way we can get rid of the clamp. And then what we're gonna do is take that same drill bit and drill out these three remaining holes using our base plate as a template. Once you have those drilled out and get the rest of our hardware in for this opening down here we're gonna use the same setup as this one just be one inch bolt, Robach tight. We're gonna push that through on the other side secure a split lock washer and a hex nut. For these two we're gonna do something a little bit different and we're gonna use what's called a handle nut. So the way these are gonna work is there's an opening in the bottom of our frame rail here. We're gonna feed that through and that is gonna line up with our holes there. You may have to kind of bend the handle nut accordingly to get it to line up correctly on the inside. And when you do that, be very careful. You don't want to grab this end and bend it directly there because I've, I have had these break off. So just something to keep in mind. And matter of fact, what I did is just put some sealer or some JB Weld around there too just as a little bit of extra backup that way we don't have to worry about them breaking. You don't have to but it is a little precaution you can take. And when I suggest doing, so this is the bolt that's gonna go through these two holes. It's a little bit longer one. So you're gonna put a split water washer on it. Don't forger your real lock tight you're gonna feed through there. But before you do that what I do suggest doing is taking your handle nuts and just running these in by hand, make sure they go in nice and smooth because sometimes the paint can kind of hang it up a little bit and make it a little tricky to get started. So on the bottom of the frame rail, you could see this is the opening that we're gonna use to put our handle nut in and get it lined up. So now we have all of our hardware in place. We need to come back and snug it all down And then we need to come back with a torque wrench and tighten down all of the hardware to the amount specified in the instructions. After everything's twerked. And I'm gonna do is come in with a pair of snips and just trim off that remaining handle nut. That way kind of cleans up our install look and prevents these from rattling around and making a bunch of noise. Now we can go ahead and do is re-install our windshield washer reservoir. Now the three studs on the frame here that was holding the reservoir on kit's gonna come with a bunch of flat washers, just like this. You're gonna take six of them and place them over each stud. What that's gonna do is kind of pull that tank out and that way it'll clear our base plate. So got them on all three. We will work this back into position and just re-secure it, using the factory nuts. Now we can go ahead. Tighten everything down. We'll just plug all of her lines back in and our electrical connectors. Once we have that done, go ahead and grab our horn. And re-install that just see opposite way. Have you removed it Now we can go ahead and re secure our temperature sensor. Now what you're gonna do is just remove it from this bracket that it originally came on kind of just pinch those in it pops out and on this plastic piece here on the driver side I just drilled a half inch hole and this is simply just gonna push right into place. So now what we can do on each side is install our safety cables. Now these are pretty straightforward. I wrapped it around this portion of the frame and this part here, it goes around the plastic. I simply just wrapped it around that to kind of take up some of the slack. And these are gonna get connected to the base plate using this quick link. So that runs through the base plate and the cables go through it. And then what you want to do is make sure the safety cables nice and tight. That way it's not moving around touching other engine components or anything like that. So I removed all the slack and secured it using a handful of zip ties. And I did it the same on each side of the vehicle. Now, at this point it would be a great opportunity to install some of your other flat tow components like a braking system or diode wiring. And I say that because we're gonna have all this extra room to work with our facia still removed. So that's exactly what I'm gonna do. And if you have those components I recommend you do that as well. So now at this point what we can do is re-install our facia. Now that we have our other components on. What I went ahead and did, was this kind of held our facia up to the front of our vehicle as best as I could, and looked to see where our base plate interferes with our grill. And it looks like there's really not a whole lot we're gonna have to remove. I put a couple of marks here and I think that's the only area that we should need to trim out to let our base plate pass through. I'm gonna get these cut out, test fitted, it again and if you have to come back and cut out a little more no big deal. This is relatively thin plastic. I'm just gonna use a tool like this. You could also use regular snips, probably a thermal tool utility knife, whatever you have laying around. I wanna head and put our facia back into position. And I want to mention I did have to cut out another wrong right there. So I actually did that with the facia on the cart, just quite didn't want to sit perfectly flat. So I cut that out. And then I also just had to cut out a small opening there. That way our wiring connector was more accessible. But now that we have this on the front of our vehicle we can go ahead and read, secure it the opposite way that we removed it. And that'll finish up our look out and our installation of the blue ox base plate kit with removable arms on our 2011 Chevy Traverse..
Ratings & Reviews




Heather A.
5/1/2026
The install looks great Ed! Where are you planning on taking the Encore? I will let Royce know you reached out.


Nick S.
1/5/2026
I am glad you were able to get it installed with no issues and a little help from our video! What kind of coach are you pulling the Kia Soul with?
Roger
12/12/2025
Still the same no issues...fine product
Matthew
10/12/2026
Its been two years since installation of the Blue Ox Baseplate. Since then, Ive flat towed the CRV from NJ to FL and back three separate times with many other shorter trips in between. Paired with a Blue Ox Tow Bar, the system has worked flawlessly since installation.


Kate F.
12/17/2025
Thanks for the detailed review Chris, and the pointers! This will be most helpful to others. What was your favorite stop in those 7,000 miles? Where did you go, what did you see?

Perry
10/1/2026
Follow up. Ive put about 8000 miles on the setup and its been great. A 34 ton suburban pulls nicely behind my Dutch star, and they dont have a steering lock so its nice not to have to retrieve keys when stopping for the night. I have used the safety cable attachment a few times for straight line pulls with a small shackle when working as a rally racing volunteer, its been fine but I wouldnt side pull on it.
Nick S.
12/1/2025
I am glad it worked well for you! What kind of coach are you pulling that Jeep with?

Andrew N.
10/21/2026
Hey Luis, thanks so much for the detailed response and photos. Install looks great on your Mini Cooper! I know the instructions sometimes aren't perfect, but I'm glad you got it installed correctly!
James
10/16/2025
Perfect
Do you have a question about this Tow Bar Base Plate?
Info for this part was:
At etrailer we provide the best information available about the products we sell. We take the quality of our information seriously so that you can get the right part the first time. Let us know if anything is missing or if you have any questions.























Mike L.
9/9/2026
Thanks Douglas, nice truck you've got there! Nice job on the install.....