
Most Popular Vehicle End Connector for 2017 Kia Soul
change vehicle# 1
Pollak 6-Pole, Round Pin, Plastic Trailer Wiring Socket w/ Rubber Boot - Vehicle End

- view all Trailer Wiring
- Trailer Connectors
- Vehicle End Connector
- Plug Only
- 6 Round
- Pollak
More Information >
by: Chuck02/09/2024
This part is an exact replacement to the part that failed. The failure was caused by a poor installation which allowed the rubber boot to chaff on the truck frame. As it was an exact replacement installation was straight forward although I modified the mounting bracket to prevent a reoccurrence of the problem.
View More
View Less
by: Jon 03/18/2024
I found what I thought I needed on the website to prepare our car to be flat towed, but wanted to call to verify. After a short phone call, eTrailer saved me about $50 and got me the stuff I actually needed to get the job done! I won’t shop anywhere else!
View More
View Less
# 2
Hopkins Endurance 6-Way Trailer Connector Socket - Vehicle End - Ergonomic Design

- view all Trailer Wiring
- Trailer Connectors
- Vehicle End Connector
- Plug Only
- 6 Round
- Hopkins
More Information >
by: Woodruff03/28/2024
The stuff not here
View More
View Less
by: Philip11/19/2023
Very difficult to make the wiring connections, I was afraid I’d have problems on down the road so, I took it out of circuit and threw it away
View More
View Less
# 3
Pollak 6-Pole, Round Pin, Trailer Wiring Socket - Exposed Terminals w/ Rubber Boot -Vehicle End

- view all Trailer Wiring
- Trailer Connectors
- Vehicle End Connector
- Plug Only
- 6 Round
- Pollak
More Information >
by: Steve C03/03/2019
Used this as the connection point for the Roadmaster diode wiring kit. Seems to be well made and will hopefully last a long time. I did spray paint it flat black so it blends into the front bumper of my “toad” a little better.


View More
View Less
by: Jeffrey 03/31/2024
The documentation for wiring is limited and difficult to read without magnification. Otherwise this is well made and works perfectly.
View More
View Less
# 4
Hopkins Wiring Harness with 5-Pole Flat Trailer Connector - Vehicle End - 5' Long

- view all Trailer Wiring
- Trailer Connectors
- Vehicle End Connector
- 0 - 5 Feet Long
- Plug and Lead
- 5 Flat
- Hopkins
More Information >
by: Gene06/04/2019
The Glolight LED trailer set is the perfect replacement for my tow dolly. It is light weight and much more visible than the standard bulb lamp set the trailer was equipped with. Installation was quick and very easy, I will recommend this to all needing to change theirs out...
View More
View Less
by: Joby02/27/2023
Great Prices and Fast Shipping
View More
View Less
# 5
Hopkins Endurance 5-Way Flat Trailer Connector - Vehicle End - Ergonomic Design

- view all Trailer Wiring
- Trailer Connectors
- Vehicle End Connector
- 0 - 5 Feet Long
- Plug and Lead
- 5 Flat
- Hopkins
More Information >
by: Joel 02/13/2024
I fitted the Hopkins 5-way flat connector harness with a 5-way round plug which couples to my Goldwing trike (tow vehicle). The popup trailer lights operate as designed.
View More
View Less
by: Robert08/26/2018
Connector and wire harness well made - connector designed such that it can be mounted and harness has added protection for wires. Would like to have marine grade wire since I do mostly saltwater fishing. I mounted the connector on a piece of 1.5" square galvanized tubing painted black.


View More
View Less
# 6
Hopkins Endurance Quick-Fix Replacement 4-Way Flat Trailer Connector w LED Test Lights - Vehicle End

- view all Trailer Wiring
- Trailer Connectors
- Vehicle End Connector
- Plug Only
- 4 Flat
- Hopkins
More Information >
by: Louis06/09/2018
I recently had a need for the Hopkins Endurance Quick-Fix Replacement 4-Way Flat Trailer Connector w LED Test Lights - Vehicle End - HM48190 to replace the faulty one on my van. It was easy to find what I needed on the site and the price was comparable to other sites I had visited. I decided to go with etrailer because I had previously ordered the hitch through them. I appreciated the fact that an email was sent out confirming that they received the order as well as a follow-up email telling me that the part was shipped along with providing the tracking number. The installation of the part was easy and took no time to complete. Overall it was a fine experience and if I need to order anything in the future, I will be sure to come back and order from etrailer.


View More
View Less
by: Trudy 04/18/2024
Great product. Easy to install
View More
View Less
# 7
Pollak Black Plastic, 7-Pole, RV Blade-Style Trailer Socket - Vehicle End

- view all Trailer Wiring
- Trailer Connectors
- Vehicle End Connector
- Plug Only
- 7 Round - Blade
- Pollak
More Information >
by: Don 03/25/2024
As the video indicates, ensure that your vehicle wiring is the same as the 7 blade definitions. Mine was not. Had to determine what color wire connections to use for a 4 flat adapter use on a dolly.
View More
View Less
by: Alexander02/22/2024
Service from erailer is always quick and efficient. The one time an incorrect product was shipped, the company beat a path to my door to get the right item into my hands. Every experience with them has been 100% positive. Great folks!
View More
View Less
# 8
Hopkins 4-Way Flat Trailer Connector w/ 48" Harness

- view all Trailer Wiring
- Trailer Connectors
- Vehicle End Connector
- 0 - 5 Feet Long
- Plug and Lead
- 4 Flat
- Hopkins
More Information >
by: Donald 05/14/2024
What can I say, it works. Etrailer is easy to do business with.
View More
View Less
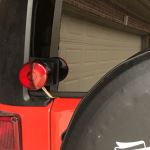
by: Mike A10/23/2017
SMI Stay in Play Duo installation in 2015 Jeep Wrangler Unlimited – Packaging was great with everything needed included plus extra items for various installation methods of you’re choosing. Upon initial investigation and survey, everything except the CD Information pack was accounted for. No big deal, as I had previously watched 2 different Youtube installations found on the internet. In fact, the internet videos were what I used as my step by step installation process, and the written instructions were only used for concerns where the video may not have been as clear as I had hoped for. Understanding that everyone has their own style and methods for doing this project, I purposely was not in a hurry to rush through it. All in all, I took @ 8 hours to install the Adapter 4 to 6 pole #30637, the EZMount Tow lights Kit, and the Stay in Play Duo Braking System. I choose the EZMount because I didn’t want to mess around with the OEM taillights and wiring. Magnetic lights don’t work so well on composite tops and I didn’t want to stick them to the sides of te Jeep, so I modified the EZ mount to wrap around the thickness of the rear glass hatch on both sides. I added a 2”x 4” pc of Velcro on the inside of the glass hatch and the mating surface of the plastic light housing - to hold the lamps in place until the rear gate was closed. I ran the wire harness on the inside under the trim all the way up to the front and through the grommet in the firewall. The flat 4 wire was routed and secured up to the Adapter 4 pole to 6 pole that I had fastened to the Blue Ox base plate. The actual installation of the SMI unit and assorted parts went rather smoothly. Most difficult issue was the lack of working space in front of the driver’s seat area. Installing the screw that holds the G force controller on the front (the side towards the front of the car) was difficult as it was almost a blind installation due to lack of room. The nut and fender washer used through the fire wall for attaching the air cylinder cable bracket was a challenge to reach - tight fit with not much room for one's hand and arm. Other than that, no big surprises – just a lot of tedious steps to do when you want to be sure that it is being installed properly – take your time and don’t be in a hurry. Once everything was installed – it all worked when I checked the system out. The only thing that may seem a bit odd is that when setting the G force initially, the compressor will shut off while adjusting per instructions. To do this initial adjustment, the wife stepped on the brake in the Motorhome, with the switch “On”. The compressor starts, and the brake is pushed down by the Air Cylinder, at which time I slowly adjusted the G force until the compressor shuts off. I secured the adjusting bolt and I told the wife to take her foot off the brake and then re-apply them. The compressor did not start again and the air cylinder did not apply the brakes in the Jeep. After setting the G force per instructions, the unit didn't turn on when the brakes in the Motorhome were applied - but since we were not moving - all I can assume is that the brake system will function while slowing down once the accelerometer setting (the sensitivity setting on the G force box) has been met. I assume that the sensitivity setting method includes a way to ensure the Jeep brakes are not engaged too frequently and only until needed. This is the only step that is a tad bit confusing without an explanation as to what to expect once the G force sensitivity is set. Lastly, I checked the brake away switch and it turned the compressor on and applied the brakes as expected. Overall - the installation went rather smoothly. Can't wait to see how the product works once we hit the road. I'll check back and provide an update later.


View More
View Less
What our customers are saying:
"Thanks for my order super fast shipping quality excellent. will order again. thanks again. A+A+A+ to deal with."