
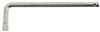
H11 LED Headlight Bulbs - Single Beam - 1,995 Lumens - Cool White - Qty 2


To see if this custom-fit item will work for you please tell us what vehicle you'll use it with.
Get a focused and controlled beam with no glare from your low beams with these H11 single-beam LED headlight bulbs. Concept series bulbs feature built-in LED drivers with advanced temperature regulation. Plug-and-play installation.
Features:
Specs:
Lumens are used to measure the amount of usable light that is put out by a light source. Raw lumens represent the number of lumens that the manufacturer claims the LEDs are capable of producing. It does not include the light's drive method or the amount of light lost from the lens or reflector. Effective lumens take these factors into account and represent the number of lumens that are actually produced by the complete light assembly, not just the amount of light that the diodes are capable of producing. Stable lumens builds off the idea of effective lumens by measuring the amount of light produced after 30 minutes of usage, or once the diodes have reached their average operating temperature. These bulbs have a 3,000 raw lumen capacity per bulb and produce 1,995 effective lumens per bulb. The stable lumen capacity per bulb is 1,550 lumens.

Videos are provided as a guide only. Refer to manufacturer installation instructions and specs for complete information.
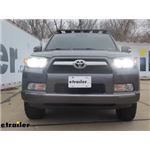
Hi, I'm inaudible 00:00:01 at etrailer.com. Today we're going to be taking a look at ARC's line of LED headlights. And just to give you an idea of the difference between our factory light and the new LED, you can see our new LED is a very rich white. It's going to help us see the road a lot better. You can see how much bigger this area is across and down. One thing I do want to point out, though, is you'll notice how high this light comes up.
Because these are so bright, take into consideration other drivers that are coming at you. You may need to adjust your light down just a little bit. And typically there's a little screw in there where you can adjust that where this light is aiming down a little bit more and not so much up into other driver's faces. And then here we have our high beams on. Again, much richer, brighter, white color.
It's really going to help you see the road a lot better on those roads that may not have any street lights.These led bulbs are going to work directly with your factory wiring. They're going to work in most applications for headlights and fog lights. They're also going to give you 6,000 lumens. They're going to be a rich, white light, as you can see here, as opposed to incandescent bulbs are kind of a yellow, dull color. Again, it's going to allow you to see the road a lot better when you're driving at night, these bulbs are going to fit directly in place of your factory bulbs.
They're going to come in high beam and low beam. Keep in mind, you're going to want to make sure that you use a fit guide because the connections for the low beam and the high beam are going to be different.Your kit is going to come with a box that looks like this. And this is a decoder. It's an anti flicker module. And what it does is if you install the lights and they start flickering, this is going to stop the flickering.
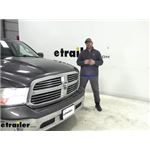
So you may or may not need these. I'm going to recommend installing your lights first, testing them out before you put this in, because if you put this in, this are going to require you to have to drill a hole in the back of the headlight dust cap to get this installed.The installation process is pretty simple and straightforward. You will have to remove the grill and to get the headlights out you have to reach behind the panel and pop a little clip down to get it out. Other than that, it's pretty simple and straightforward for changing out the bulbs. That's going to do it for a look at ARC's line of LED headlights.
Ratings & Reviews

all good
They worked well, as anticipated and hoped for.
I've had the opportunity to use these LED's for about a month now and I can say they have worked great. They are exceptionally brighter than the OEM halogen bulbs with a slight blueish tint. I have tried other cheap LED's that flickered or pulsed and threw the light out everywhere, blinding oncoming traffic. These LED's have a very define cut-off line and concentrate the light appropriately. These are plug-and-play so it easy to install these in my quad headlights. I have a stock height truck so I didn't need to re-aim my headlights once I was done. I would suggest these as an upgrade from stock lights. Thanks etrailer!
These worked fine in my 2022 Colorado. No brighter than the factory lights but the "right" color. Didn't need the anti-flicker harness though.
This is an excellent product, and the lights were easily installed and look super bright even brighter then my headlights.
Great customer service. Very knowledgea ble.
Info for this part was:
At etrailer we provide the best information available about the products we sell. We take the quality of our information seriously so that you can get the right part the first time.


Thank you! Your comment has been submitted successfully. You should be able to view your question/comment here within a few days.
Error submitting comment. Please try again momentarily.